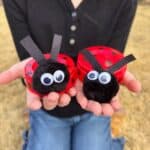
🐞 Easy Ladybug Craft for Kids (Plastic Cup)
Welcome spring with this easy ladybug craft for kids! With a red cup, pom pom, and simple supplies, kids can create adorable ladybugs for play or decorations.
Servings 1 party cup ladybug
Cost 2
Equipment
- 1 Pair of scissors
Ingredients
- 1 red party cup
- 1 Black Sharpie
- 1 piece construction paper black
- 1 large pom pom black
- 2 googly eyes
Instructions
- Cut a 3-inch line from the rim of the party cup down toward the bottom. Then, cut around the base in a circular shape to remove it, creating the body of your ladybug.
- Use a Black Sharpie to add black spots on the top and sides of your ladybug.
- Cut two thin strips of black construction paper, each about 2 inches long, to create the ladybug's antennae.
- Cross the black strips over each other at one end and glue them together using the hot glue gun. Then, glue the antennae to the back of a black pom pom.
- Glue the googly eyes to the front of the black pom pom.
- Finally, glue the pom pom to the front of the ladybug.
Notes
-
- Use the right kind of scissors to cut through the plastic party cup. We like Livingo student scissors for teens/adults and Westcott scissors for school-aged kids.
-
- To prevent smudging, let the marker dry completely before gluing on your ladybug's head.
-
- Use a strong glue. We find that hot glue guns works best on plastic, or a strong craft glue like Aleene's Original Tacky Glue.
-
- Help younger kids by doing the cutting and/or gluing for them, especially if using a hot glue gun.
-
- Take ladybugs outside and hide them in the trees or grass for some fun playtime!
-
- Complete the fun by adding cork honeybees and bow-tie butterflies to your springtime craft session!