Monster Halloween Pretzel Rods (Easy Kids Treat)
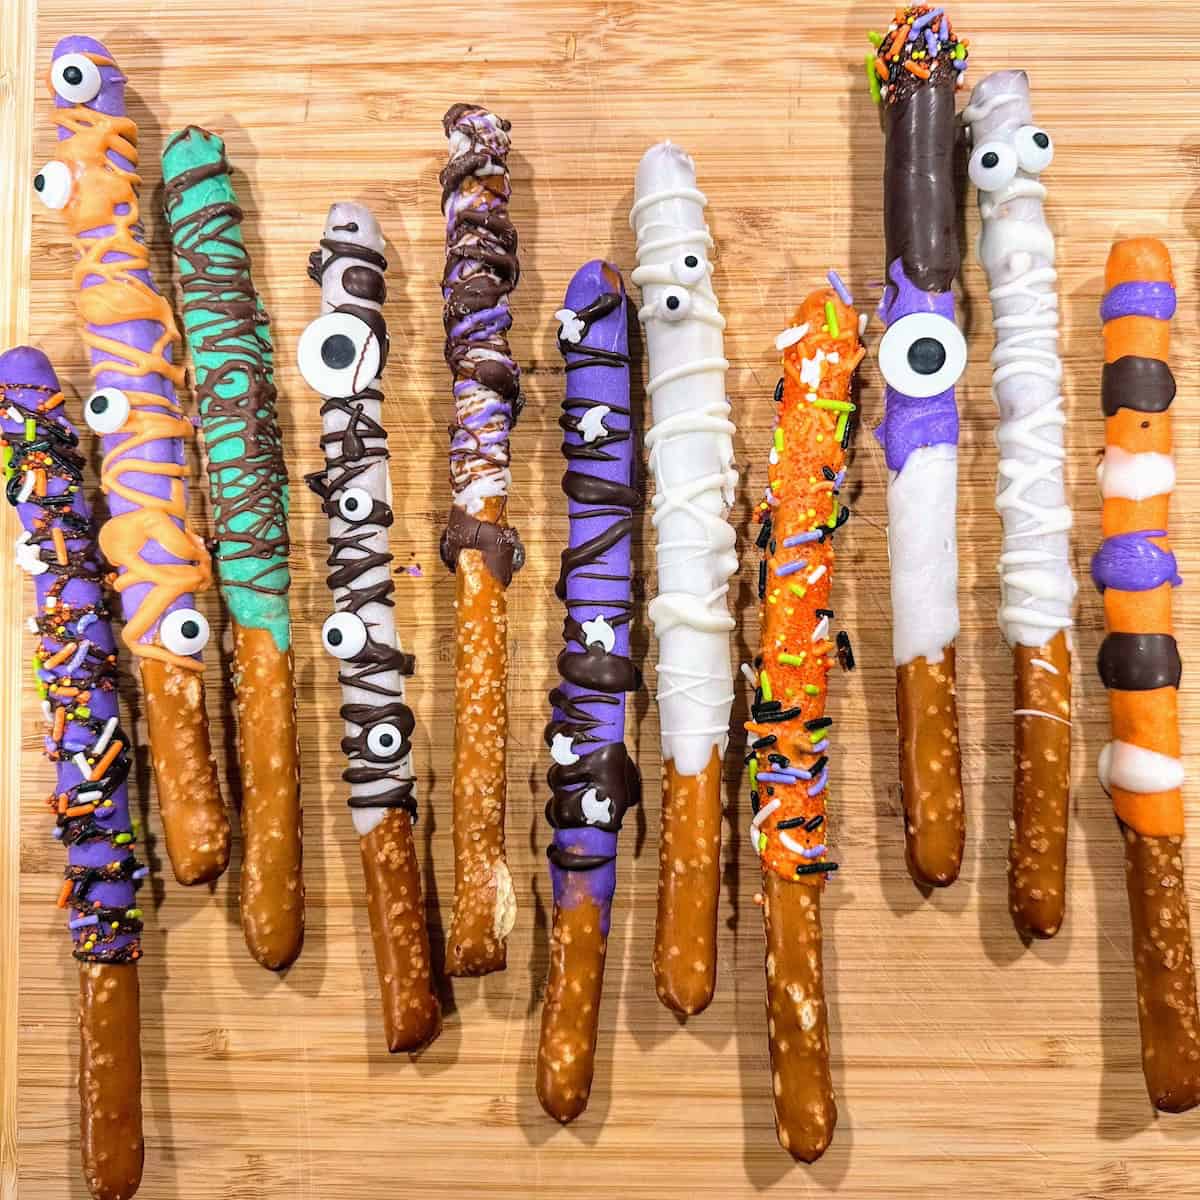
These easy Halloween pretzel rods are such a fun treat to make with kids! Dip pretzel rods in colorful candy melts, then add sprinkles, candy eyes and drizzles to create silly monsters, mummies and other spooky designs. They’re ready in about 20 minutes and perfect for Halloween parties or a fun afternoon activity.
Want to Save this Recipe or Activity?
Enter your email and we will send it straight to your inbox! You’ll also get the latest posts from Platein28!
By submitting this form, you consent to receive emails from Platein28.
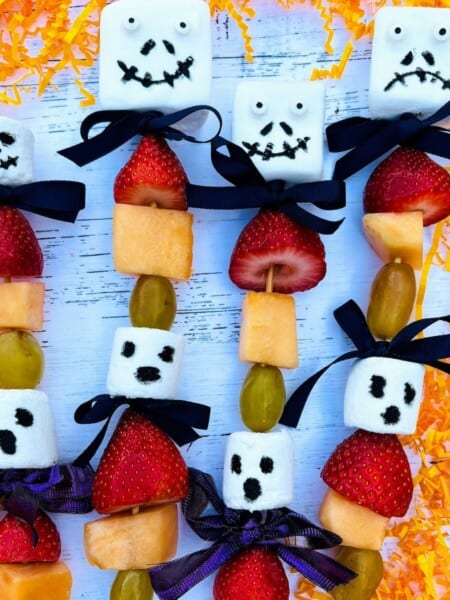
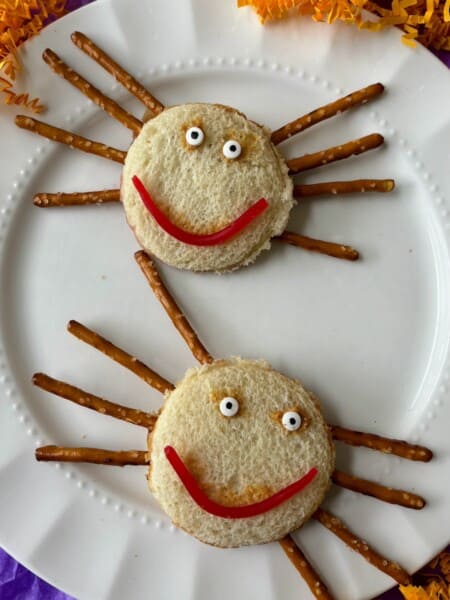
If you’re looking for more fun Halloween snacks, check out our easy-to-make Halloween fruit kabobs. And our hilarious apple teeth snack, 💀 skeleton veggie tray and spooky spider sandwiches are great for parties!

Why We Love These Monster Halloween Pretzels
- Easy for kids – There’s really no wrong way to decorate them.
- Just a few supplies – Pretzel rods, candy melts and your favorite Halloween decorations are all you need.
- Ready in 20 minutes – A quick Halloween activity and treat in one.
- Perfect for Halloween parties – Make monsters, mummies or let kids invent their own spooky creations.
🤔 What are Candy Melts?
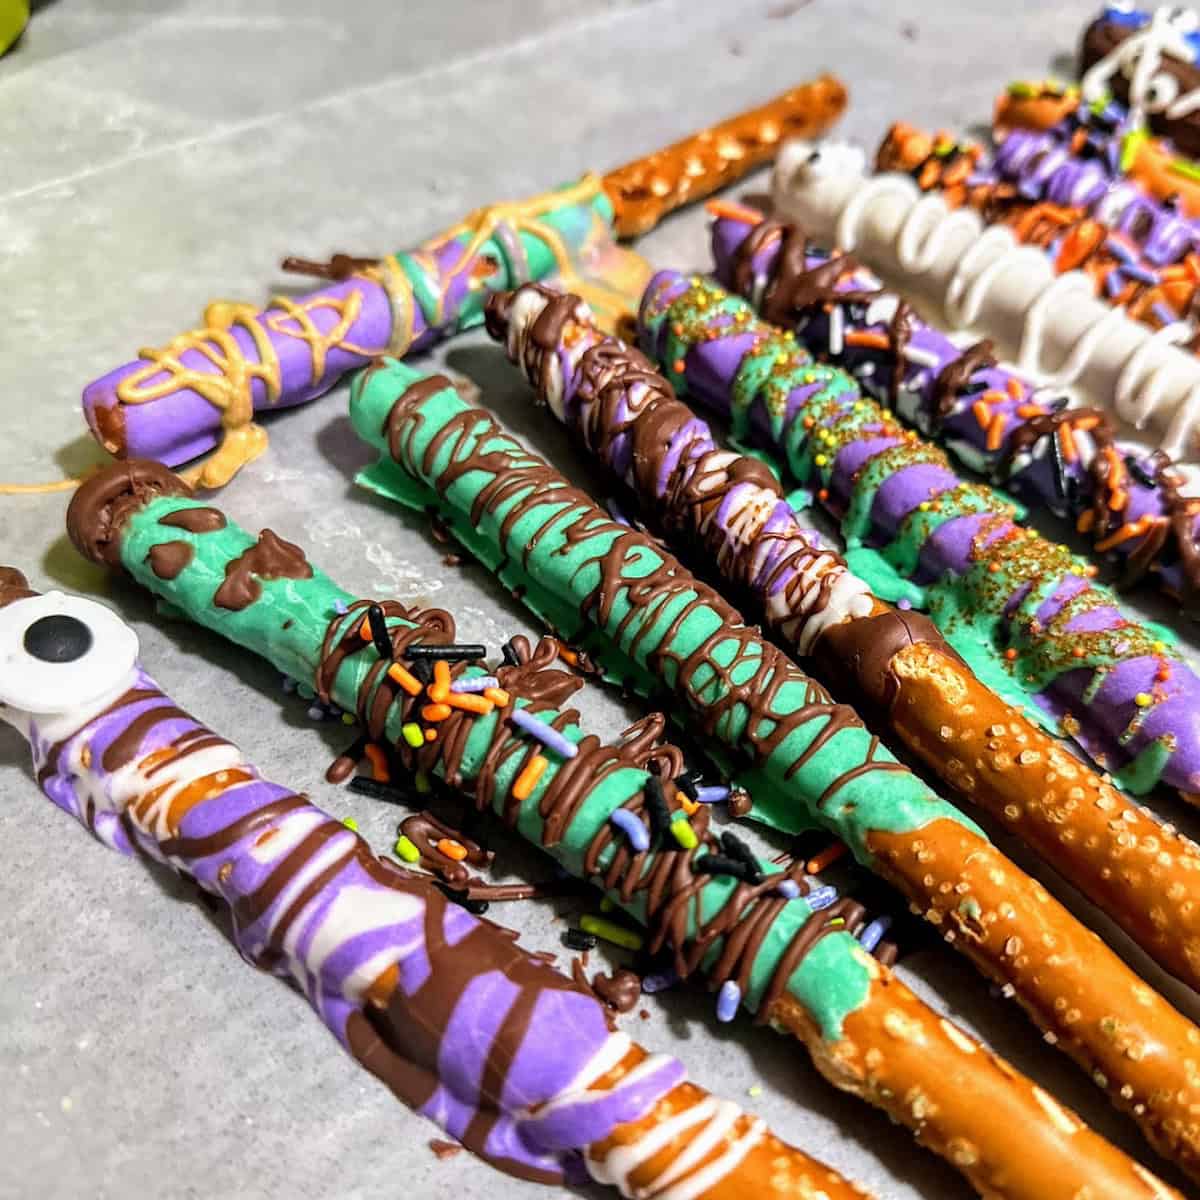
Candy melts (aka melting wafers) are these awesome and weird little edible discs that you can melt together (like chocolate) and then use to make candy, coat fruit and treats, decorate cakes, etc. The melted wafers dry and harden quickly after you use them, making melting wafers useful for so many sweet creations. Typically, you’ll find melting wafers at the store in these flavors: white vanilla-flavored, milk chocolate-flavored, and (sometimes) dark chocolate-flavored. With white candy melts, you can add food coloring to them after melting to create whatever color you like. I’d say the most common candy melt brands are: Wilton and Ghirardelli.
🍭 What You’ll Need
Notes on key ingredients are provided below. Please see the recipe card for a full list of ingredients and quantities.
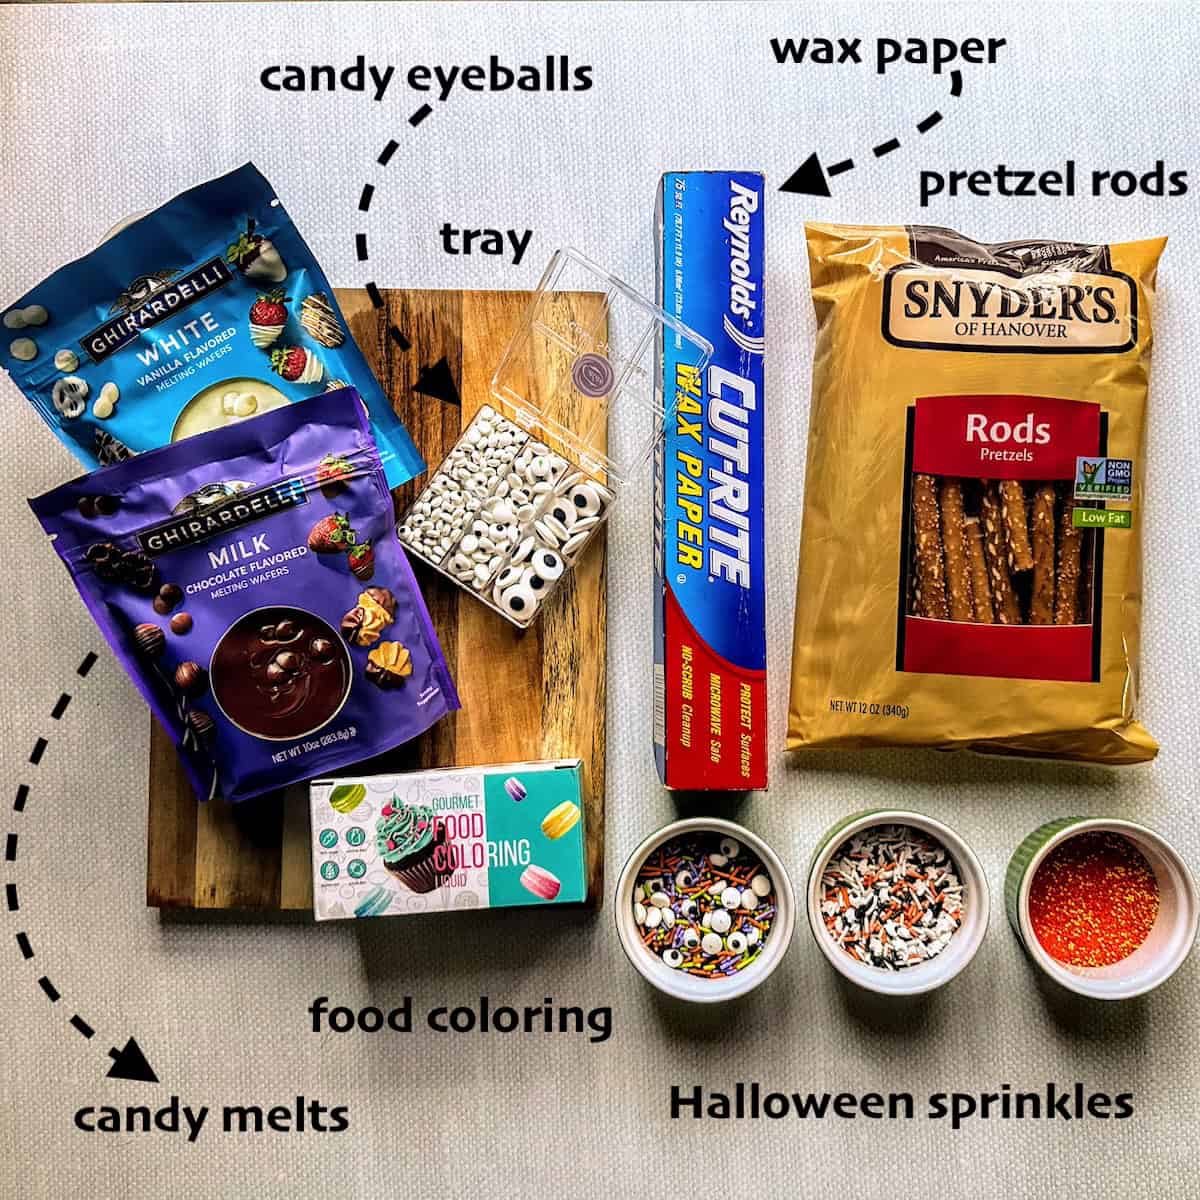
Main ingredients: Pretzel rods, candy melts (Ghirardelli melting wafers or Wilton candy melts), food coloring , Halloween sprinkles and candy eyeballs (optional).
Other supplies: Parchment/wax paper, microwave-safe bowls, spoons and an optional Ziploc bag for drizzling.
📋 Instructions
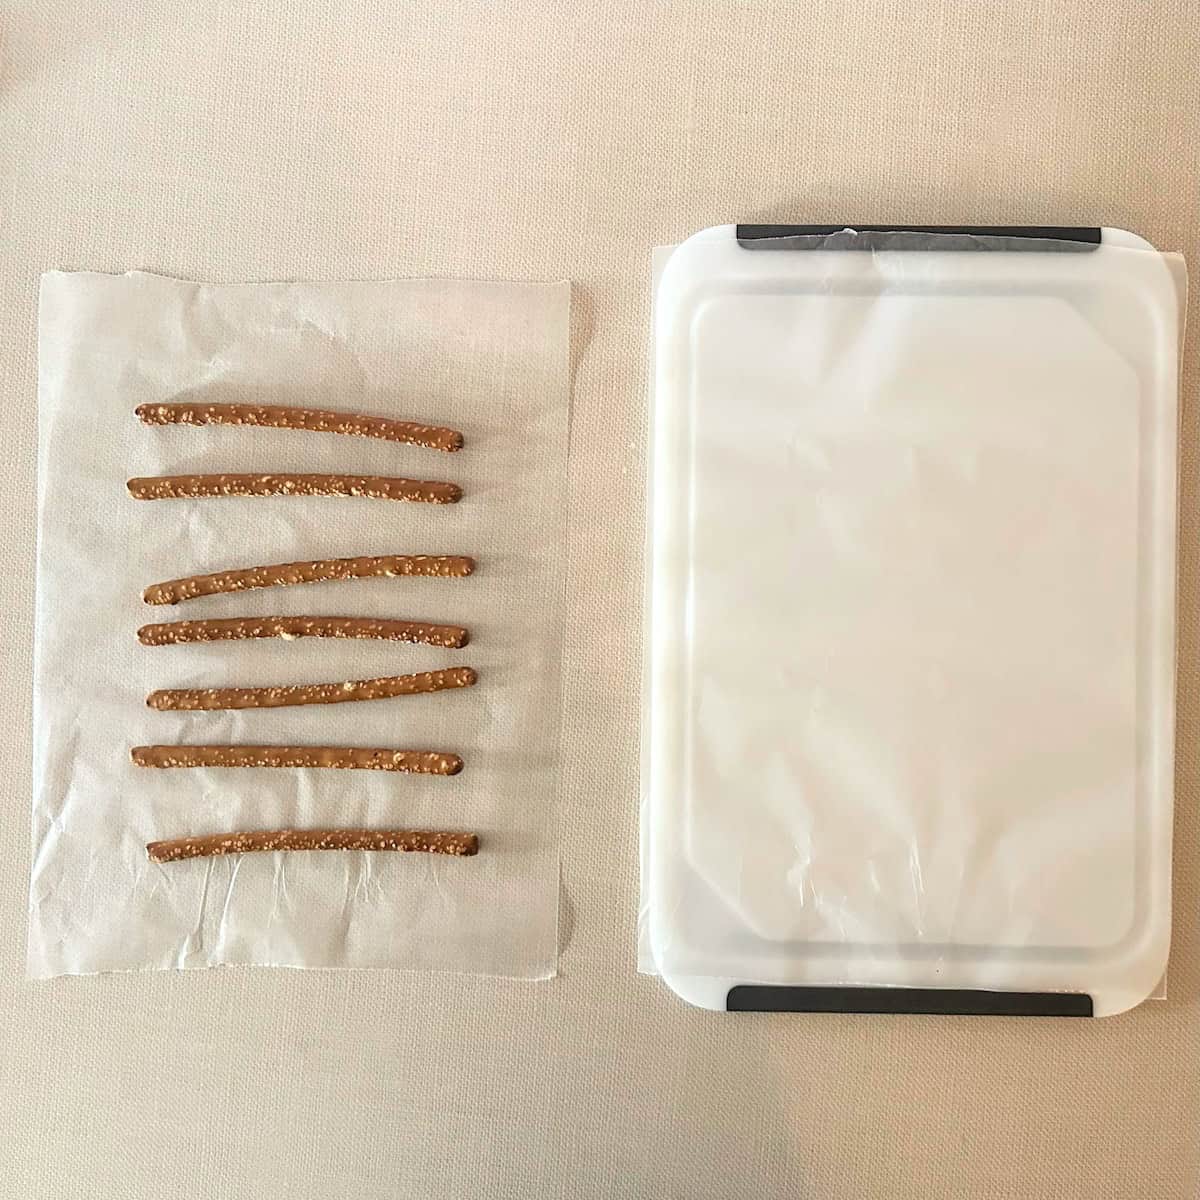
1. SETUP: Lay out 2 sheets of parchment or wax paper. Place one directly on your counter with a handful of pretzel rods on top; this is your decorating area. Place the second sheet on top of a tray, cutting board or baking sheet; this is for your finished, dipped pretzels.
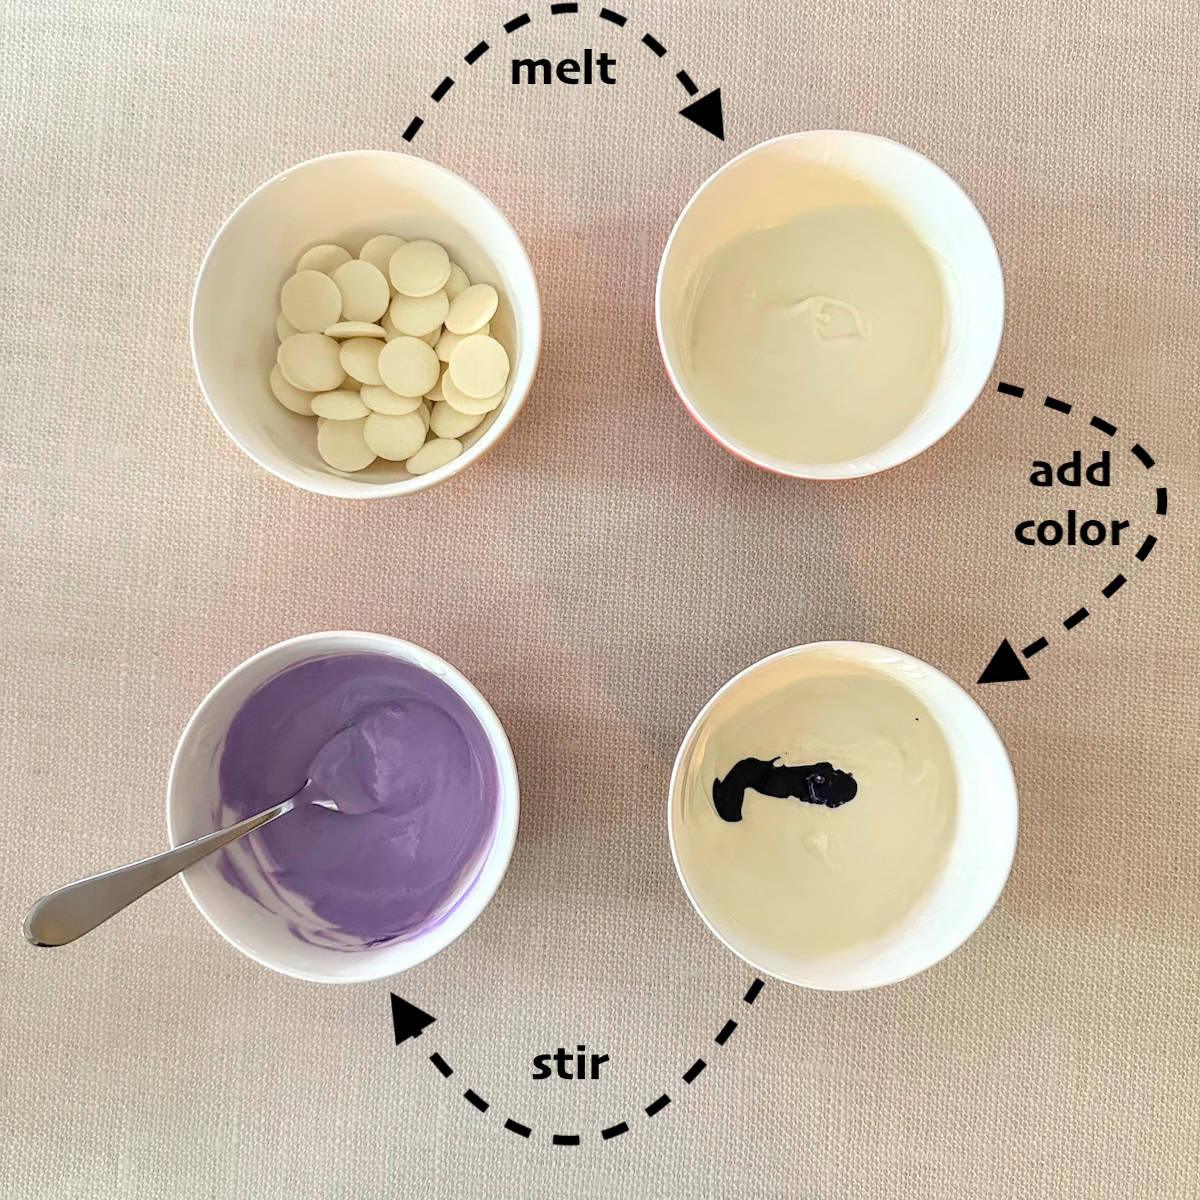
2. PREPARE THE CANDY MELTS: Pour a handful of white melting wafers into a small bowl, and melt in microwave. For a specific color (e.g. purple), pour in a couple drops of purple food coloring, and stir!
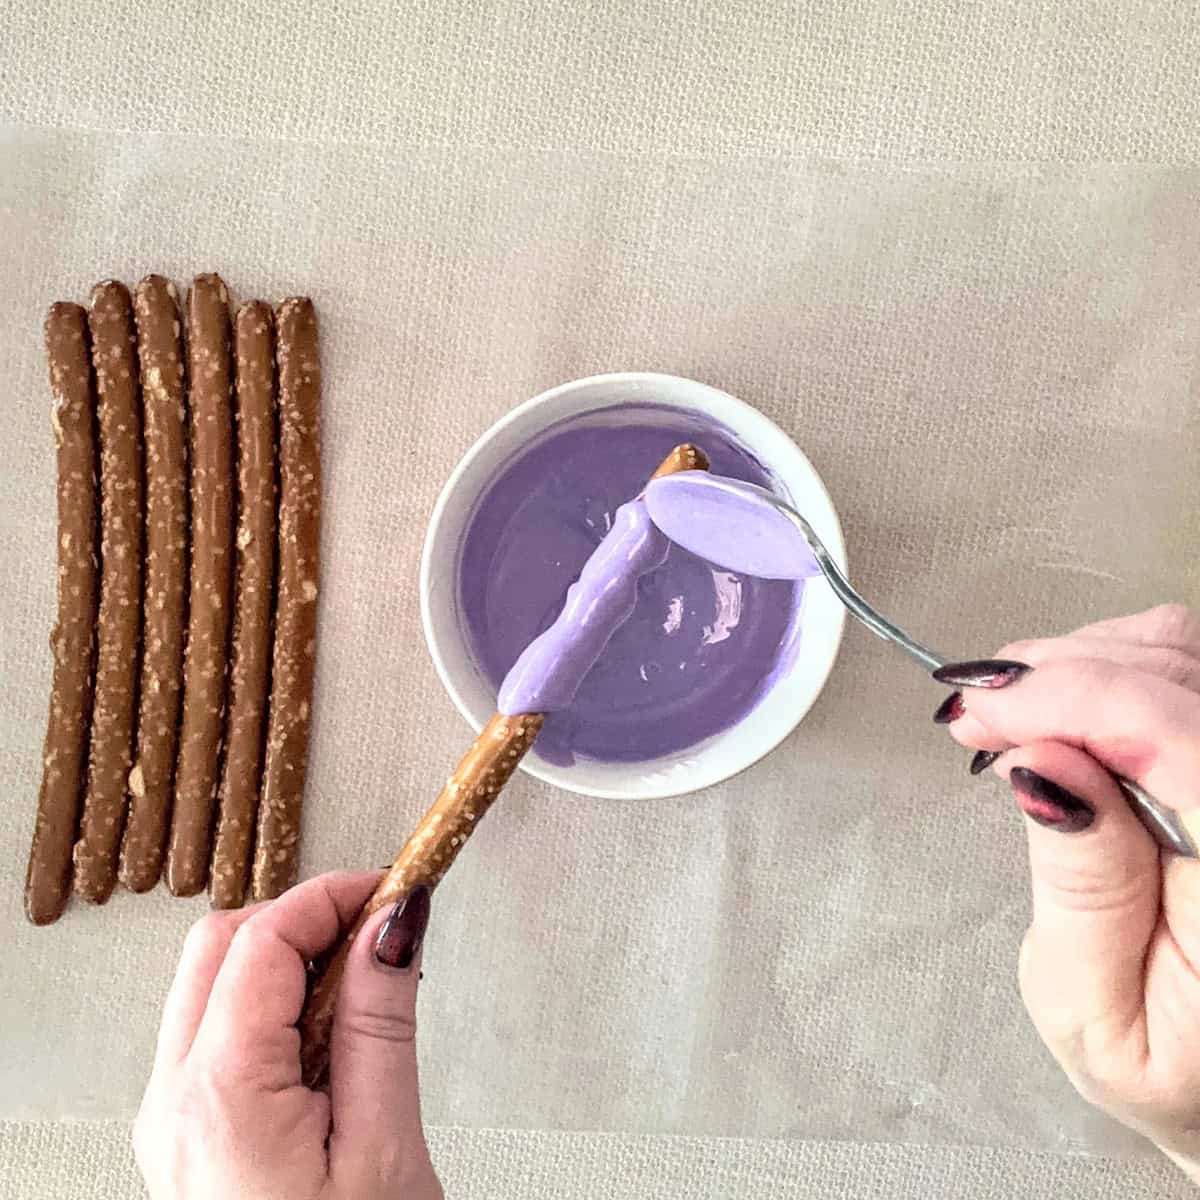
3. COAT PRETZELS: Dip a pretzel into the melted candy bowl to coat the tip. Then use a spoon to coat the pretzel with the melted candy. Lightly tap the dipped pretzel against the edge of the bowl to discard the excess. Leave the bottom 1/3 of the pretzel undecorated, so you have a place to hold the pretzel.
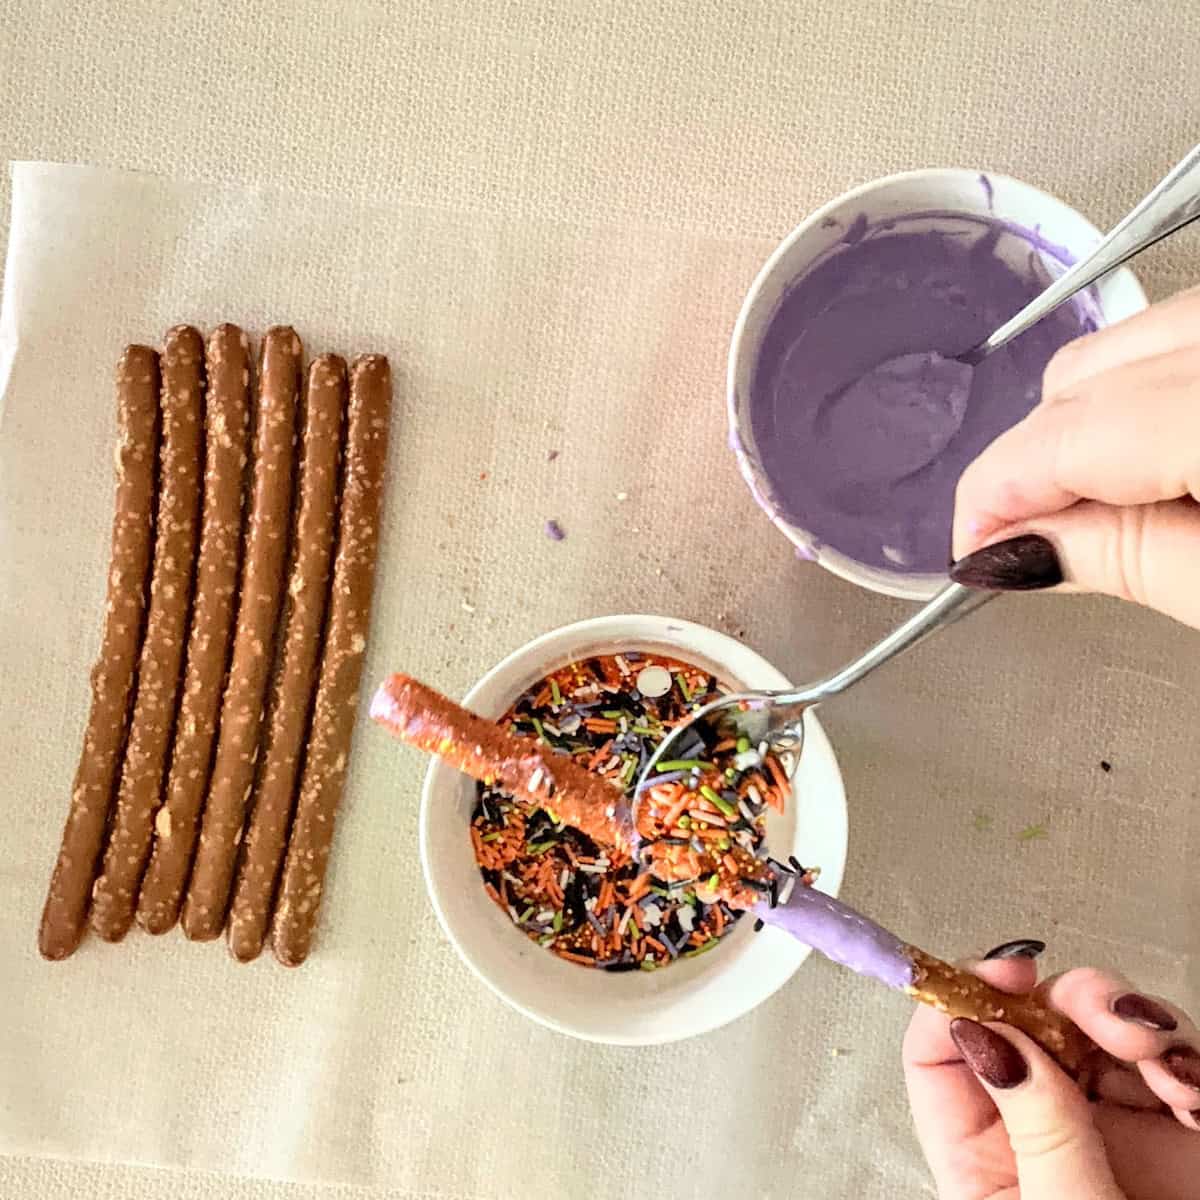
4. ADD SPRINKLES: If you want to add sprinkles, do it while the pretzel coating is still wet. The sprinkles will stick directly to the dipped pretzel.
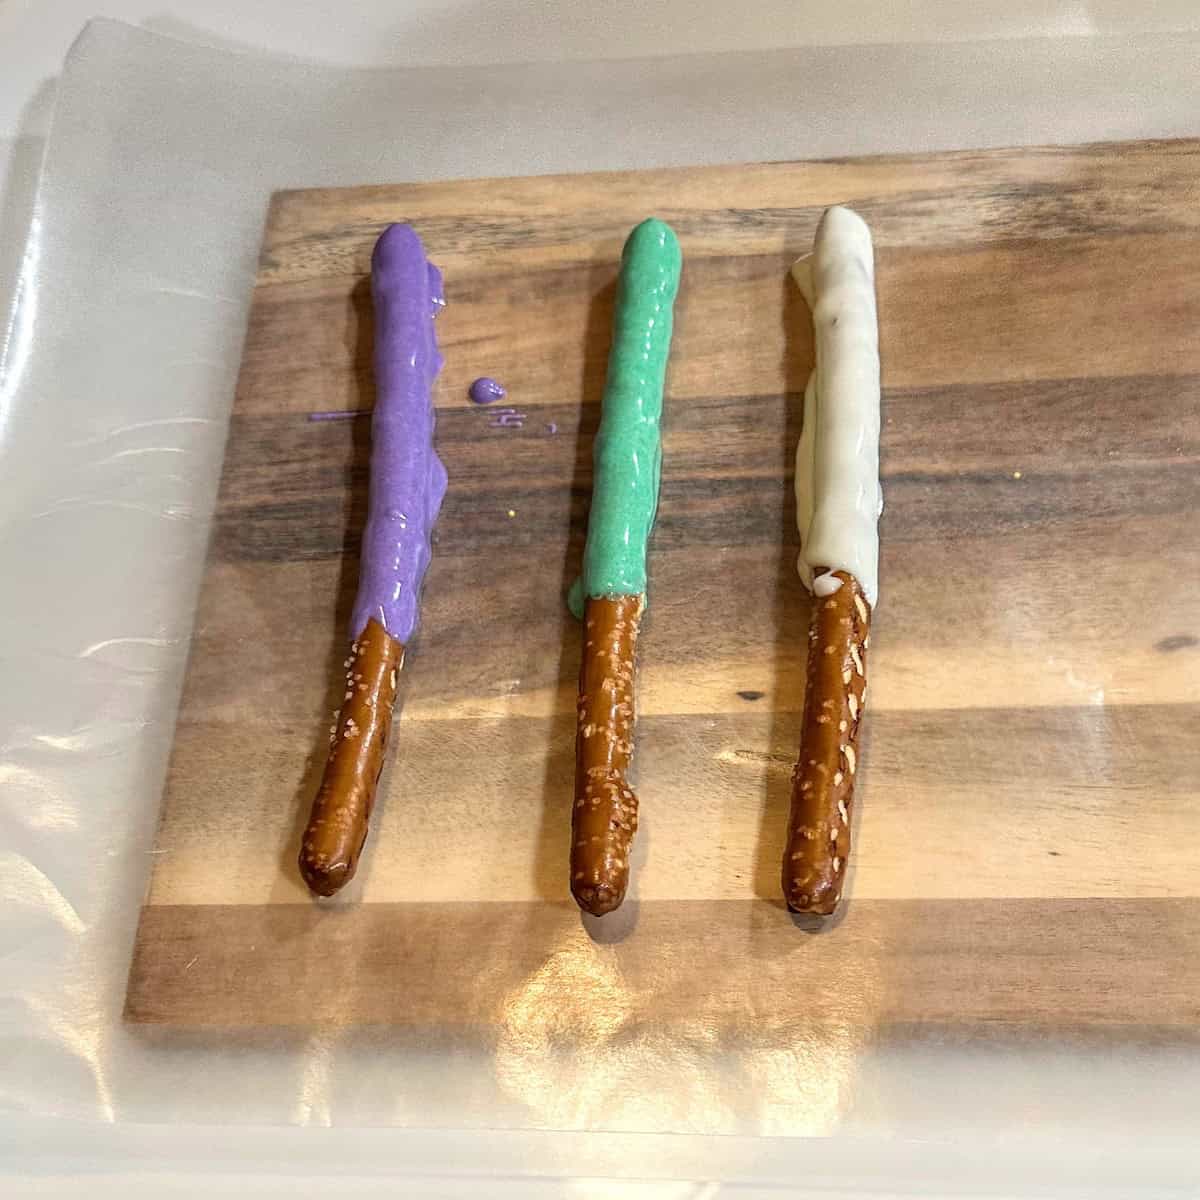
5. LET PRETZELS DRY: Lay the coated pretzel(s) on your tray and put tray in fridge for 5 minutes to harden. Or just leave tray on the counter until pretzels seem dry.
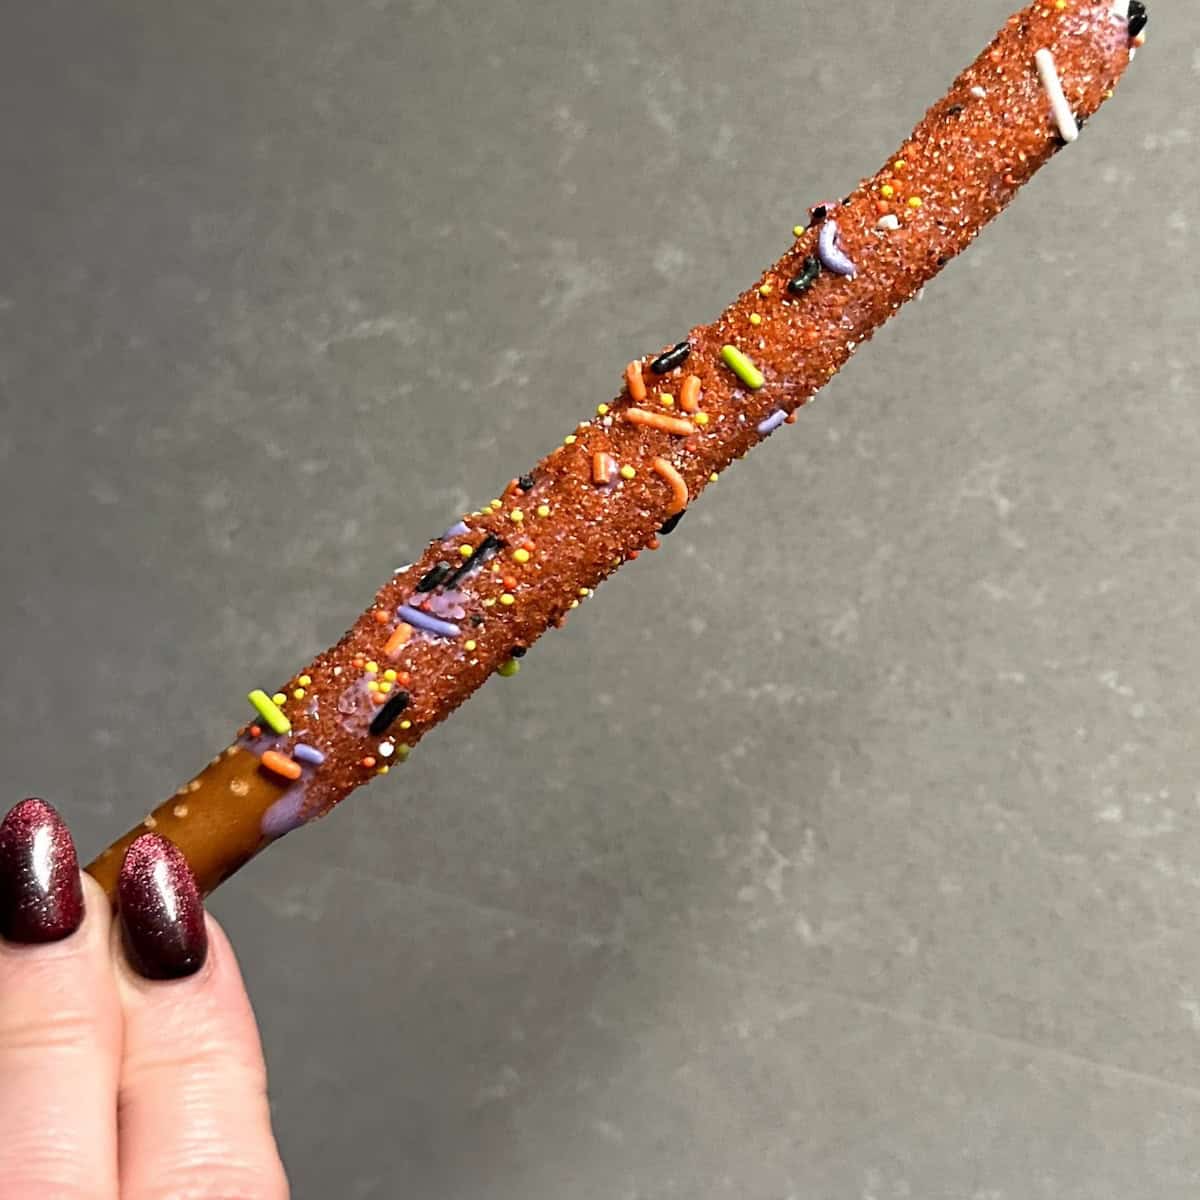
6. DRIZZLE! After your pretzel coating hardens, you can add a fun drizzle. Dip a spoon into some melted candy and hold it above the pretzel, moving the spoon side-to-side to drip down in whatever design you like.
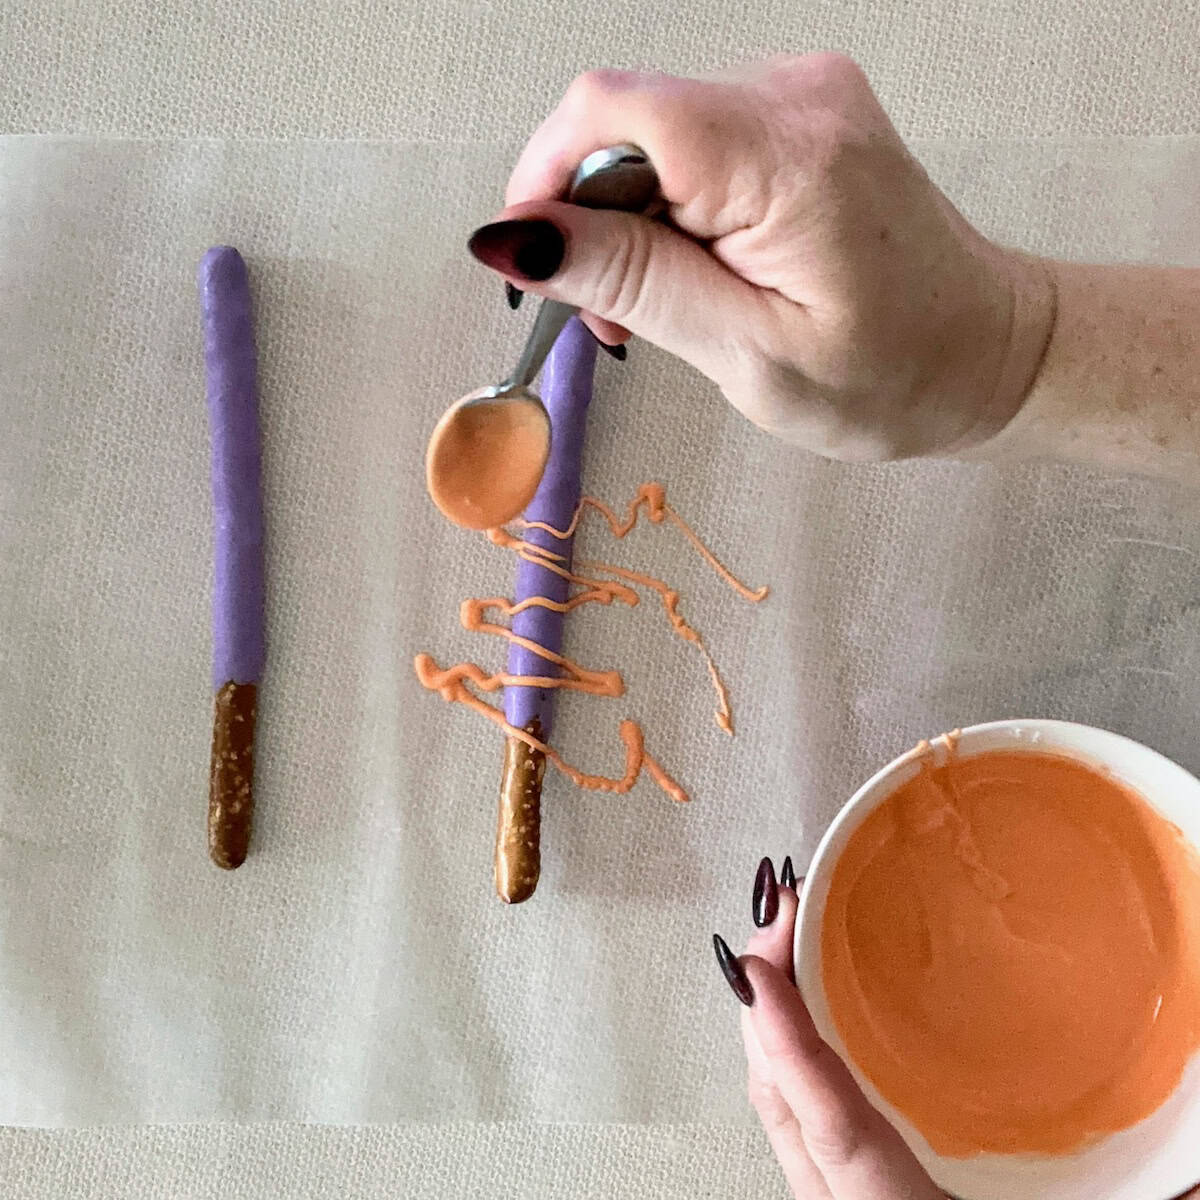
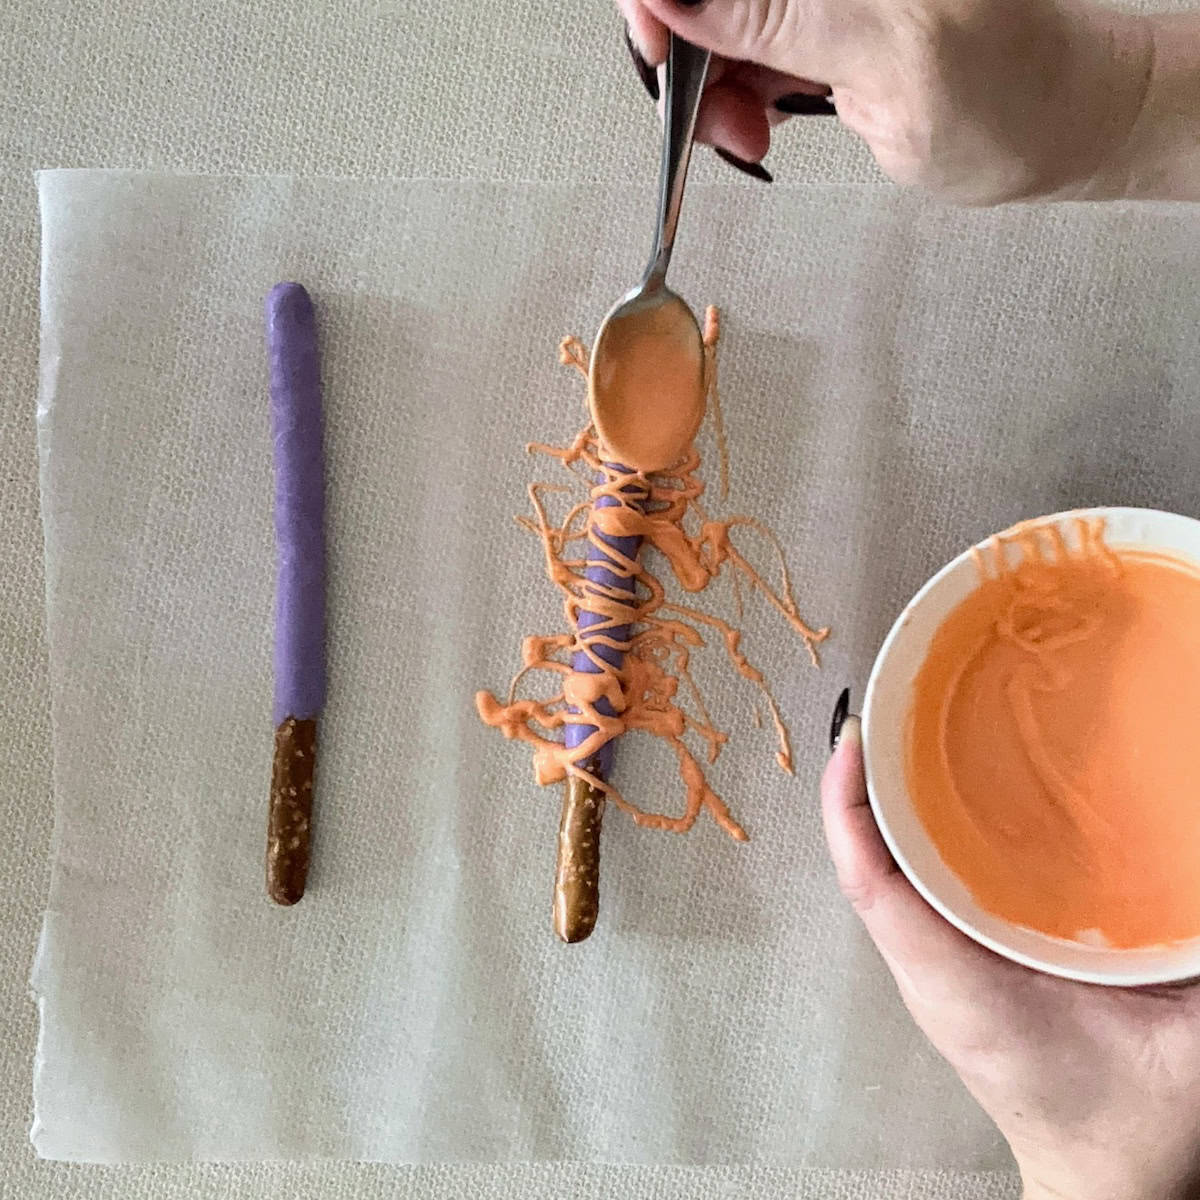
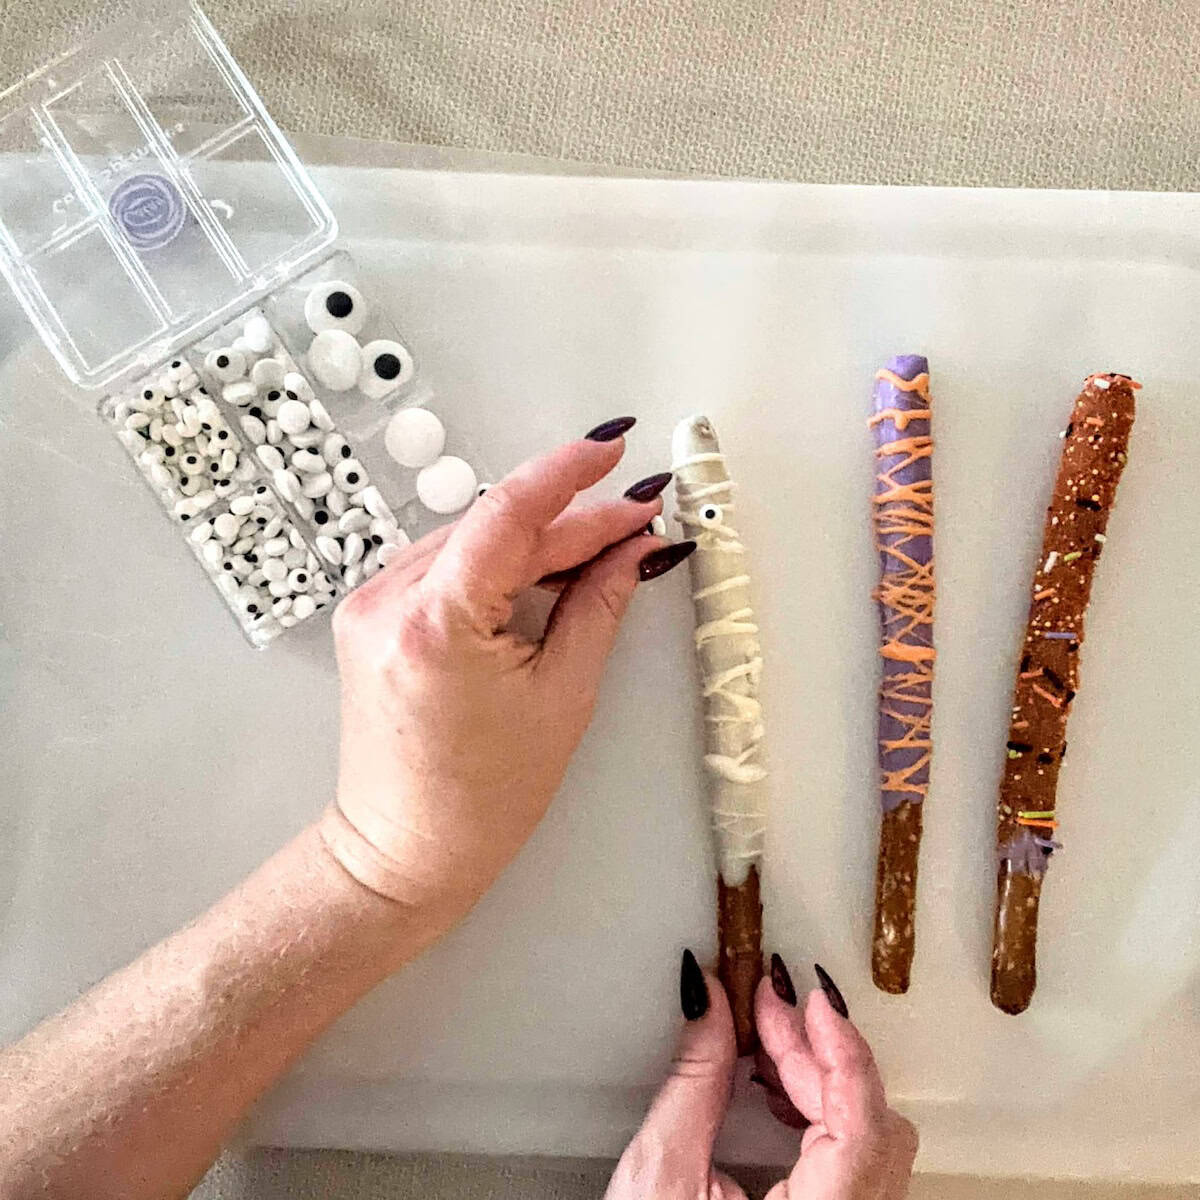
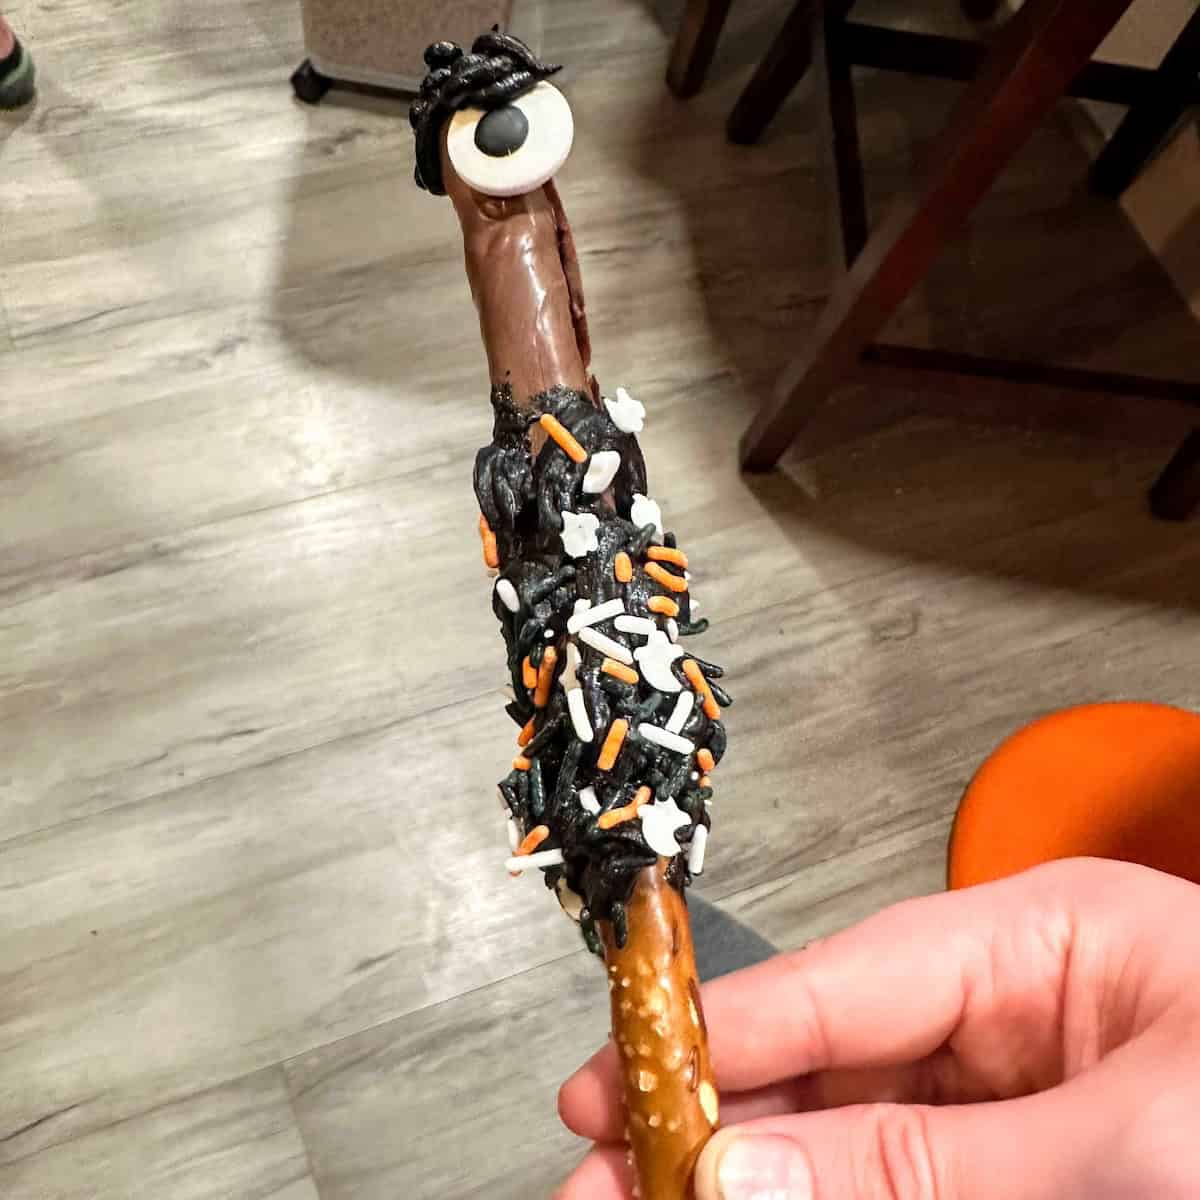
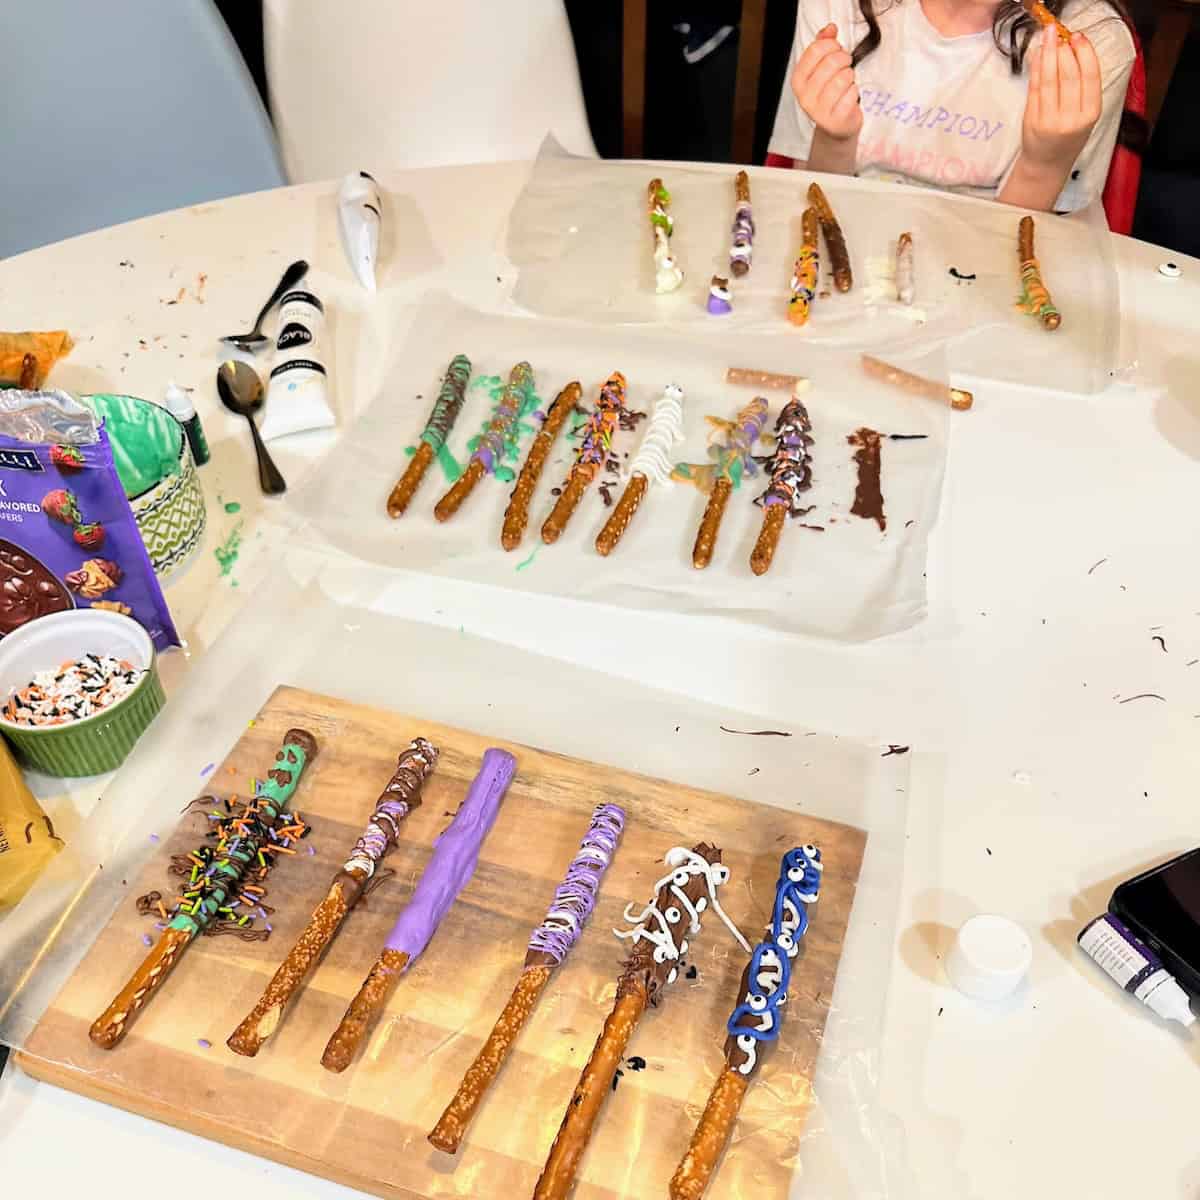
7. OTHER DECORATION IDEAS: You can make monster pretzels by adding several different-color drizzles, lots of sprinkles, and/or candy eyeballs 👀 in funny places. Or make a mummy by coating a pretzel with white candy melt, let dry, do a white candy melt drizzle on top, and then attach 2 eyeballs near the top of the pretzel. OR make whatever spooky designs you like!
✔️ Tips for Perfect Monster Halloween Pretzels
- If the wafers still haven’t fully melted after microwaving for 2 rounds of 45 seconds, heat the bowl in 10 second increments and stir, until all wafers have melted.
- You don’t have to refrigerate your dipped pretzels to harden the coating, but it does speed up the process. Just leaving them out on the counter to air-dry is fine.
- For a finer drizzle on the pretzels, make a DIY piping bag using a small Ziploc bag. Just cut a tiny hole in the bottom corner of the bag, add some melted candy wafers to the bag, and squeeze to drizzle.
- Remember that the melted candy wafers act like a glue. So, you can attach any fun, edible decorations to a wet pretzel.
- Start with 2 pieces of wax paper, but know you may need more, as this craft can get messy.
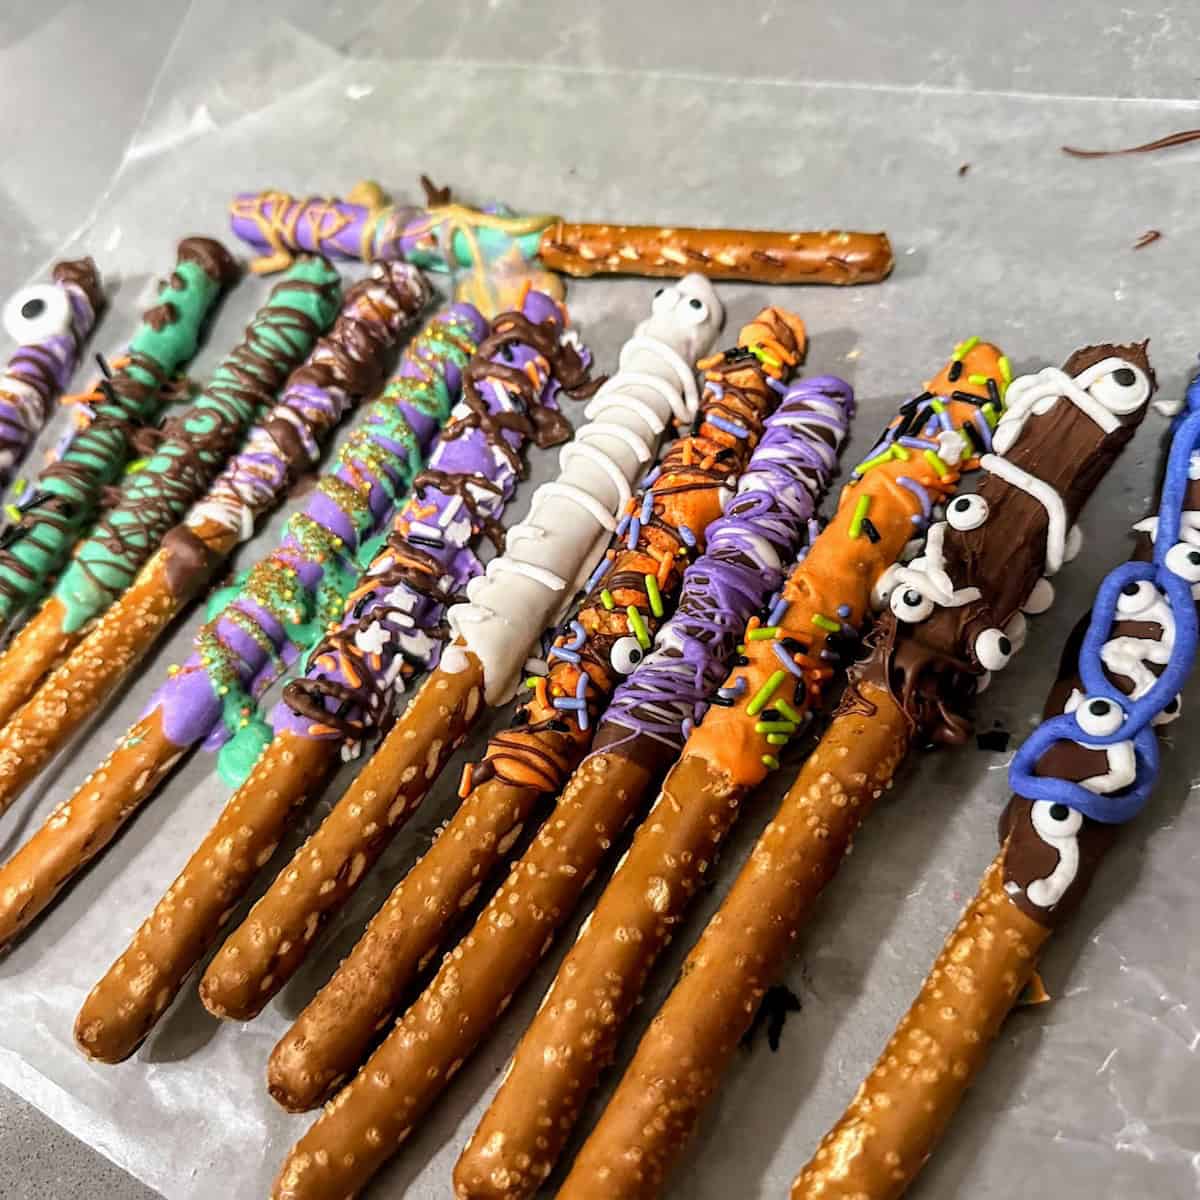
👯♂️ Two Ways to Decorate Your Monster Pretzels
There are two ways to drizzle melted candy over pretzels:
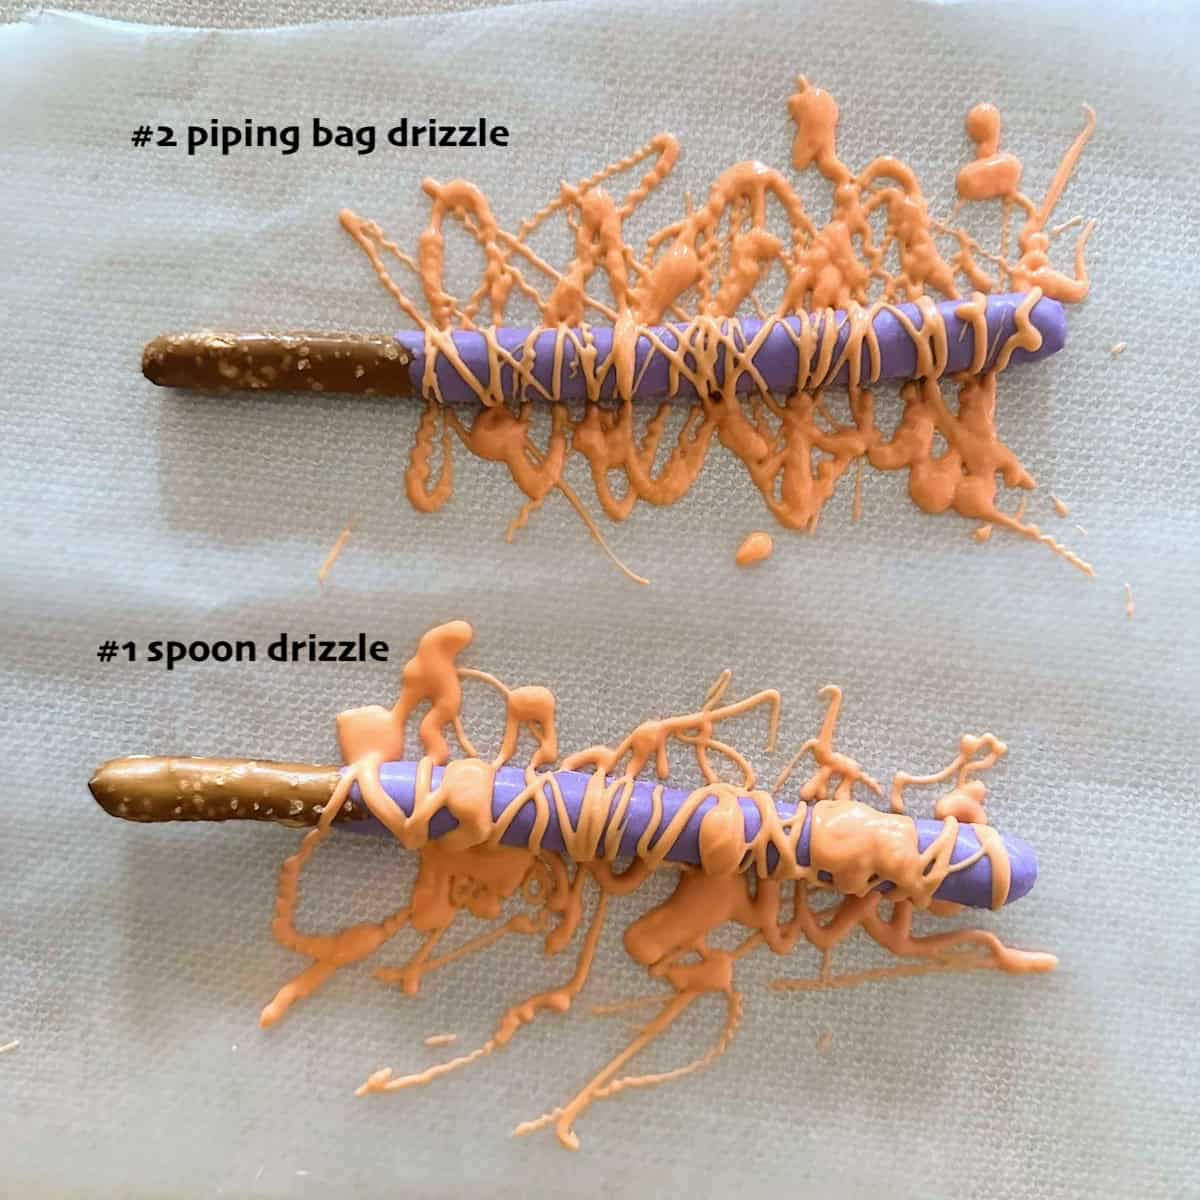
Method #1: Simply to dip a spoon into the melted candy, hold it above the pretzel and carefully let the melted candy drip down, moving your hand back and forth in a zig-zag pattern over the pretzel. Bonus: this is easy. Downside: you’ll get a thicker, sloppier looking drizzle.
Method #2: Make a DIY piping bag. Take a small Ziploc bag and cut a tiny sliver off one corner of the bottom. Then add your melted candy to the bag – on the opposite side of the hole. When ready, squeeze the melted candy over to the side with the hole and gently let the melted candy drip out the hole, while squeezing. Bonus: you get a much cleaner, finer line. Downside: it takes maybe one extra minute to do it.
❓FAQ
Some fun and simple ideas for Halloween pretzel designs are: coat with Halloween sprinkles, drizzle different colors, do different colored stripes, put candy eyes on your pretzels, make a mummy, or make a funny monster! If you want an all-in-one Halloween decorating package, Sweets Indeed has everything you need.
Ghirardelli melting wafers and Wilton candy melts are the brands of melting wafers I’ve used and come across the most. Ghirardelli has white vanilla flavored candy melts (which you can dye different colors), milk chocolate flavored and dark chocolate flavored. Wilton has the same flavors, but also has pre-colored vanilla wafers!
These candy-coated pretzel rods will get stale if you leave them out. So, I would store them in a sealed, large Ziploc bag or tupperware. They should be fine for a couple weeks or so.
🎃 Make It a Full Halloween Night!
While the kids decorate their monster pretzels, get dinner started! Our non spicy chili is ready in 28 minutes — the perfect cozy Halloween dinner to fuel all those creative little monsters!
Want more crafts?
Sign up below to get crafts and recipes straight to your inbox plus make sure to follow on your favorite social!

Monster Halloween Pretzel Rods
Equipment
- 1-4 small bowls
- 1-4 spoons or small spatulas
- baking sheet or tray
- wax paper or parchment paper
- 1-4 small Ziploc bag optional, to make a DIY piping bag
Ingredients
- 12 oz pretzel rods (or 34 pretzel rods )
- 10-20 oz melting wafers
- 1-2 drops food coloring or gel
- 2-3 tsp Halloween-themed sprinkles
- edible eyeballs
Instructions
- Set up. Line your work surface and a baking sheet with parchment or wax paper
- Melt. Microwave candy melts according to package directions and add food coloring if desired.
- Dip. Coat about ⅔ of each pretzel rod and tap off excess coating.
- Decorate. Add sprinkles and candy eyes while the coating is wet. Let harden.
- Drizzle. Add additional melted candy with a spoon or piping bag to create monsters, mummies and other designs.
Notes
- If the wafers still haven’t fully melted after microwaving for 2 rounds of 45 seconds, heat the bowl in 10 second increments and stir, until all wafers have melted.
- You don’t have to refrigerate your dipped pretzels to harden the coating, but it does speed up the process. Just leaving them out on the counter to air-dry is fine.
- For a finer drizzle on the pretzels, make a DIY piping bag using a small Ziploc bag. Just cut a tiny hole in the bottom corner of the bag, add some melted candy wafers to the bag, and squeeze to drizzle.
- Remember that the candy melt acts like a glue. So, you can attach any fun, edible decorations to a wet pretzel.
- Start with 2 pieces of wax paper, but know you may need more, as this craft can get messy.
- OTHER DECORATION IDEAS: You can make monsters by adding several different-color drizzles, lots of sprinkles, and/or candy eyeballs in funny places. Or make a mummy by coating a pretzel with white candy melt, let dry, do a white candy melt drizzle on top, and then attach 2 eyeballs 👀 near the top of the pretzel. OR make whatever spooky designs you like!
Nutrition
The nutrition facts provided are calculated using a third-party tool and are estimates only. Actual nutritional content may vary based on the ingredients and brands you use, as well as portion sizes. For accurate results, please consult a registered dietitian or nutritionist.