Melted Crayon Art with Molds

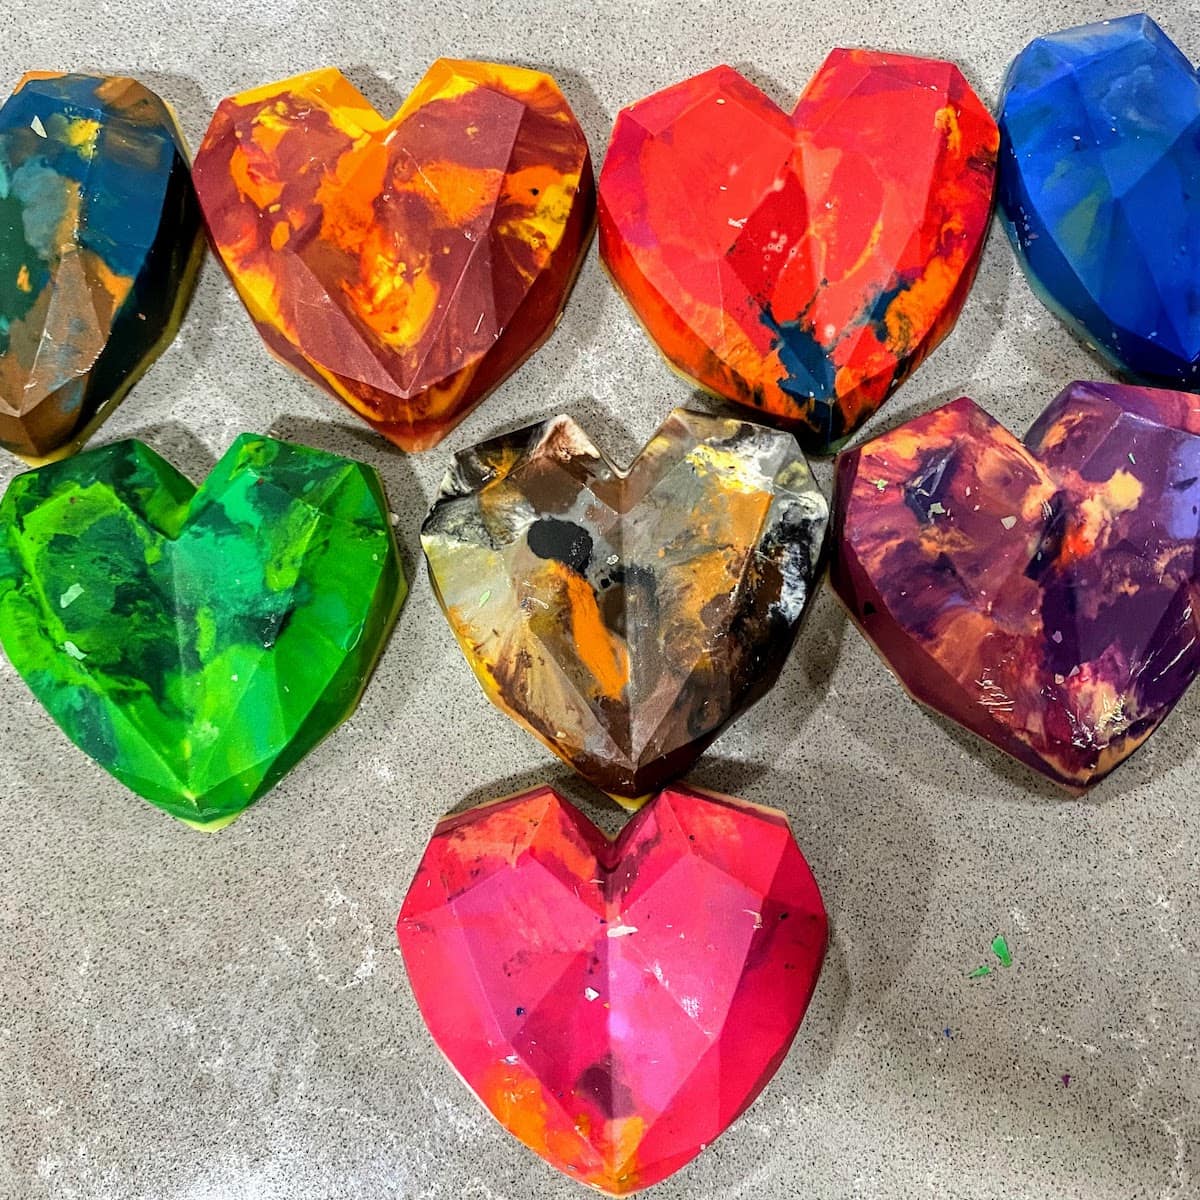
This sweet melted crayon art project might blow your mind a little…seriously. I could NOT believe how great these crayon molds came out. It’s the easiest craft ever and the product is, dare I say, semi-professional looking. My kids and I loved it so much that we did it three days in a row!
Want to Save this Recipe or Activity?
Enter your email and we will send it straight to your inbox! You’ll also get the latest posts from Platein28!
By submitting this form, you consent to receive emails from Platein28.
This all started when my kids needed to make Valentines for their classmates. Foregoing our usual dollar store Valentine card tradition, I decided to try something different- melted crayon art! So, I hopped onto Amazon and bought a couple molds with fun shapes. We did go to the dollar store – but for crayons! Fast-forward to a couple days later, and this melted crayon art mold thang turned out to be a massive, super fun success!
👌 Why we love this melted crayon art project!
Parents’ Perspective:
- Finally getting rid of those old, annoying crayon bits!
- You don’t need much at all! Crayons, mold, oven.
- Conscientious – teaches kids about upcycling!
- Educational – fosters fine motor skills, color sorting, art design, and science!
- You can bang out some to-do’s during baking and freezing wait times.
Kids’ Perspective:
- It’s cool to turn their old, stubby crayons into new ones.
- Kids can take charge and help every step in the craft (except the oven part).
- Creative choices all around.
- Kids can go play during baking and freezing wait times!
- Wow! Look at those crayons melt into something totally new. Yay melted crayon art!
✂️ Supplies

Notes on supplies:
Crayons – Use up your old crayons first. We did, and then bought more at the dollar store!
Molds – There are lots of shapes and designs out there (like out heart mold), just make sure yours is silicone and oven-safe.
🖍 How to Make Crayon Molds
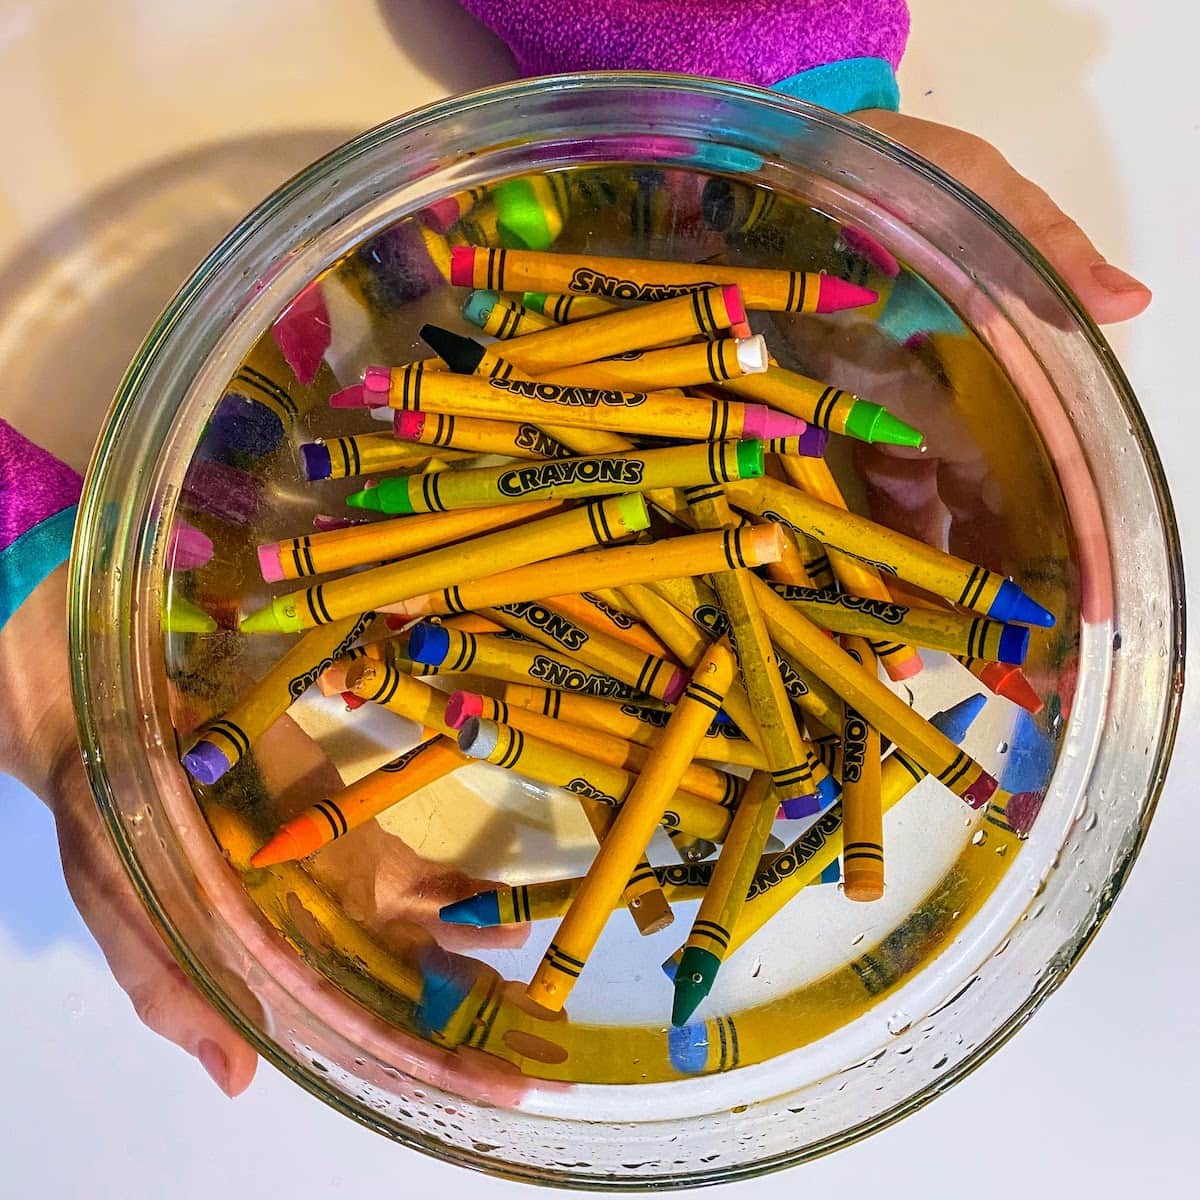
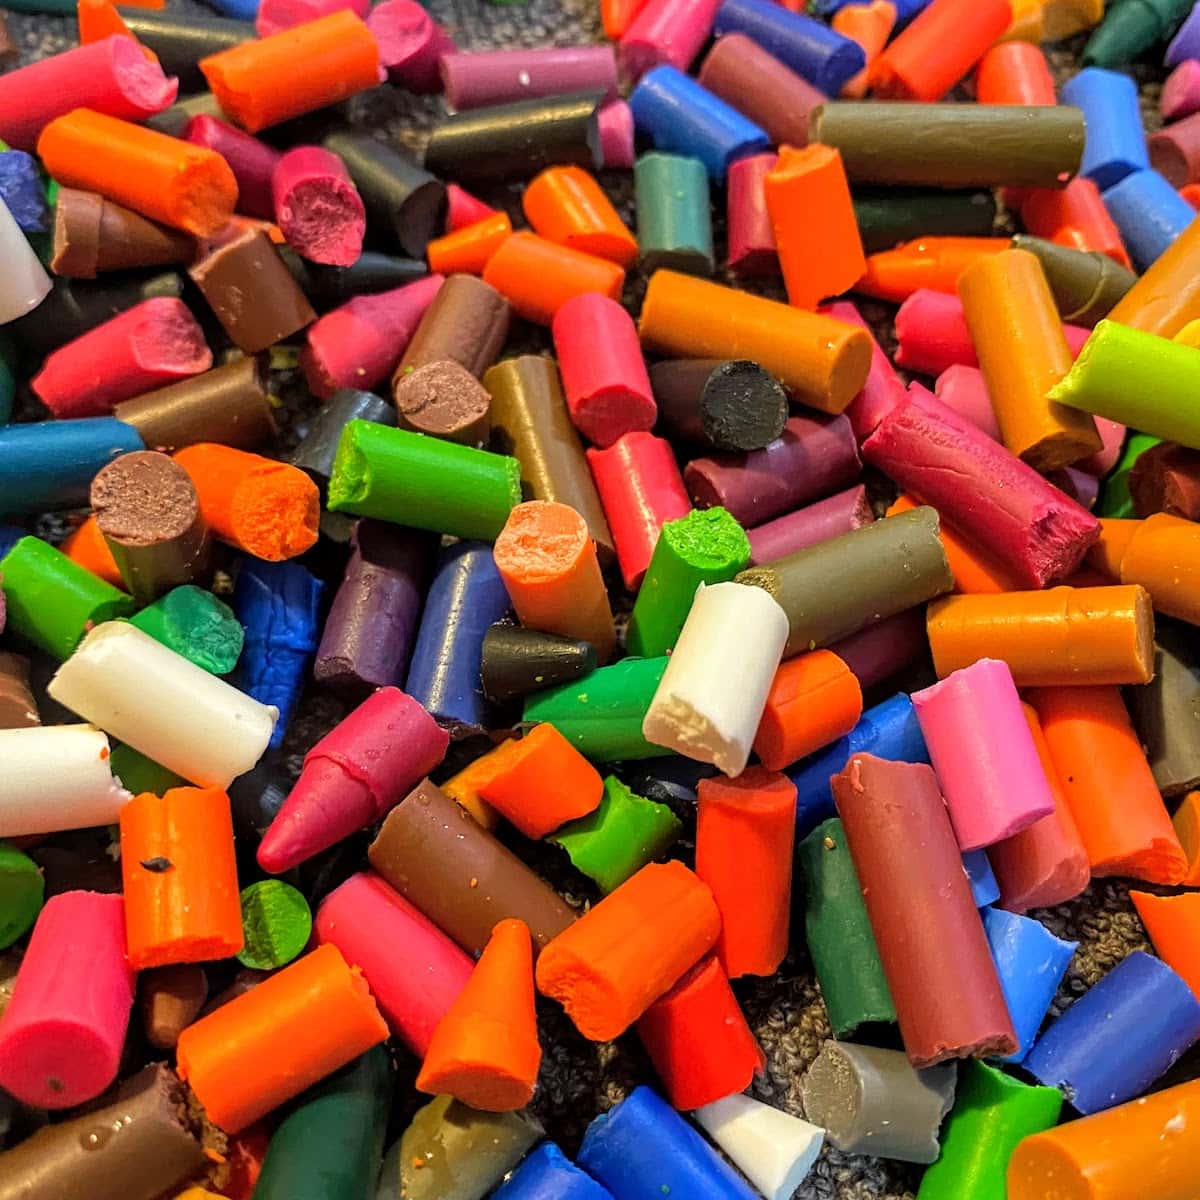
STEP 1: Soak your crayons in very warm water
We found this step to be crucial! It makes the crayon wrappers just slide off AND more importantly, the crayons break apart more easily the warmer they are.
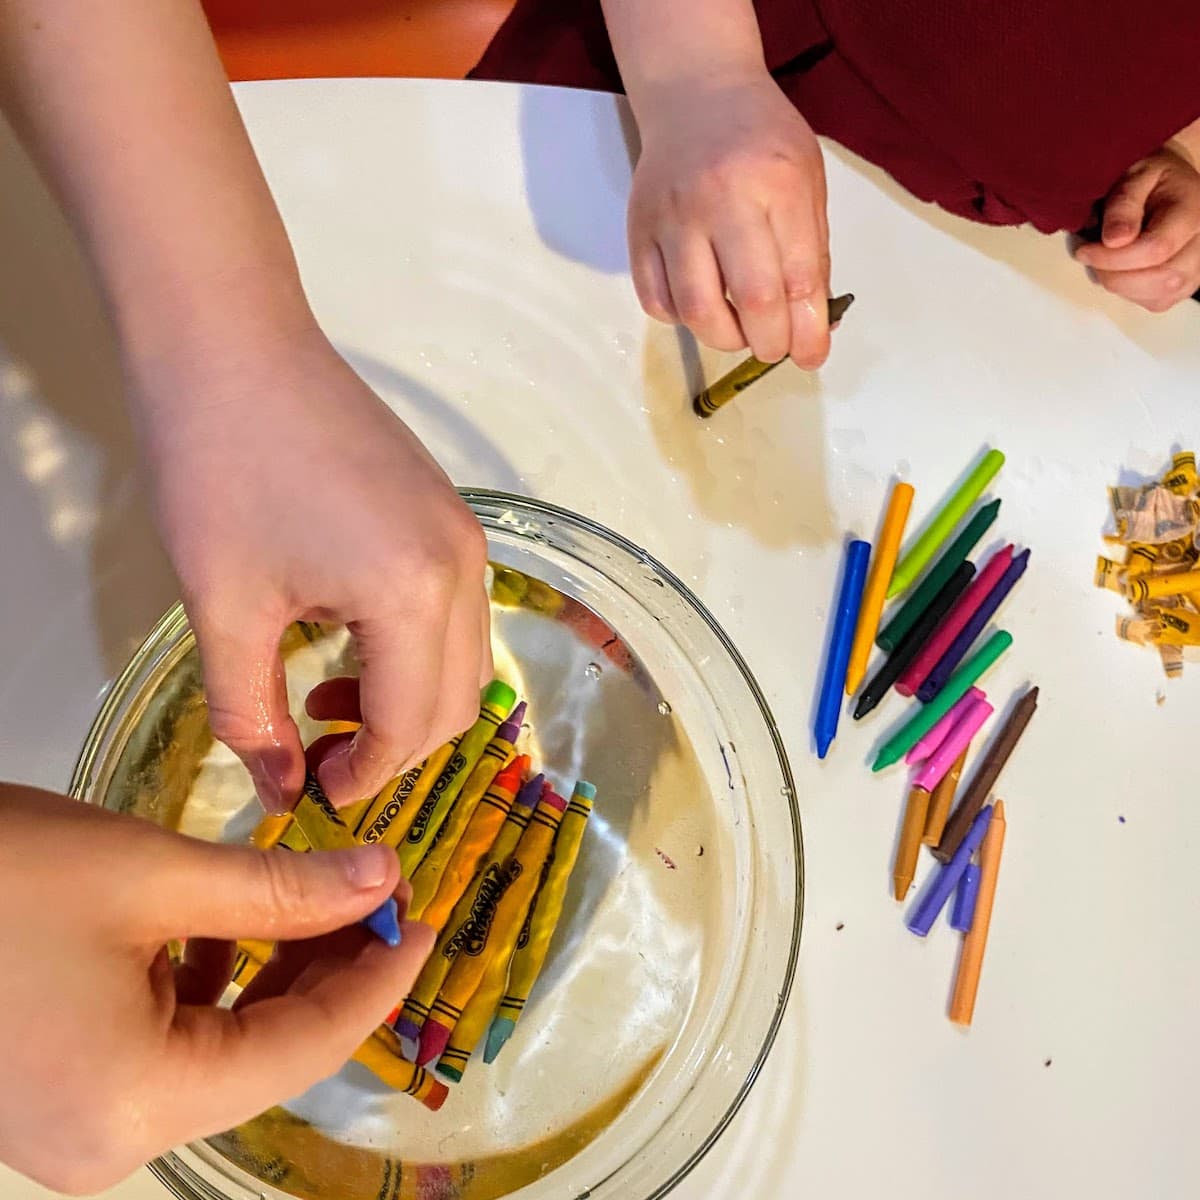
Step 2: Peel & break your crayons
Make the pieces as small as possible. The bigger the crayon pieces, the longer they take to melt.

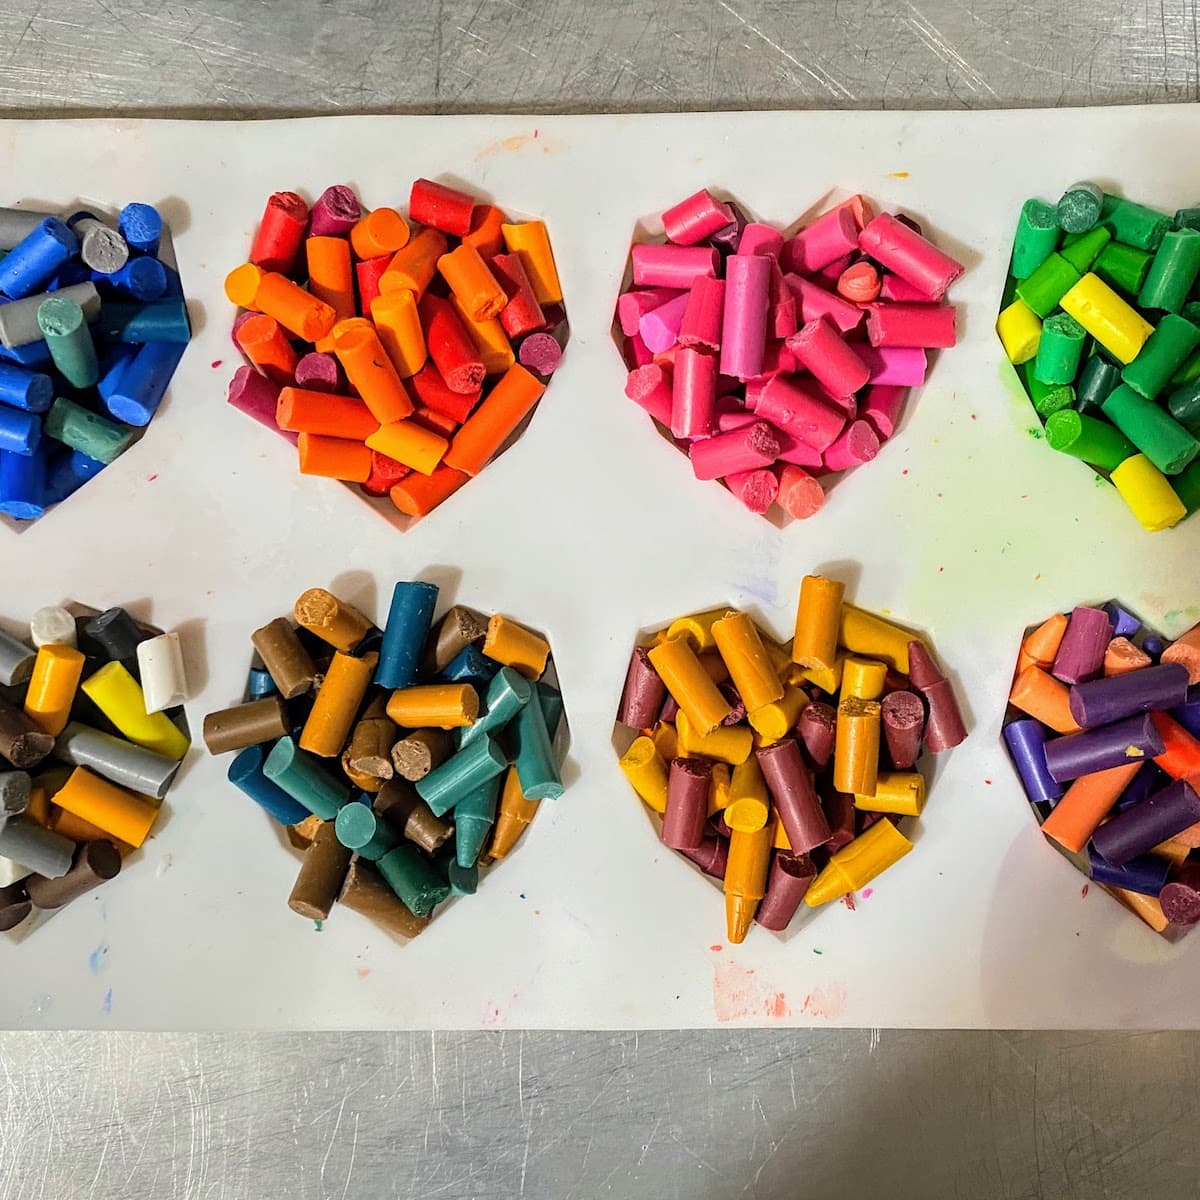
Step 3: Fill mold(s)
Overfill the molds…seriously. The crayon bits melt down a lot, making beautiful mcrayon art!

Step 4: Bake!
*This task is for adults only!!
Put the mold on a baking sheet and into oven. We baked these hearts for 15 mins at 350°, but check how hot your mold can get before starting. Peek at your hearts while baking – if you still see chunks of unmelted crayon in the mold, it’s not done yet.
Step 5: Freeze!
*This task is for adults only!!
We took our baking sheet (with mold on top) directly from the oven to the freezer, for ~ 10 mins. Alternately, you can let the molds cool on the counter until they’re solid enough to move into the freezer (without the baking sheet).

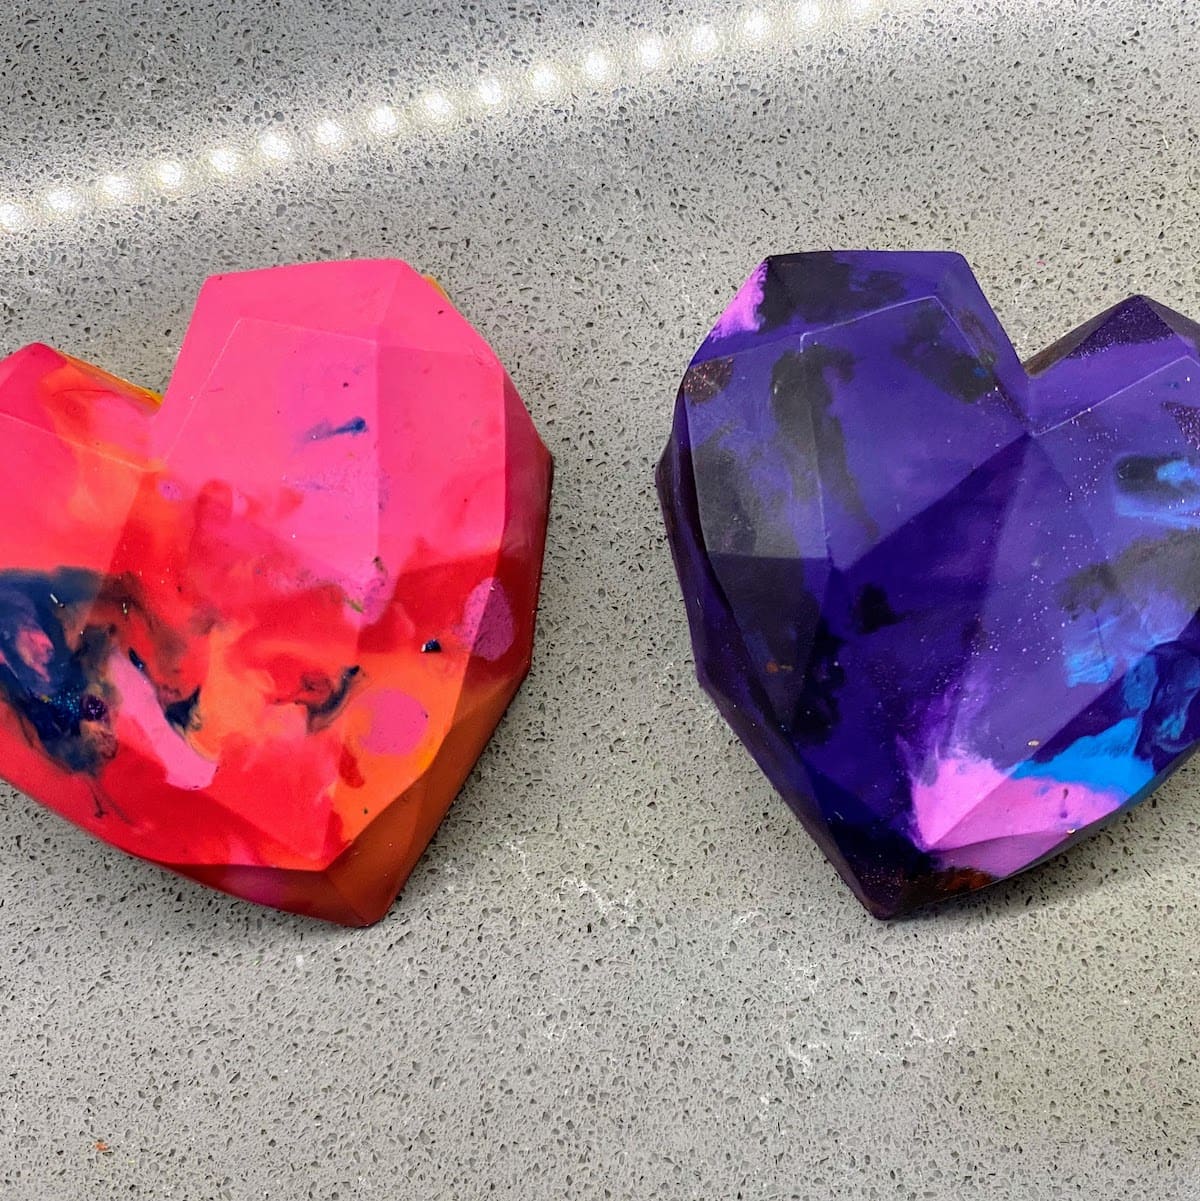
Step 6: Pop ’em out!
This is the best part! Just be gentle when you push your melted crayon art out of the molds. Note – don’t leave them too long in freezer or they’ll be hard to get out of mold.

🤔 What is the Best Mold for Melting Crayons?
The best mold is one that’s 100% silicone. Silicone molds are great for melted crayon art projects because they are BPA-free, oven-safe (many being able to handle up to 446° F), and microwave safe. On the flip side, they can handle the cold temps of fridges and freezers. Many are also ok to put in the dishwasher. Extra bonus: the floppy, silicone material makes it very easy to pop your crayon art out of the molds when done.
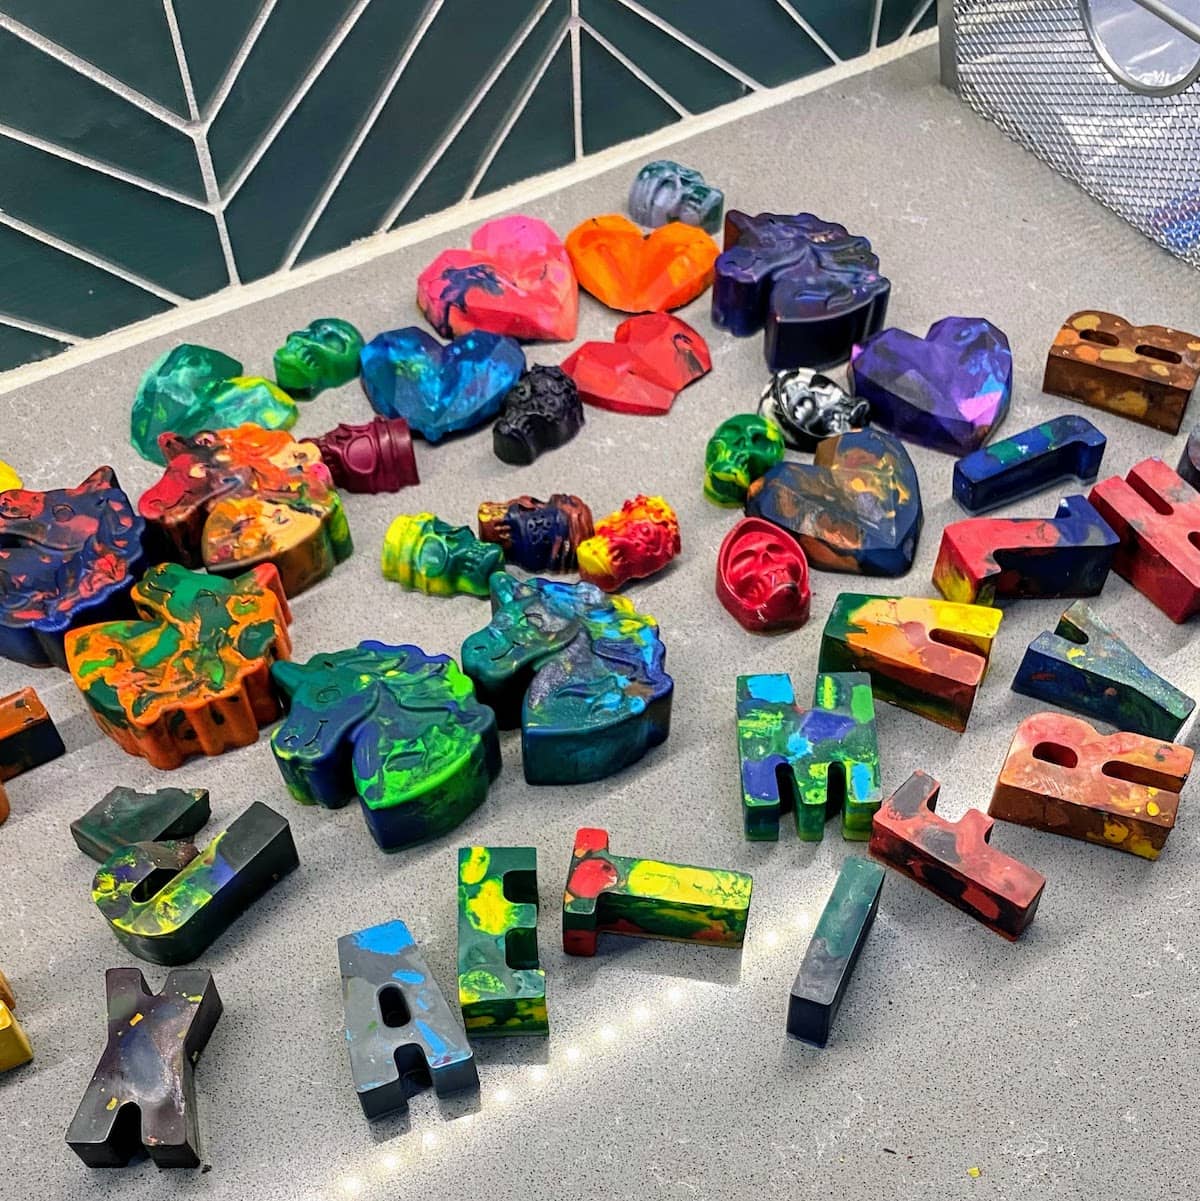
You can pick any shape or design you like. Letter molds are fun cause you can give them out as gifts with the person’s name. We sorta went nuts and bought a bunch of molds. These were all great: ![]()
![]()
![]()
- heart molds (for Valentine’s Day of course) ❤️
- alphabet letter molds 🔠
- Lego molds 🧱
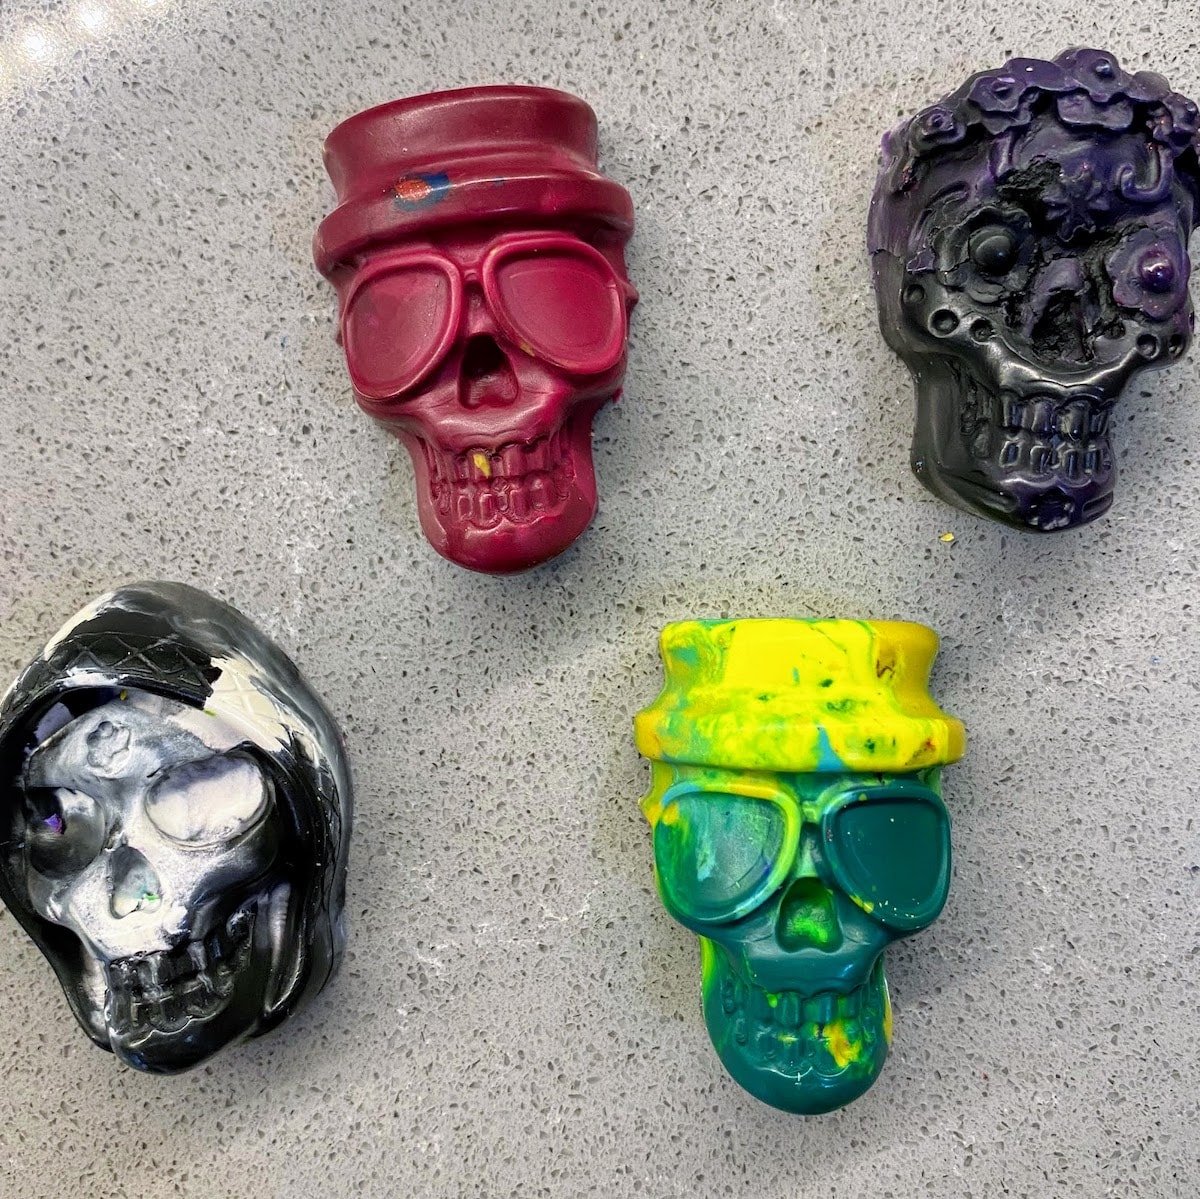
- skull molds 💀
- and unicorn head molds 🦄
✨ What to Do with Your Finished Craft
So many things! Valentine’s gifts, party favors, teacher gifts, play with as toys, or display as artwork. And of course, you can use them as crayons!
One cool thing about melted crayon art craft is that you’re up-cycling your old, cast-aside crayons – turning them into something else, something new. This is just like our DIY Piggy Bank Craft, which is just one way you can turn an empty tissue box into something interesting. Or our Tin Can Pencil Holder Craft, where you’re turning an old can into something useful. The possibilities are endless, and you can call yourself a no-waste, DIY extraordinaire.
✏️ Expert Tips and Tricks
🌈 NOTE FIRST – every oven and every mold is different. A larger mold with deeper cavities will need more time, and a smaller mold will need less time. We baked our hearts at 350° F for 15 mins. People have different preferences for crayon melting temp, ranging between 200° and 350°, so find out what heat your mold can handle before you start.
🌈 Don’t skip the soaking step. It makes the crayon wrappers just slide right off.
🌈 Try to break each crayon while it’s still warm, after you remove from water. The warmer they are, the easier they are to break. And the smaller the pieces are, the faster they will melt.
🌈 Not necessary, but it’s helpful to have a hand towel to dry off the crayons.
🌈 Definitely overfill the mold cavities! The first time we did melted crayon art, we only filled the cavities up to the surface of the mold, and the crayons melted down to only halfway. In other words, crayons melt down a lot, so heap on the crayons in each mold cavity.
🌈 We found that a baking sheet helped stabilize the mold so the crayon melts didn’t spill everywhere when taking it out of the oven. Highly recommend!
🌈 Check on your molds while baking – if you still see chunks of unmelted crayon in the molds, they’re not done yet.
🌈 Freezing options – when the molds are done, either (1) transfer directly to freezer. It helps to put a pot holder under baking sheet in freezer to protect the freezer surface. OR (2) let mold sit out until slightly solidified and then transfer mold to freezer without baking sheet.
🌈 Don’t freeze mold too long. The molds are done when not wobbly or warm to the touch. But if you freeze the mold too long, it’s hard to pop your crayon artwork out.

❓FAQ
The oven temp for melting crayons depends on your mold. Most 100% silicone molds (which we recommend using) can withstand high heat. We melted our crayons at 350°. However, some crafters prefer lower temps, ranging from 200° to 300°.
Yes! Crayons are non-toxic and will not harm you. However, melted wax is very very hot. Have an adult take the melted crayons out of the oven and manage them until they are cool enough to handle.
Honestly, any! People have opinions about this. But we used a huge pile of all different kinds of crayons (i.e. some Crayola, some knock-off brands, some from restaurants or bday parties. etc.), and the end result was the same. FYI, the dollar store is an excellent place to buy crayons for your art project.
Yes, you can microwave crayons, but I wouldn’t recommend it. You will have to keep heating them in small increments, so as to avoid splatter. And after that you need to pour the melted wax into molds, trying not to combine colors too much. Oven is just easier.
I let the mold soak in warm soapy water, and then use my hands to pick the wax off. If the wax is being really stubborn, I’ll use a toothbrush or sprinkle some baking soda on the mold to scrub off the wax.


Want more crafts?
Sign up below to get crafts and recipes straight to your inbox plus make sure to follow on your favorite social!

🖍 Melted Crayon Art with Molds
Equipment
- oven
- freezer
Supplies
- large bowl
- water
- crayons
- heart silicone mold
- baking sheet
- oven mitt
- towel and pot holder ([optional])
Instructions
- Set oven for 350° F. Fill large bowl with very warm water. Submerge crayons in bowl and let soak for 5 mins.
- Remove a crayon from water, slide off the paper wrapping, and break into small pieces with your hands. Repeat until all crayons are done.
- Fill the mold cavities with crayon pieces, overfilling as much as possible. You pick the colors!
- Place mold on baking sheet and bake for ~15 mins. Take a peak – if you still see chunks of unmelted crayons, the molds aren't done yet.
- Remove from oven and place directly in freezer. OR let mold sit out until slightly solidified, and then move to freezer. Freeze for ~10 mins.