Fun with Melting Crayons on Pumpkins
This pumpkin craft was seriously so fun that we did it multiple times! Not only is melting crayons on pumpkins way easier than I thought it would be; you can also be endlessly creative. There are tons of color and design options. And watching the colors melt down the pumpkin is oddly soooo satisfying. This is definitely one craft where the process is the best part.
Want to Save this Recipe or Activity?
Enter your email and we will send it straight to your inbox! You’ll also get the latest posts from Platein28!
By submitting this form, you consent to receive emails from Platein28.
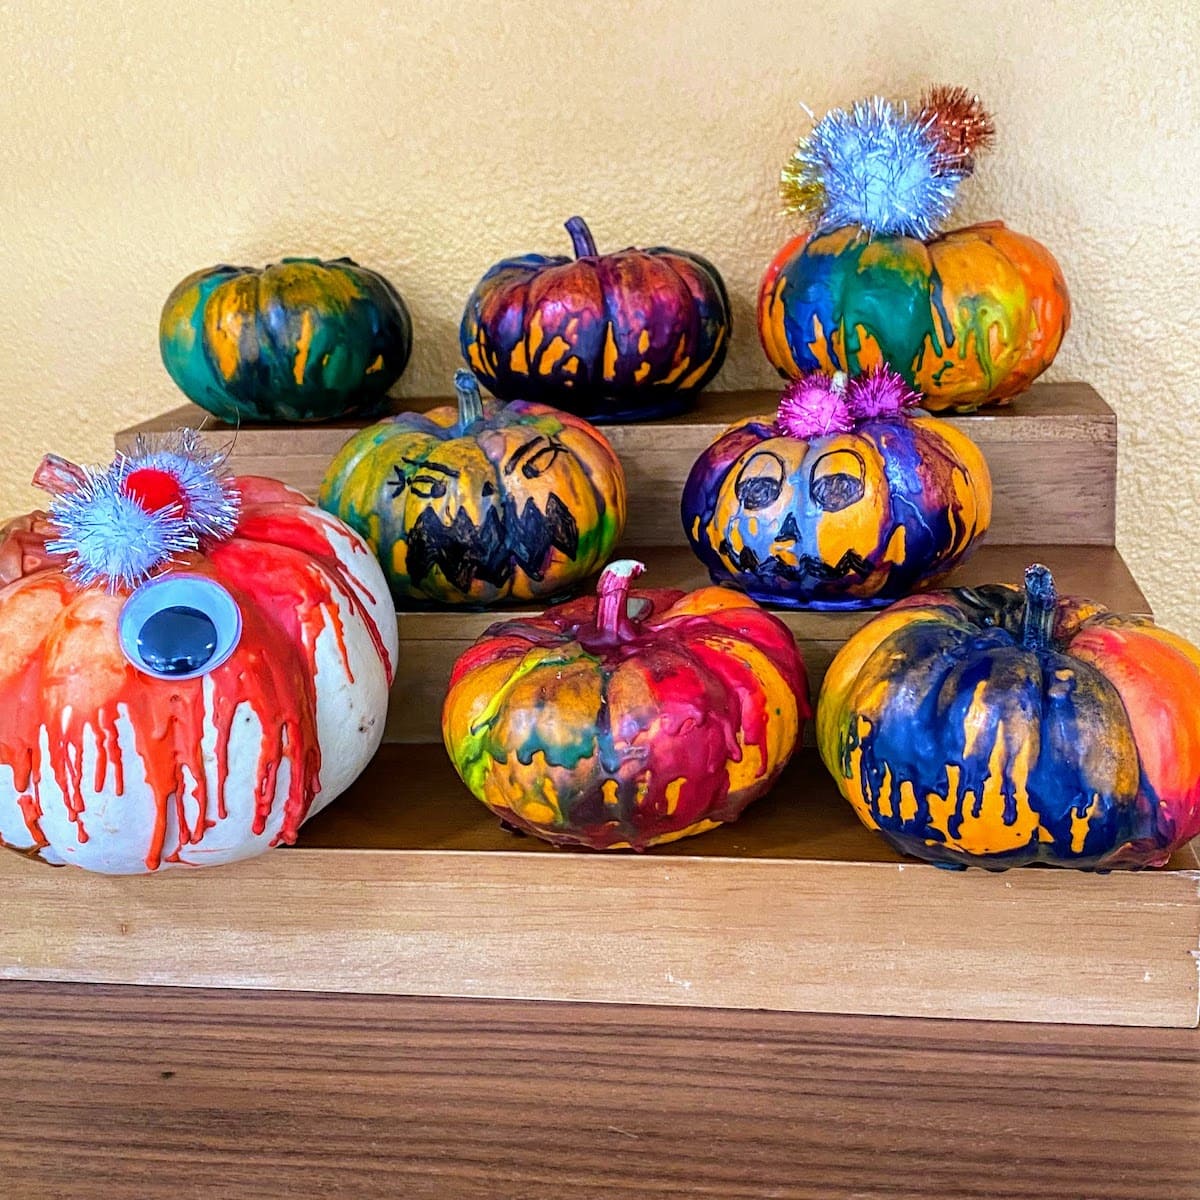
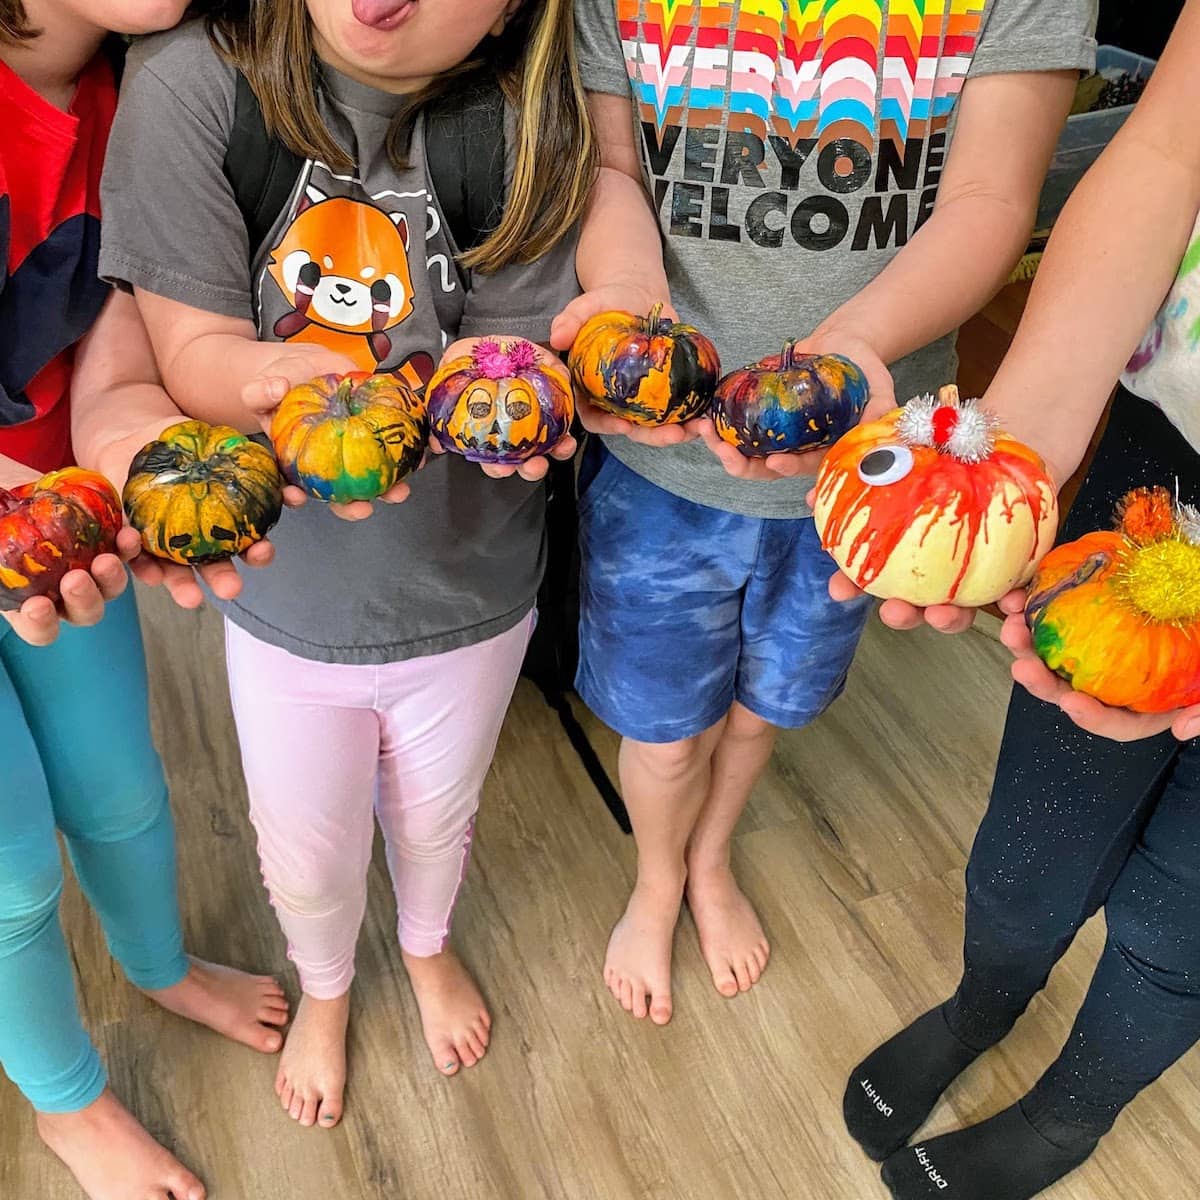
We’ve done crayon molds before, but never melting crayons on top of pumpkins. It was so fun that we did it once as a family, again with the kids’ friends over, and I even did this craft a third time without the kids. Our house is now an explosion of colorful mini pumpkins!

Why We Love Melting Crayons on Pumpkins
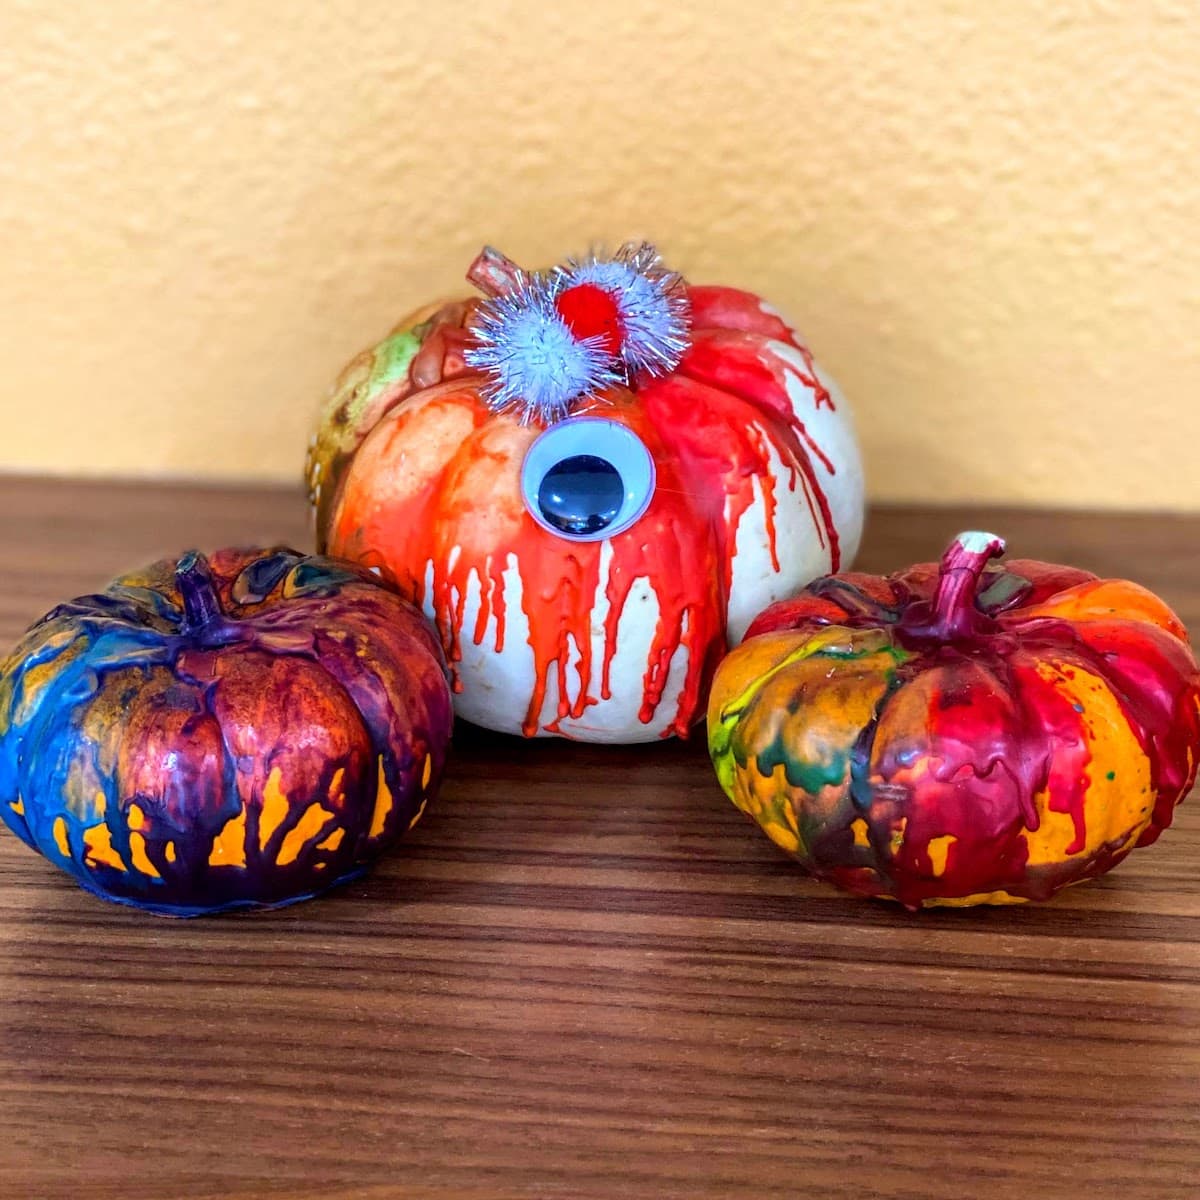
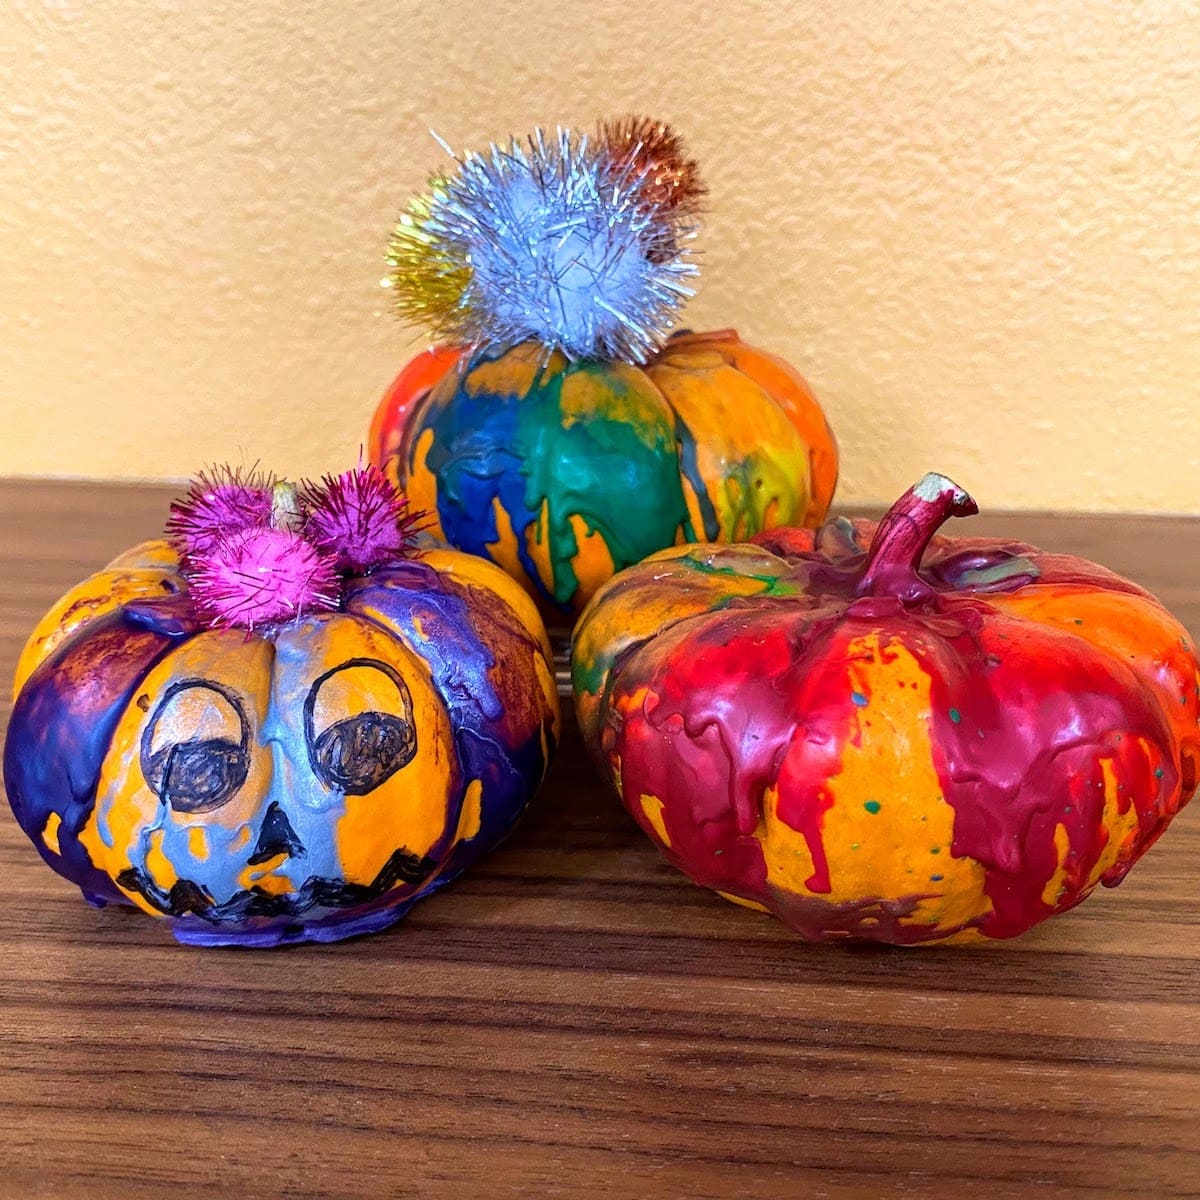
- Colorful & Creative! Any colors you want! And you can just melt the crayons OR draw a face on the pumpkin OR glue on pom-poms, glitter, whatever.
- Kinda science-y! It’s super cool to watch colored wax melt and drip down when you apply heat.
- Easy! It looks like it might be complicated, but seriously all you do is glue crayon bits onto a pumpkin and heat them with a blow dryer.
- No-carve! I definitely prefer melting crayon on pumpkins to pumpkin carving. No pumpkin junk everywhere, no rotting. Basically, more colorful – less gross. lol.
- Halloween decoration! In the end, you’ll have some awesome colorful pumpkins to decorate your house/porch for Halloween. If you use a fake pumpkin, you can display it year after year.
Note: If you love pumpkin crafts, be sure to check our our adorable Halloween felt pumpkins made from tin cans!
✂️ Supplies
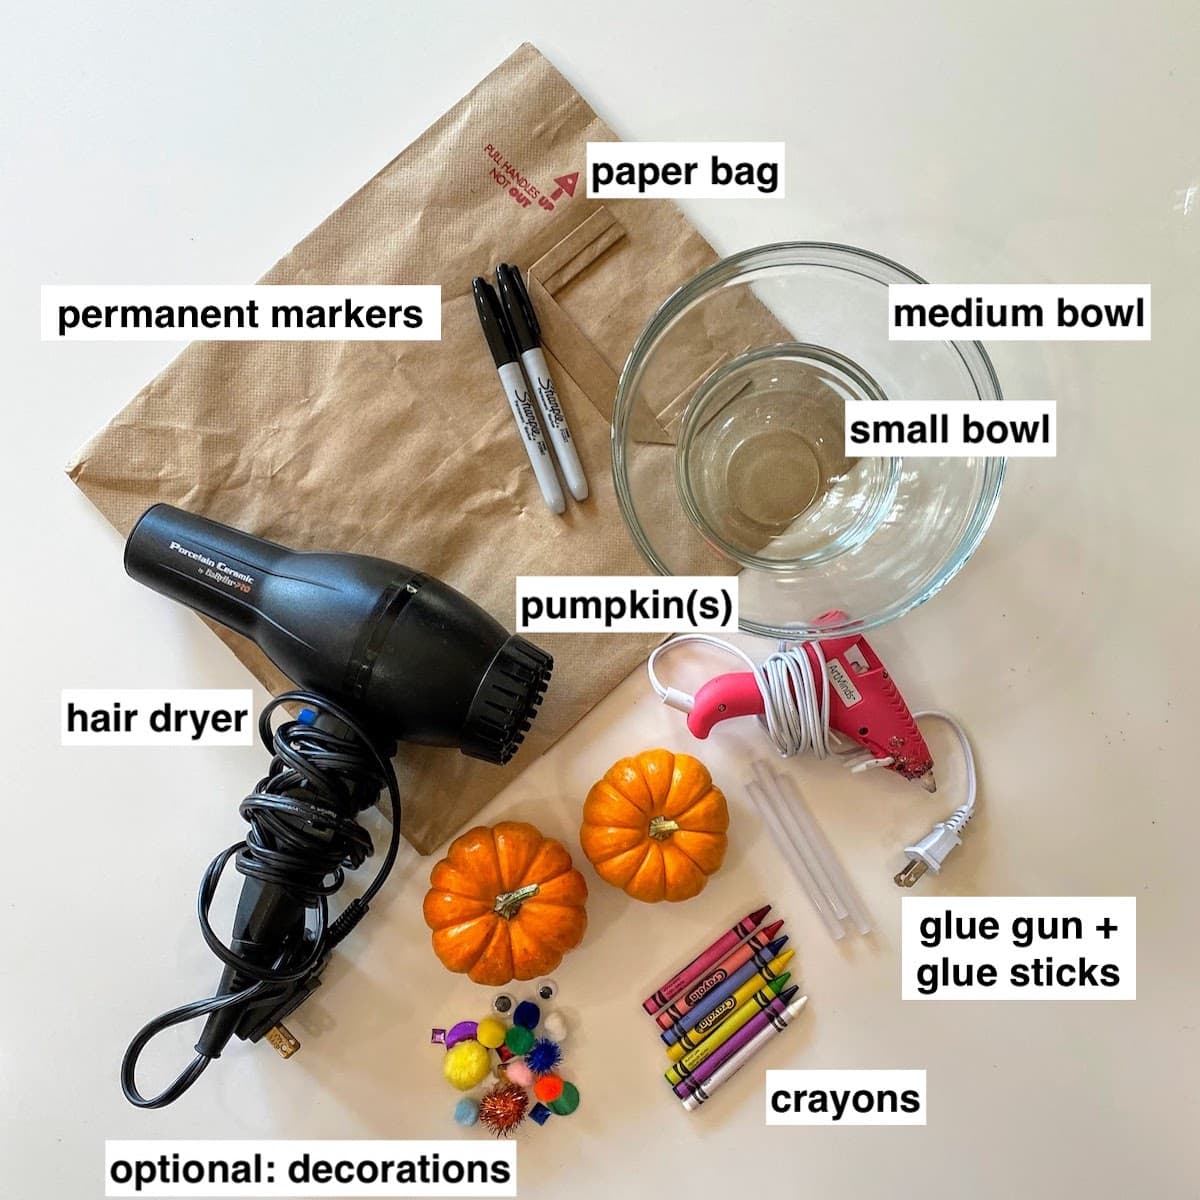
Essential Supplies:
- Crayons – use Crayola if you can…dollar store crayons take FOREVER to melt!
- Bowl – for soaking your crayons in water.
- Towel – for general use and drying off the crayons.
- Paper bag is to cover your work surface. Trust, this is messy! I cut mine open to double the surface area. Newspaper or garbage bags will also work.
- Pumpkins can be any size and any amount, real or fake.
- Hot glue gun + glue sticks
- Hair dryer
Optional Supplies:
- Small bowl – just helpful for consolidating the crayon wrappers as you peel.
- Permanent markers – for drawing faces or designs on the pumpkins.
- Misc crafty decorations – i.e. pom-poms, googly eyes, glitter.
📝 Instructions
Safety note: for toddlers especially, some of these steps may require adult supervision and/or assistance. The tip of the glue gun is very hot. And while the glue dries pretty quickly, it’s very hot right when it comes out of the gun.
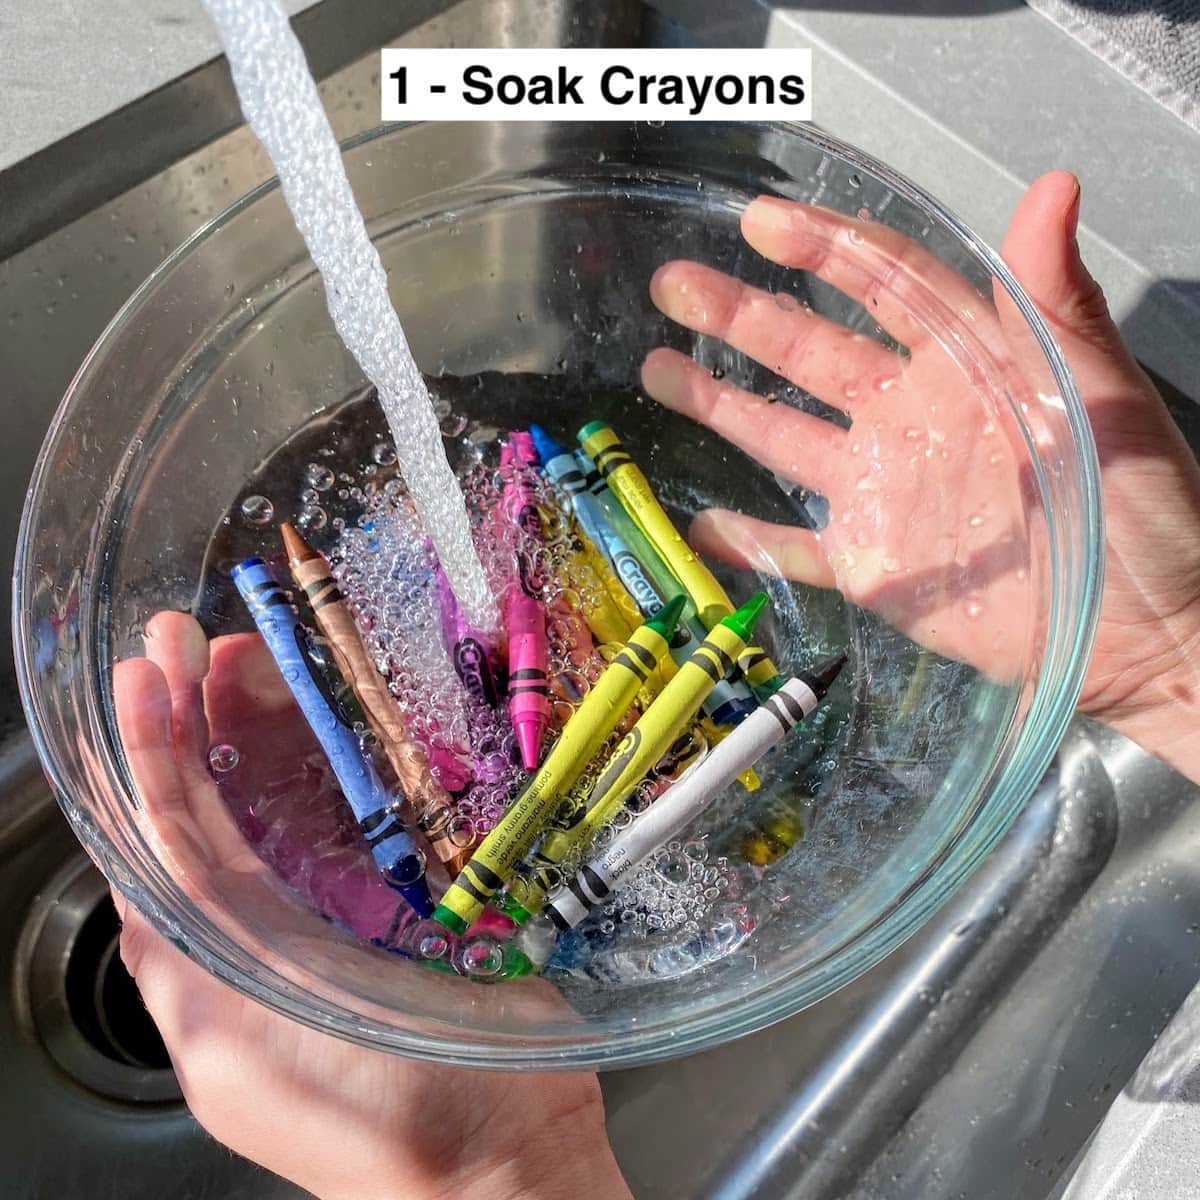
Step 1: Prep the crayons (4 mins)
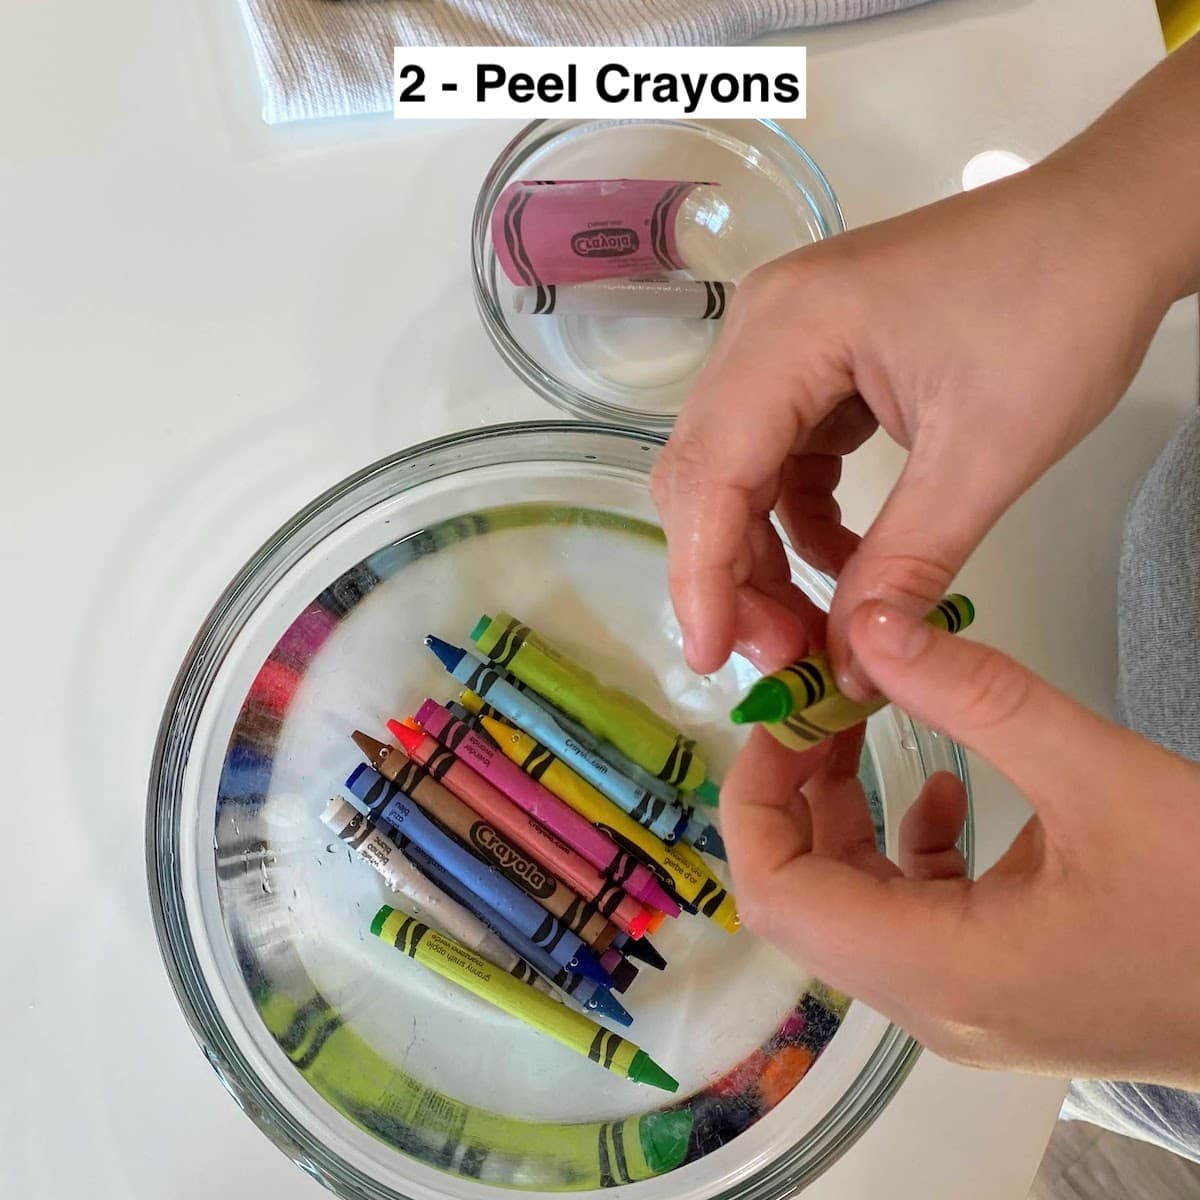
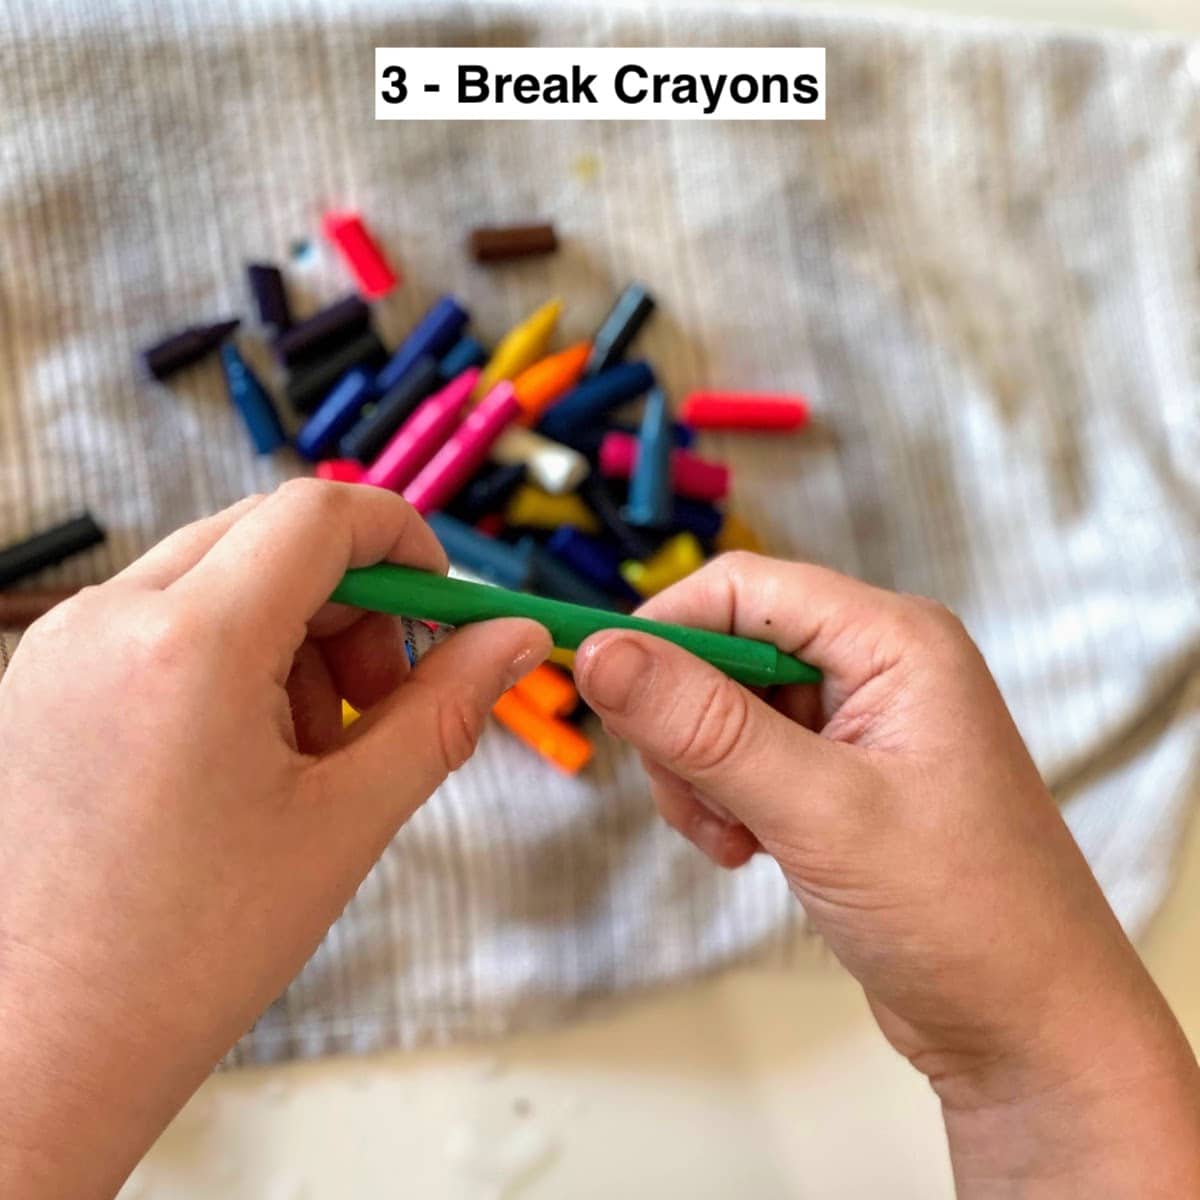
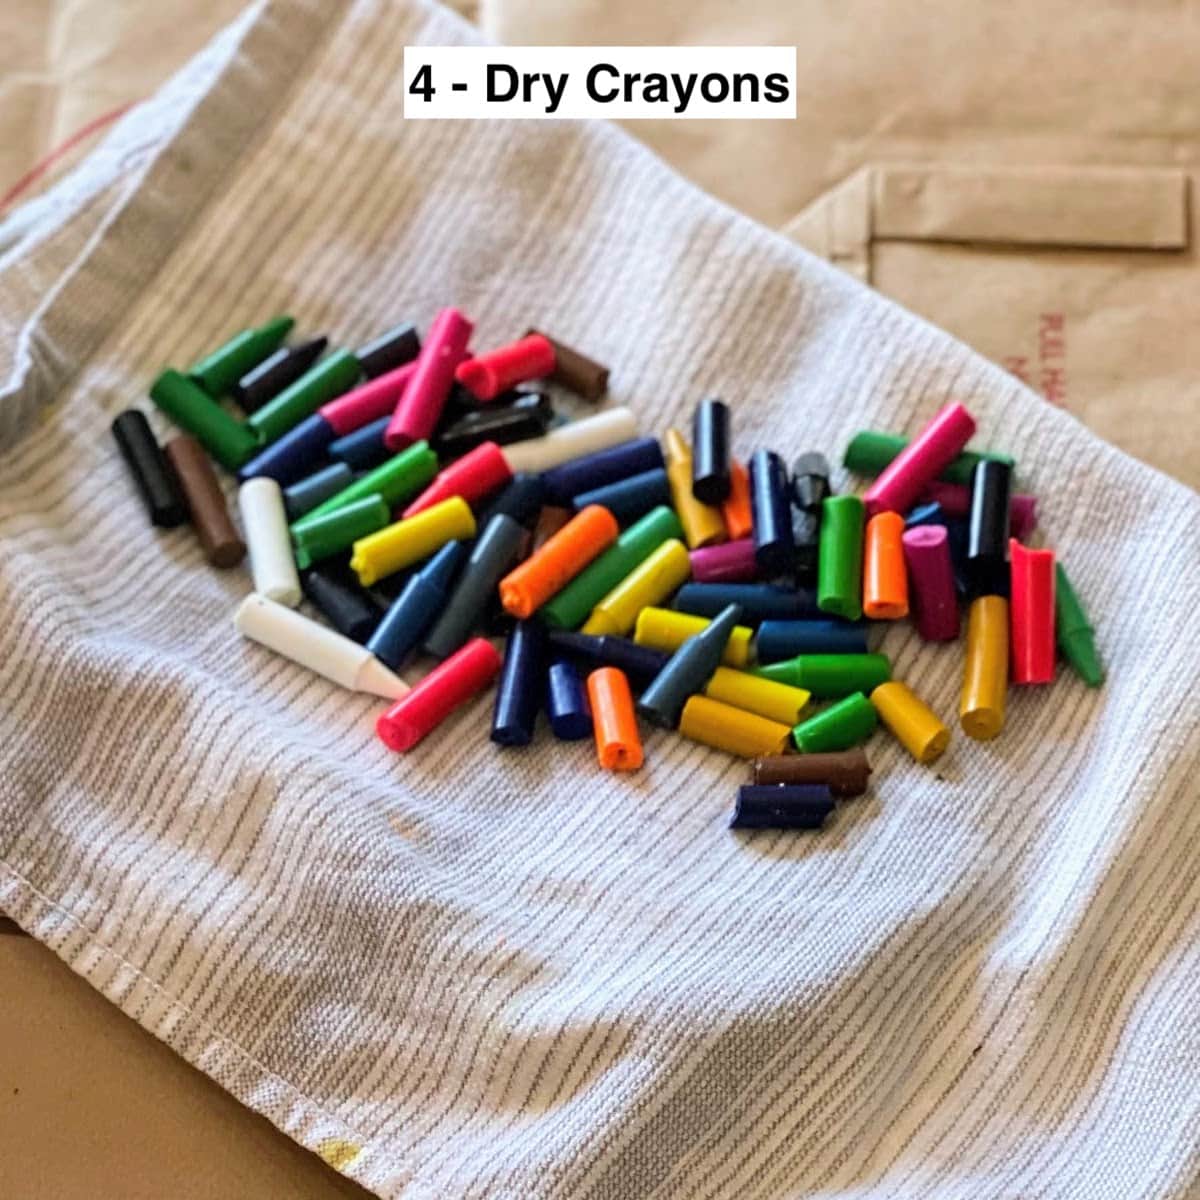
Soak, peel, break and dry the crayons. Easy peasy.
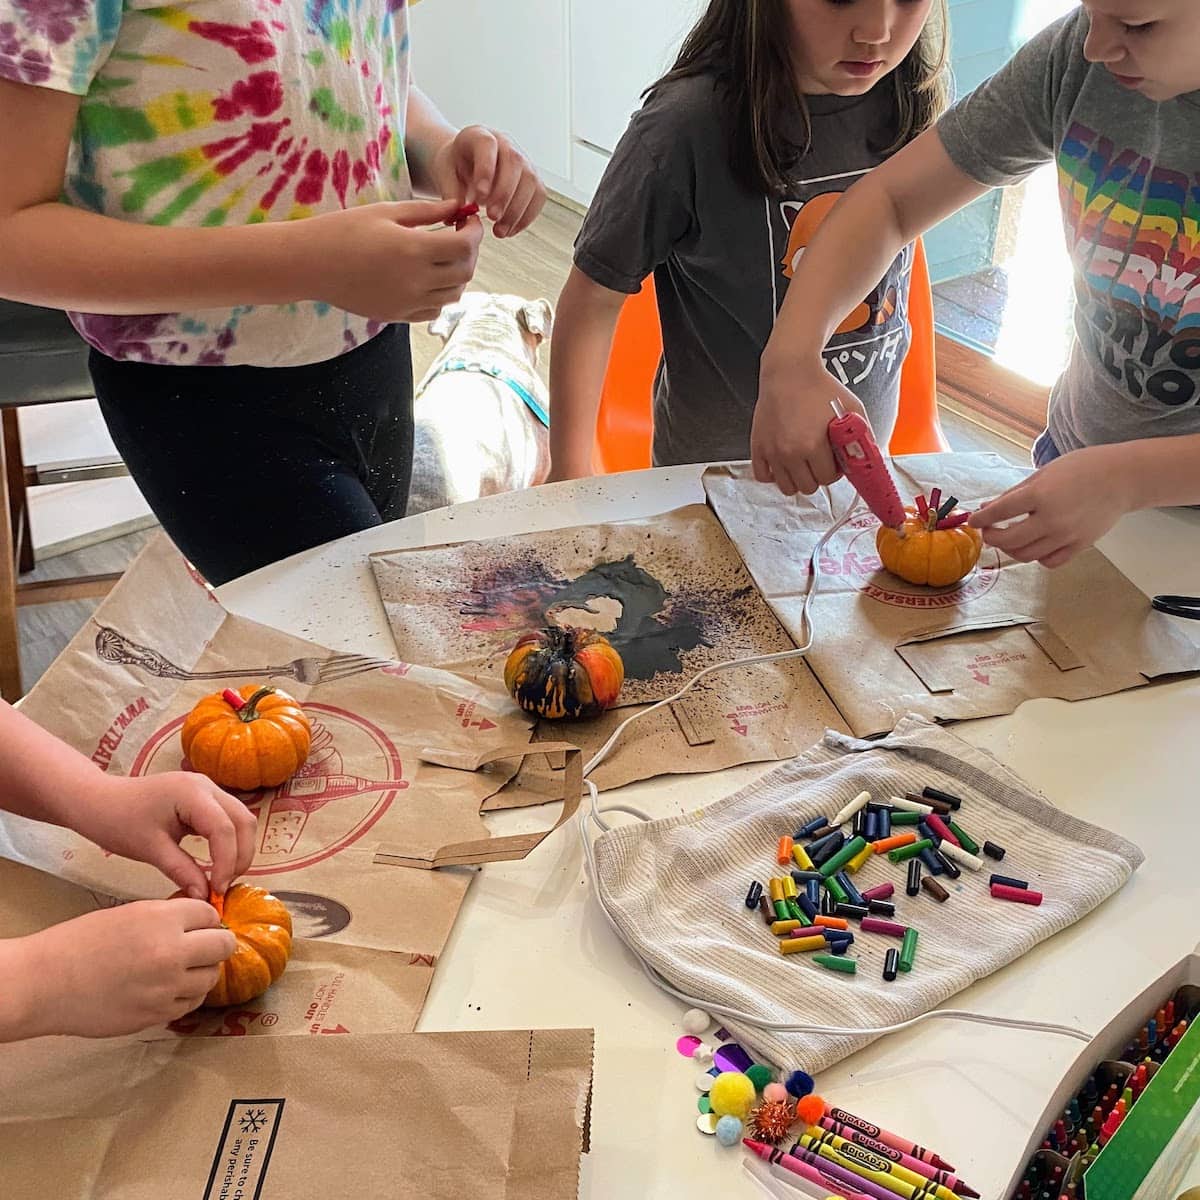
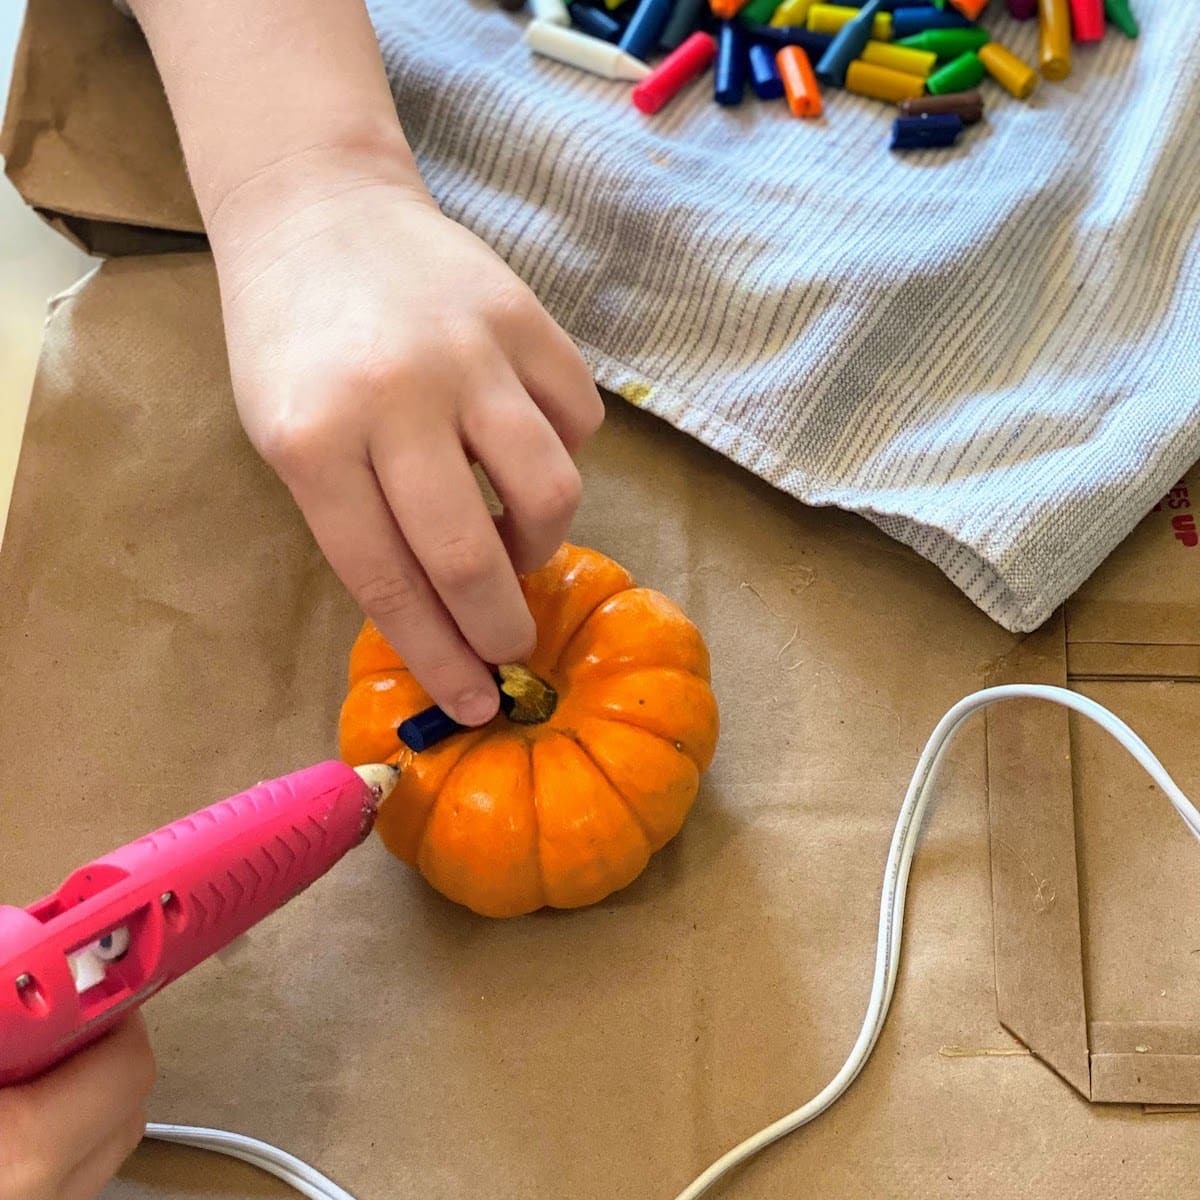
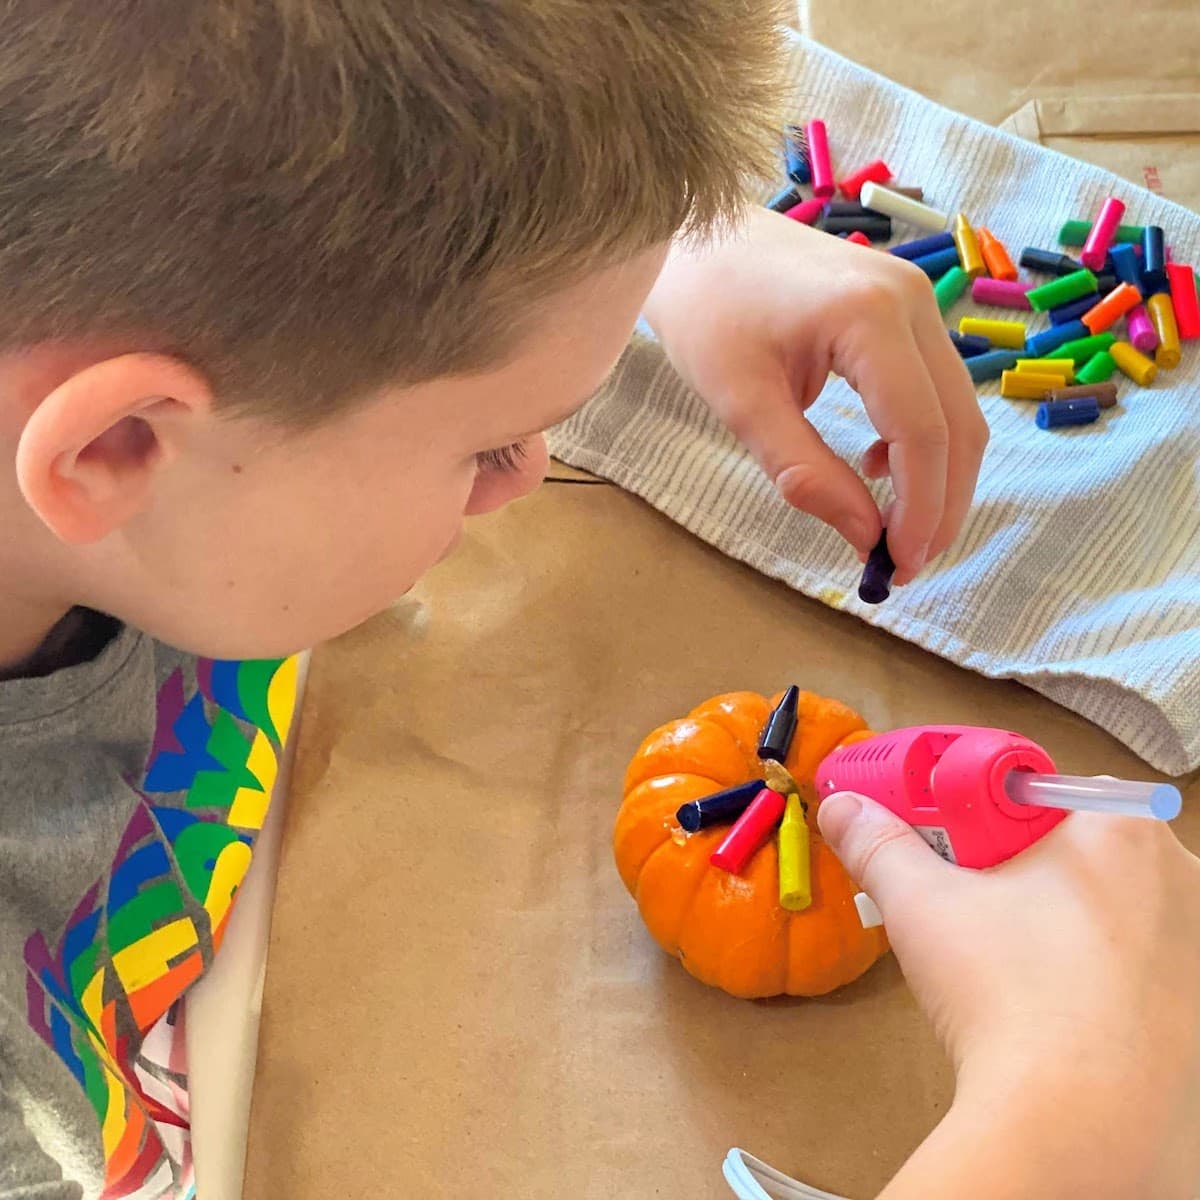
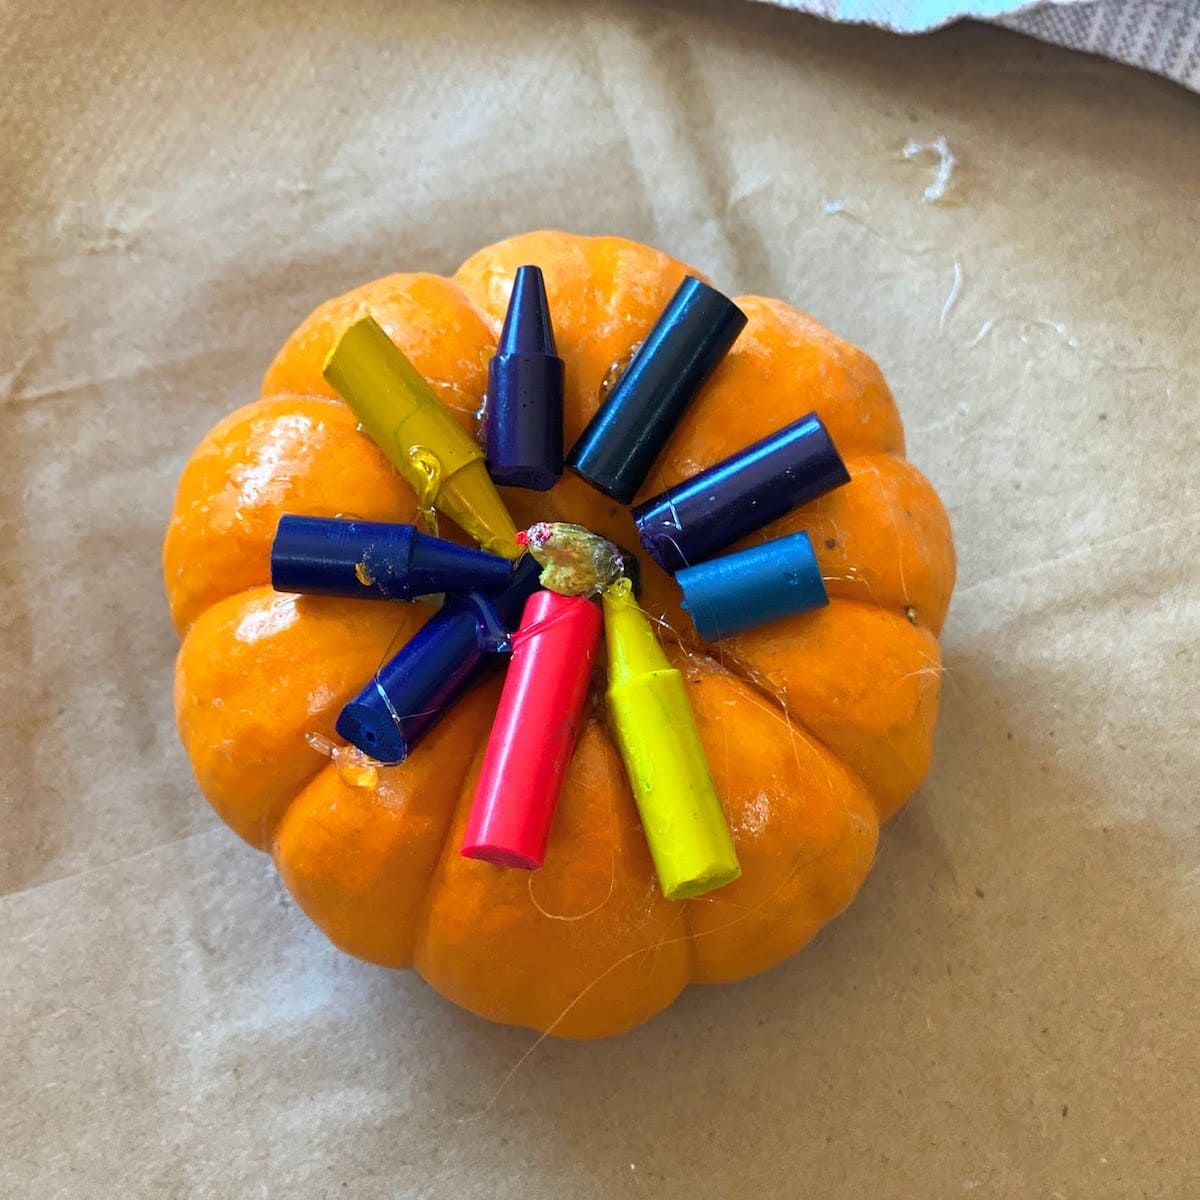
Step 2: Glue on the crayons (4 mins)
Use your glue gun to attach crayons around the pumpkin stem, one-by-one.
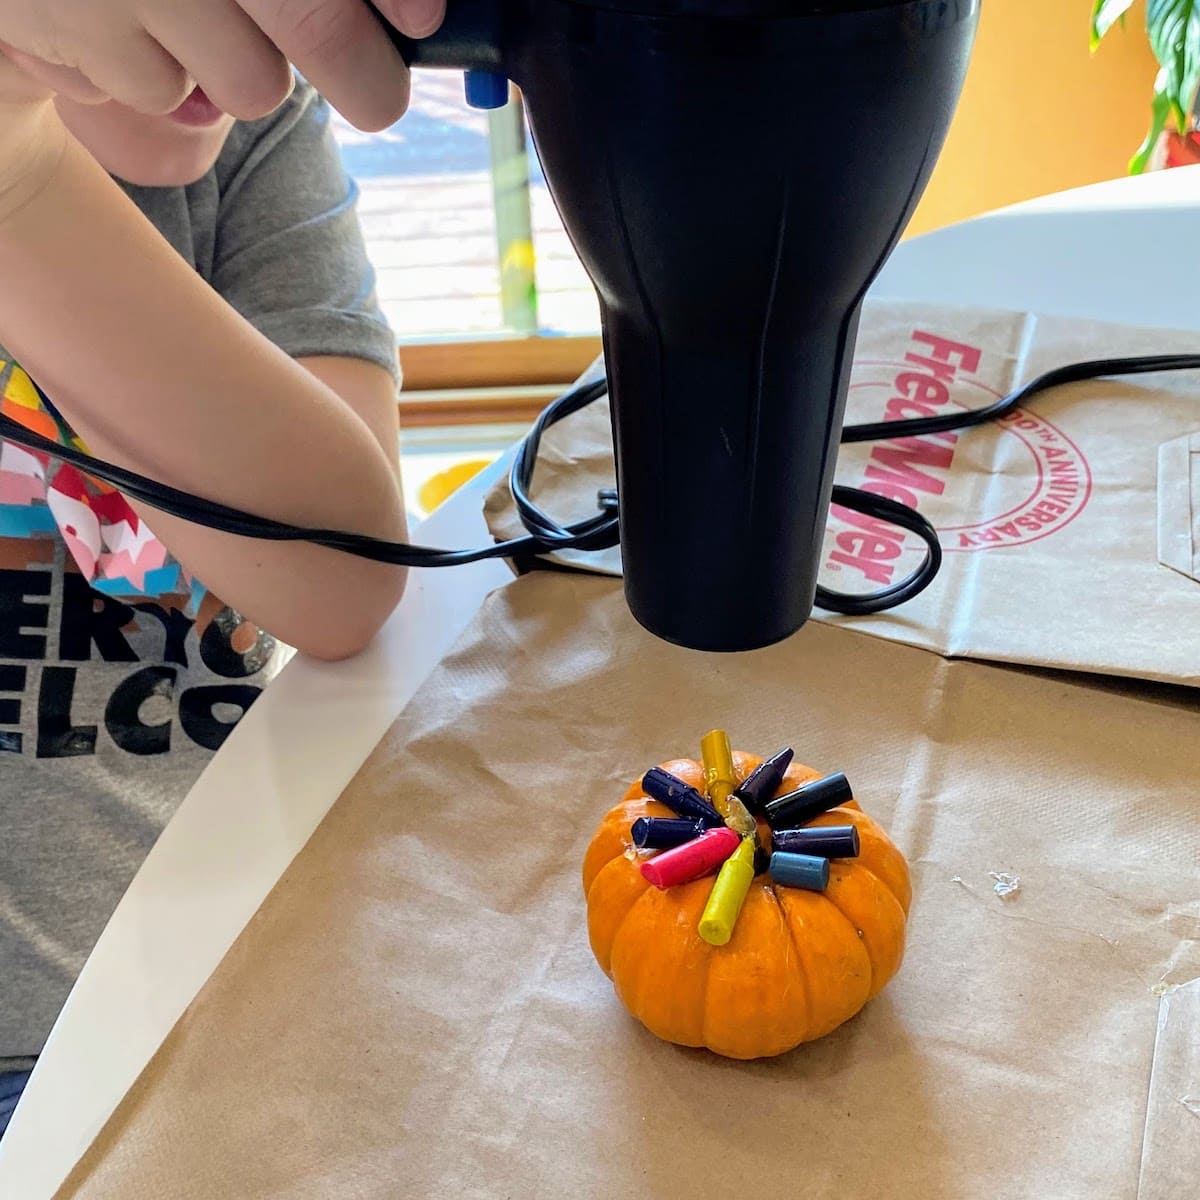
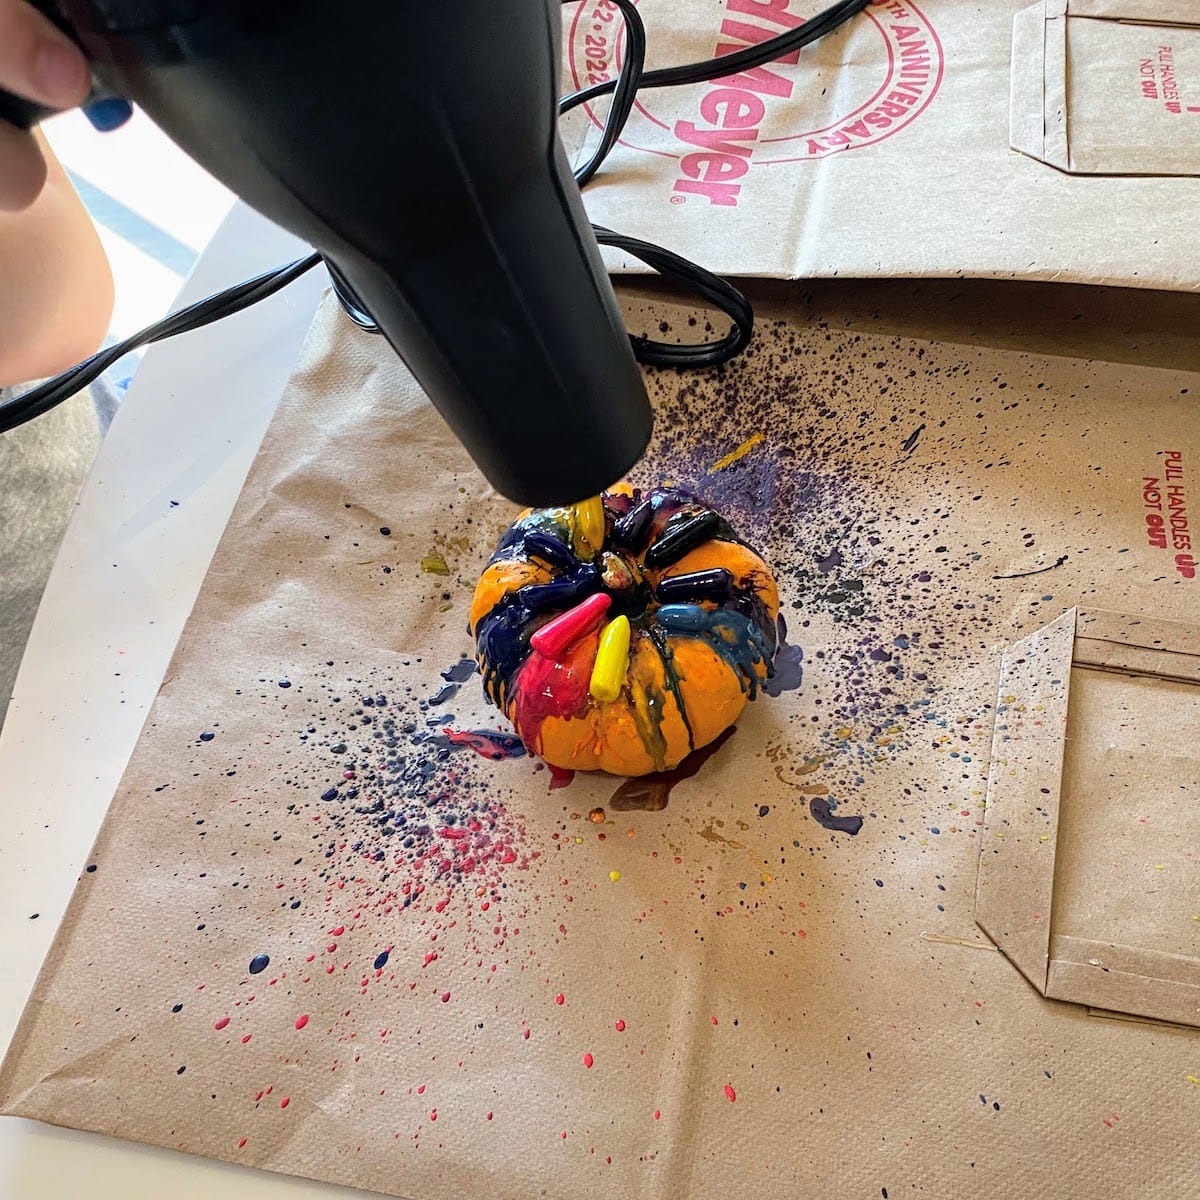
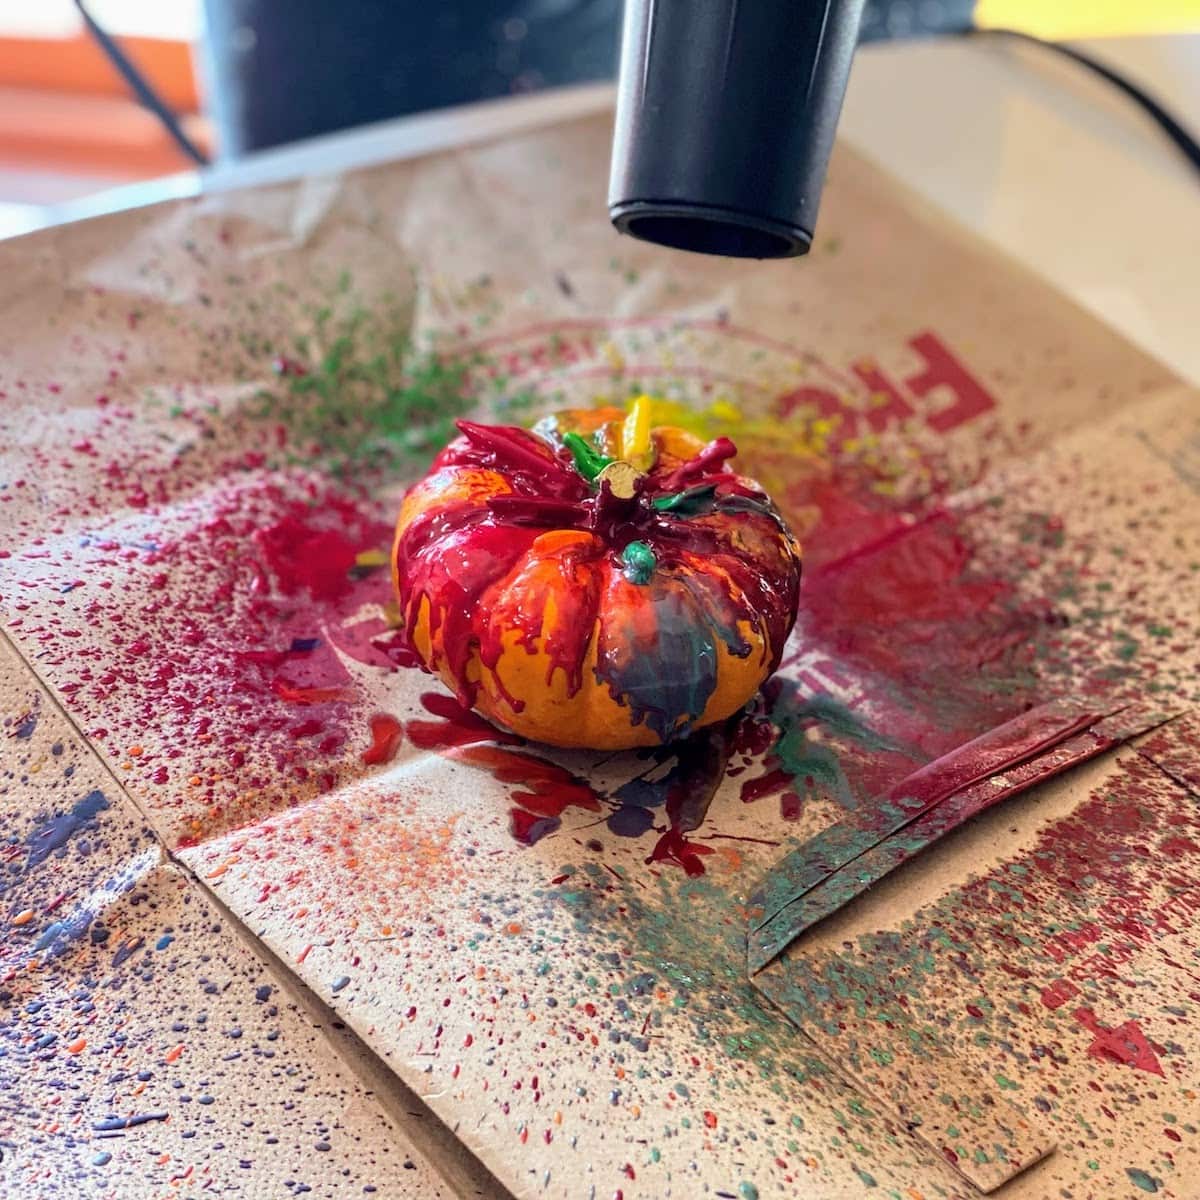
Step 3: Melt the crayons (4 mins)
Use your hair dryer to melt the crayons. Watch out for hot wax splatter!
TIP: hold you hair dryer at least a couple inches above the pumpkin. The closer it is, the more splatter there will be. You can hold the dryer at different angles so the wax drips in the ways you like.
🖍 Important Tips
I’m gonna be bossy for a sec and give you some DOs and DO NOTs. Lol! No really, these are just my suggestions from having done this crayon craft a bunch of times.
✅ DO use Crayola crayons! For the first go-around, we used dollar store crayons and, no joke, we were going on 25 minutes of blow drying and the crayons still weren’t fully melted! With Crayola, the crayons melt in like 2 1/2 minutes. Yes, we actually timed it! Use up whatever bits of crayon you have around the house too! So, DO NOT use dollar store crayons when melting crayons on pumpkins.
✅ DO use a hot glue gun, NOT regular craft glue. Hot glue both heats up and dries really fast. You can use craft glue, but you have to wait like 10-15 minutes for it to dry before you can start melting the crayons. Also, dried glue peels off really easily. So if you make a mistake (e.g. the crayon wasn’t in the right position), you can peel it off and start over.
✅ DO soak your crayons for 2 minutes in warm/hot water. Soaking the crayons, as we discovered when doing our Crayon Mold Craft, makes crayon wrappers just slide right off. And since crayons are more pliable when warm, you can easily break apart the crayons with your hands. DO NOT use (exacto) knives/scissors to peel and cut your crayons because soaking is so much easier (and safer)!
✅ DO prepare for the splatter! And DO NOT think this isn’t messy. It’s messy!!! Cover your work area with paper bags, boxes, newspaper, whatever. Or do this outside. The crayons splatter as they melt, and it can stretch pretty darn far. I even found crayon splatter on my dog! When we were done, I used a Mr Clean eraser and dish soap to get the hardened wax off our kitchen table. It worked great, but took a long time.
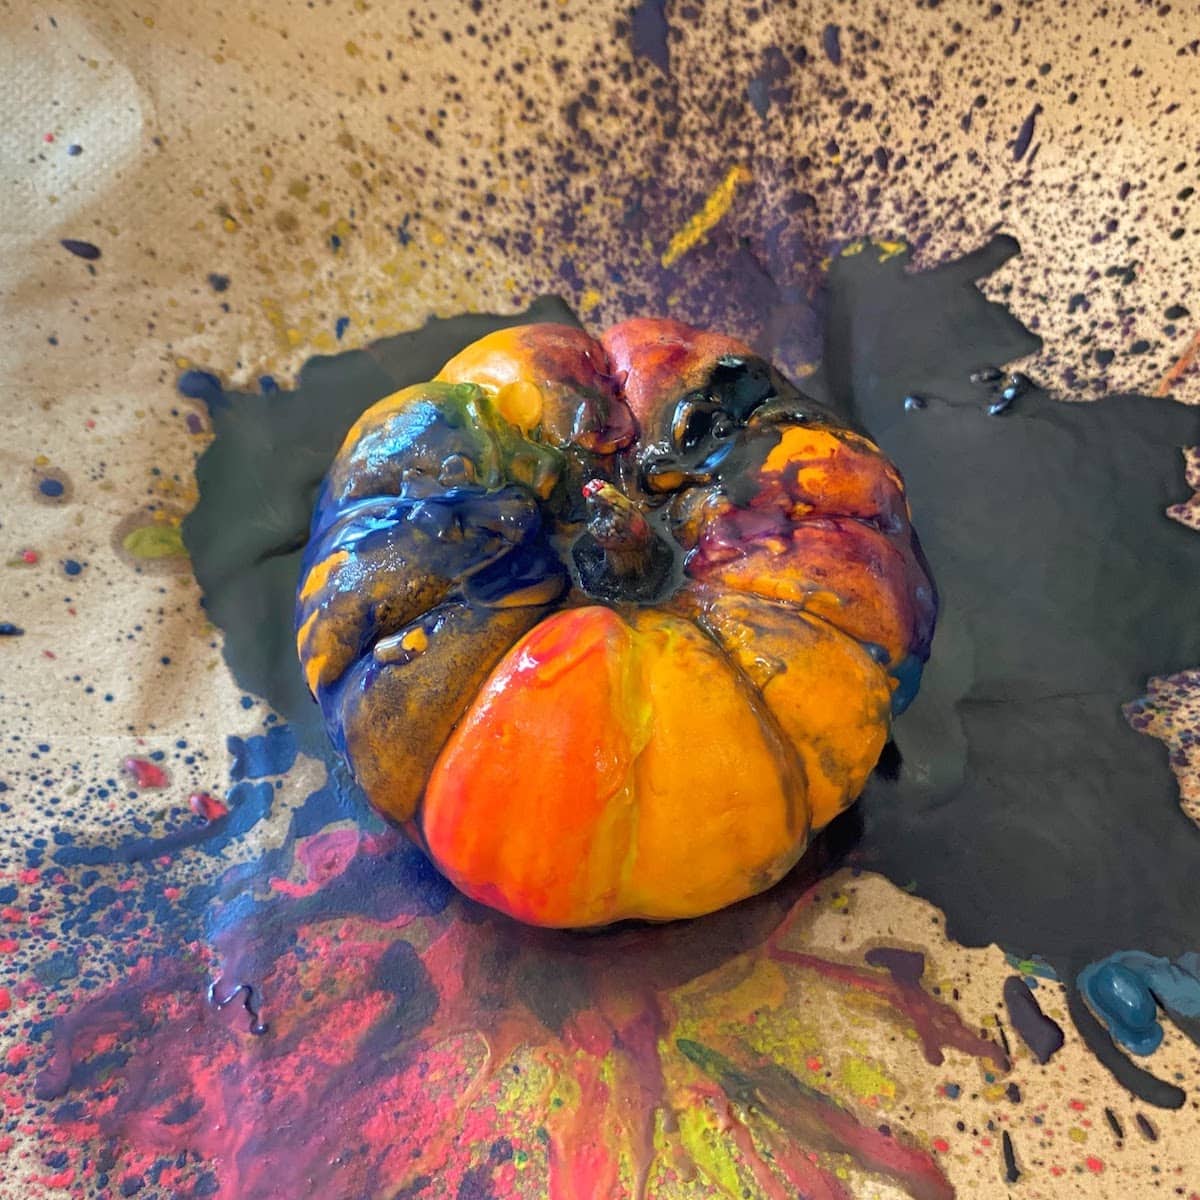
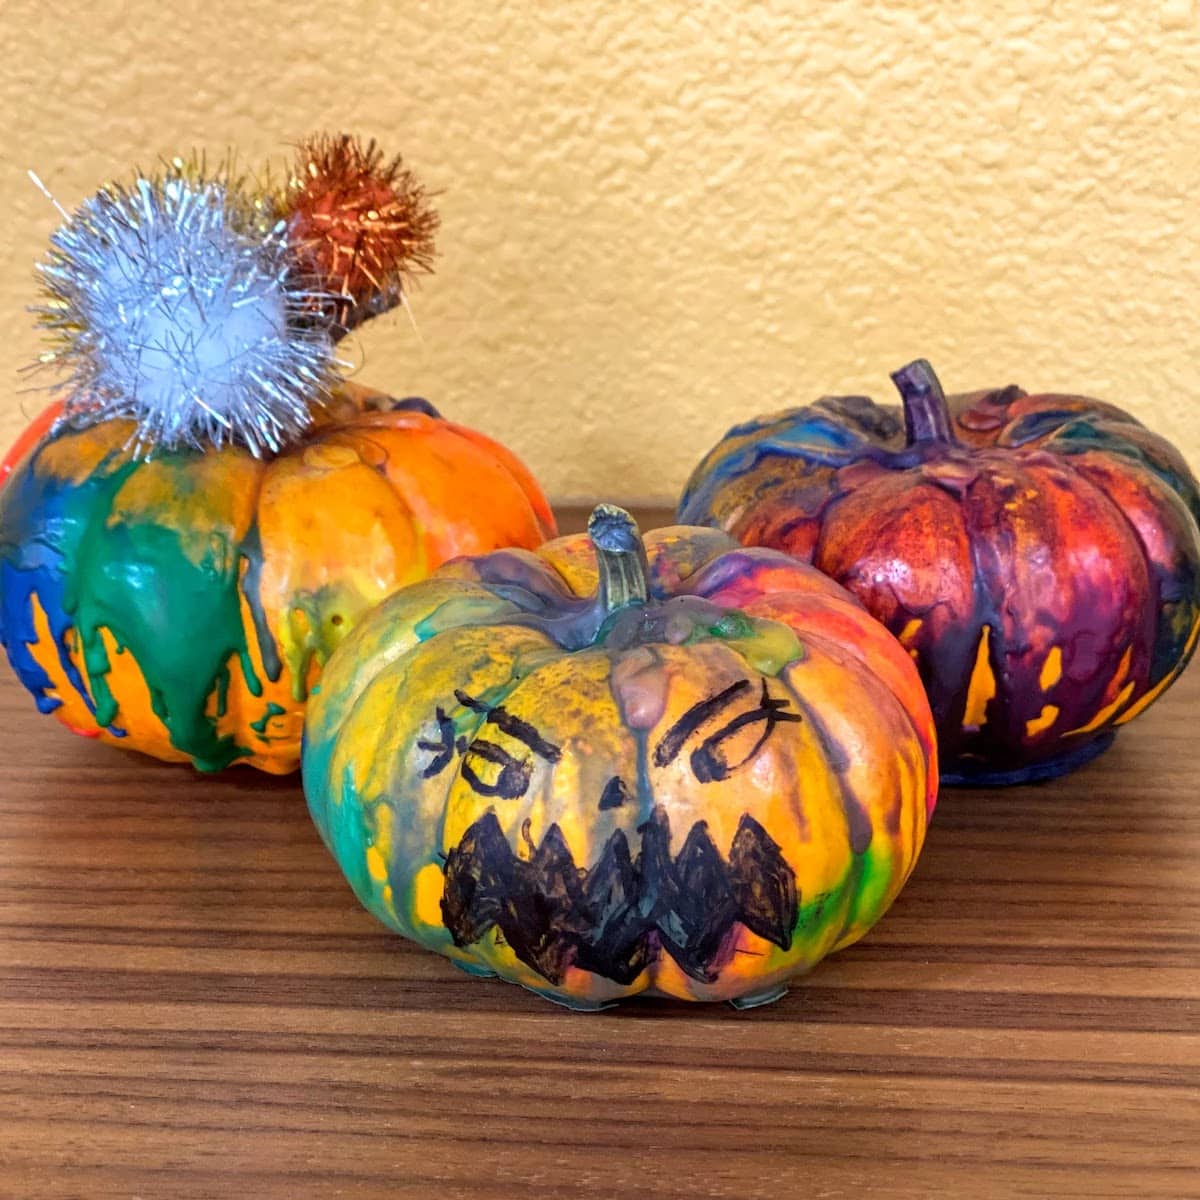
✅ DO: have fun and be creative! You can use any pumpkin you want: mini/big, fake/real, white/orange, etc. White is popular because the colors really pop on white, but I love orange! Experiment and don’t expect perfection. The end result may not be Pinterest-pretty, but it’s so fun and your kids will love watching colors blend and make unexpected designs.
🤔 Other Ideas for Melting Crayons on Pumpkins
I keep saying this cause it’s true: there are endless ways to melt crayons on pumpkins. Here are some other creative approaches:
- Biggest one – use faux pumpkins so you can reuse them every year!
- Set your pumpkin upside down on top of an open jar when you melt the crayons so that when you flip the pumpkin over, it looks like the color is dripping upwards.
- Enhance the color by melting the crayons on the pumpkin, waiting until dry, and then melting more crayons on top.
- Use neon or glow in the dark crayons! Growing a Jeweled Rose has an awesome glow-in-the-dark crayon pumpkin craft (using black lights) that I want to try!
- Make a candy corn colored pumpkin, or black and white striped.
- This isn’t for pumpkins, but melting crayons into molds is so fun too.
Want more crafts?
Sign up below to get crafts and recipes straight to your inbox plus make sure to follow on your favorite social!

🎃 Melting Crayons on Pumpkins Craft
Equipment
- medium bowl
- small bowl optional
- towel
- paper bag or newspaper
- hair dryer
Supplies
- crayons
- 1 pumpkin (small)
- permanent marker(s)
- crafty decorations, i.e. pom-poms, googly eyes, glitter (optional )
Instructions
- Prep crayons: Pick your crayons and put them in a bowl of warm/hot water. Let soak for 2 minutes. Then one-by-one remove crayons from bowl, peel off the wrapper, break into smaller pieces, and place on towel to dry. [optional: use a small bowl to collect all the crayon wrappers]
- Glue crayons: Use the glue gun to put a small strip of glue at the top of the pumpkin, stretching away from the stem. Then press a crayon piece onto the hot glue. Repeat around the stem until you've glued a full circle of crayon pieces.
- Melt crayons: Make sure pumpkin is sitting on a covered surface, like newspaper or a cut-open paper bag [the crayon will splatter!] Hold hair dryer a couple inches above center of pumpkin and turn on heat. You'll start to see the crayon bits melting down the sides of the pumpkin. Keep the blow drier steadily blowing until the crayons have melted enough to your liking.