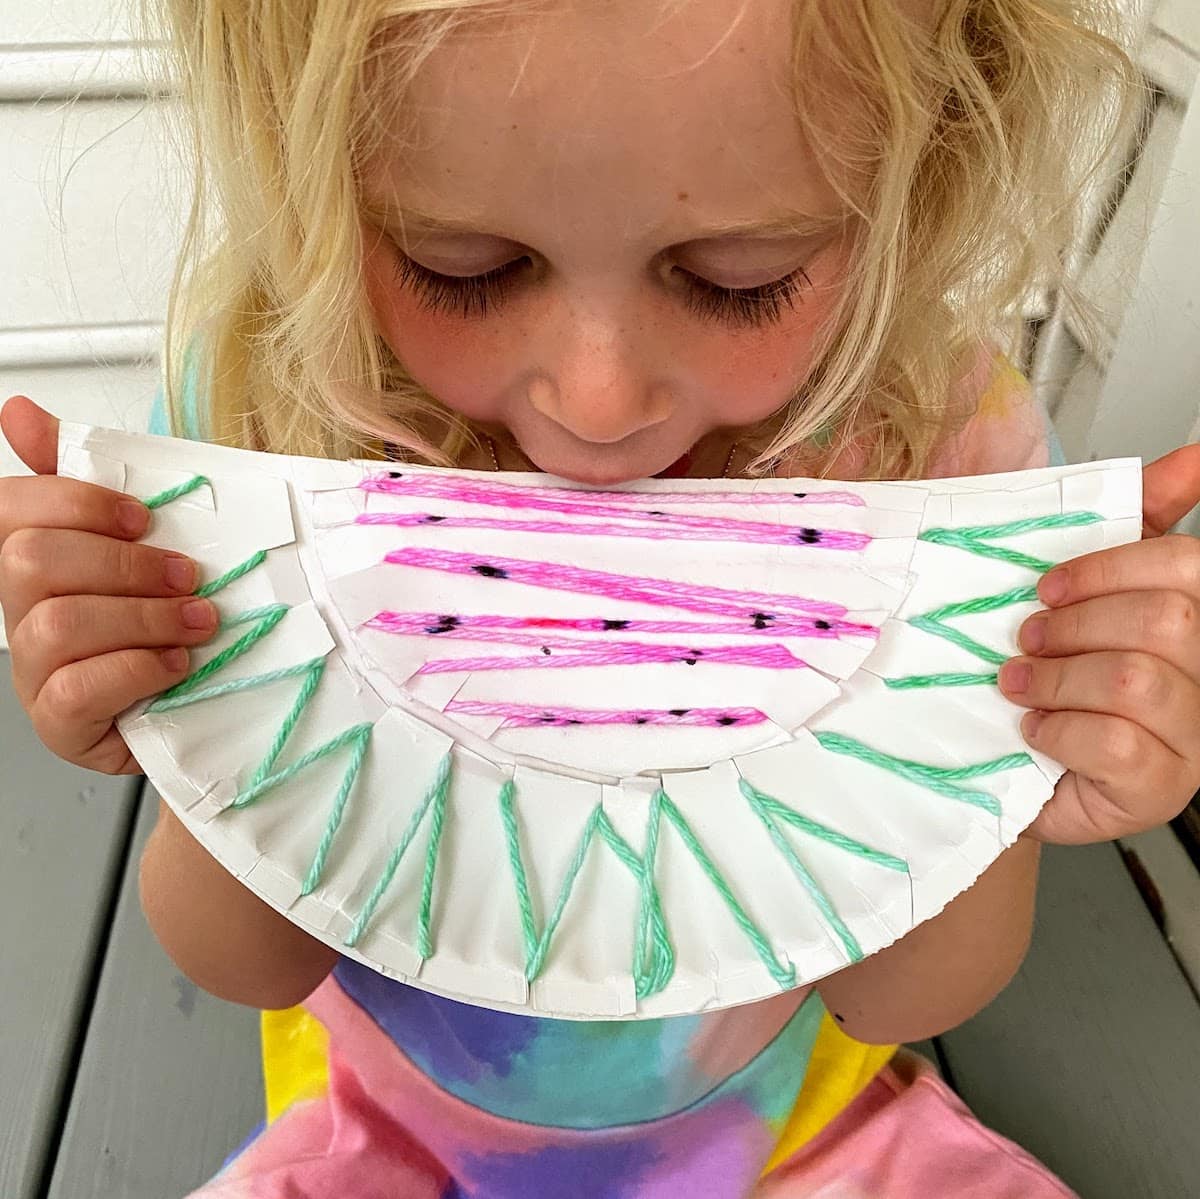
Watermelon Yarn Craft for Kids (Easy Paper Plate Craft)

Celebrate spring and summer with this adorable watermelon yarn craft! This paper plate craft is an easy activity that combines bright colors, simple supplies, and a fun hands-on element kids love. By weaving yarn through a paper plate, kids can create a playful watermelon design while building fine motor skills along the way. It’s quick to set up, easy to customize, and perfect for summer days, rainy afternoons, or anytime you need a low-stress activity that actually keeps kids engaged.

Want to Save this Recipe or Activity?
Enter your email and we will send it straight to your inbox! You’ll also get the latest posts from Platein28!
By submitting this form, you consent to receive emails from Platein28.
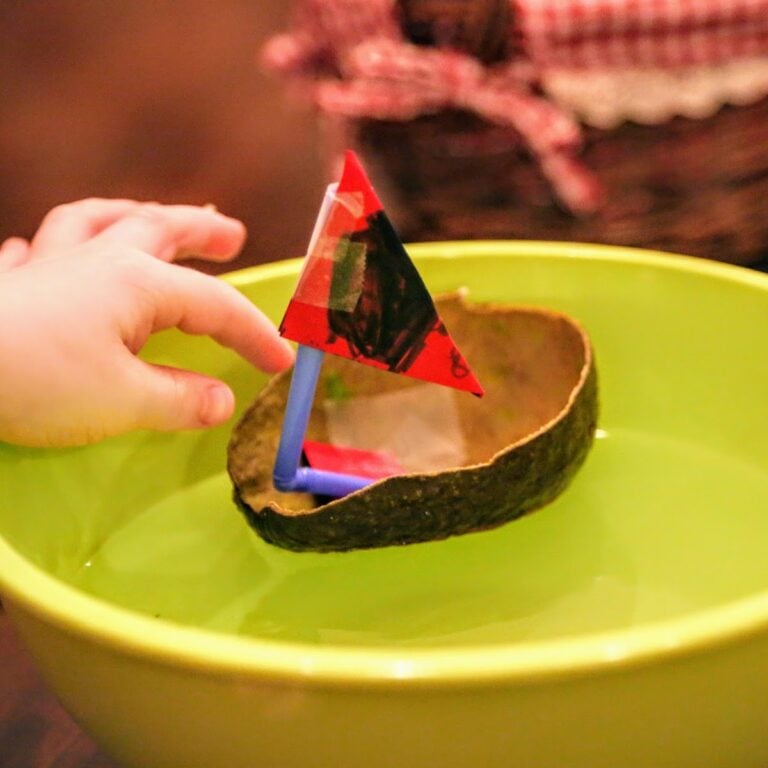
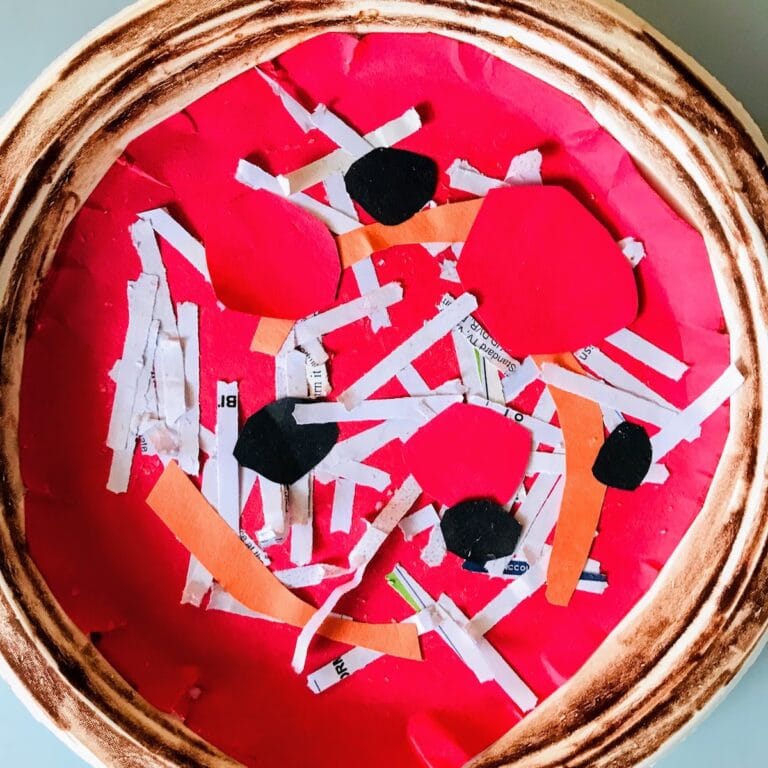
This easy watermelon yarn craft is especially perfect for keeping kids busy while you cook dinner. And if you love paper plate crafts, be sure to also check out our Paper Plate Tomato, Pepperoni Paper Pizza and Paper Plate Sunflower crafts!
🤔 What is a Watermelon Yarn Craft?
This watermelon yarn craft is a simple paper plate craft where kids weave colored yarn to create a fun watermelon design. It’s an easy, low-mess activity that also helps build fine motor skills through cutting, threading, and weaving.

Why We Love this Yarn Craft for Kids
- A unique twist! There are tons of paper plate watermelon crafts out there. To change things up, we decided to put our own twist on a paper plate watermelon by decorating it with colored yarn.
- Fine motor skills– The cool part about this activity is that it provides a great opportunity for kids to practice their fine motor skills with cutting, weaving and taping.
- Minimal mess. No paint involved here, just some basic cutting, gluing and weaving.
- Lots of playtime. We love play food crafts! Once kids create their paper plate watermelons, they can actually play with them!
- Note: Rather than running out to buy colored yarn, we decided to simply dye our white yarn using food coloring. We loosely followed Laughing Hens’ article on How to Dye Wool with Food Colouring, and the results were great!
✂️ Supplies
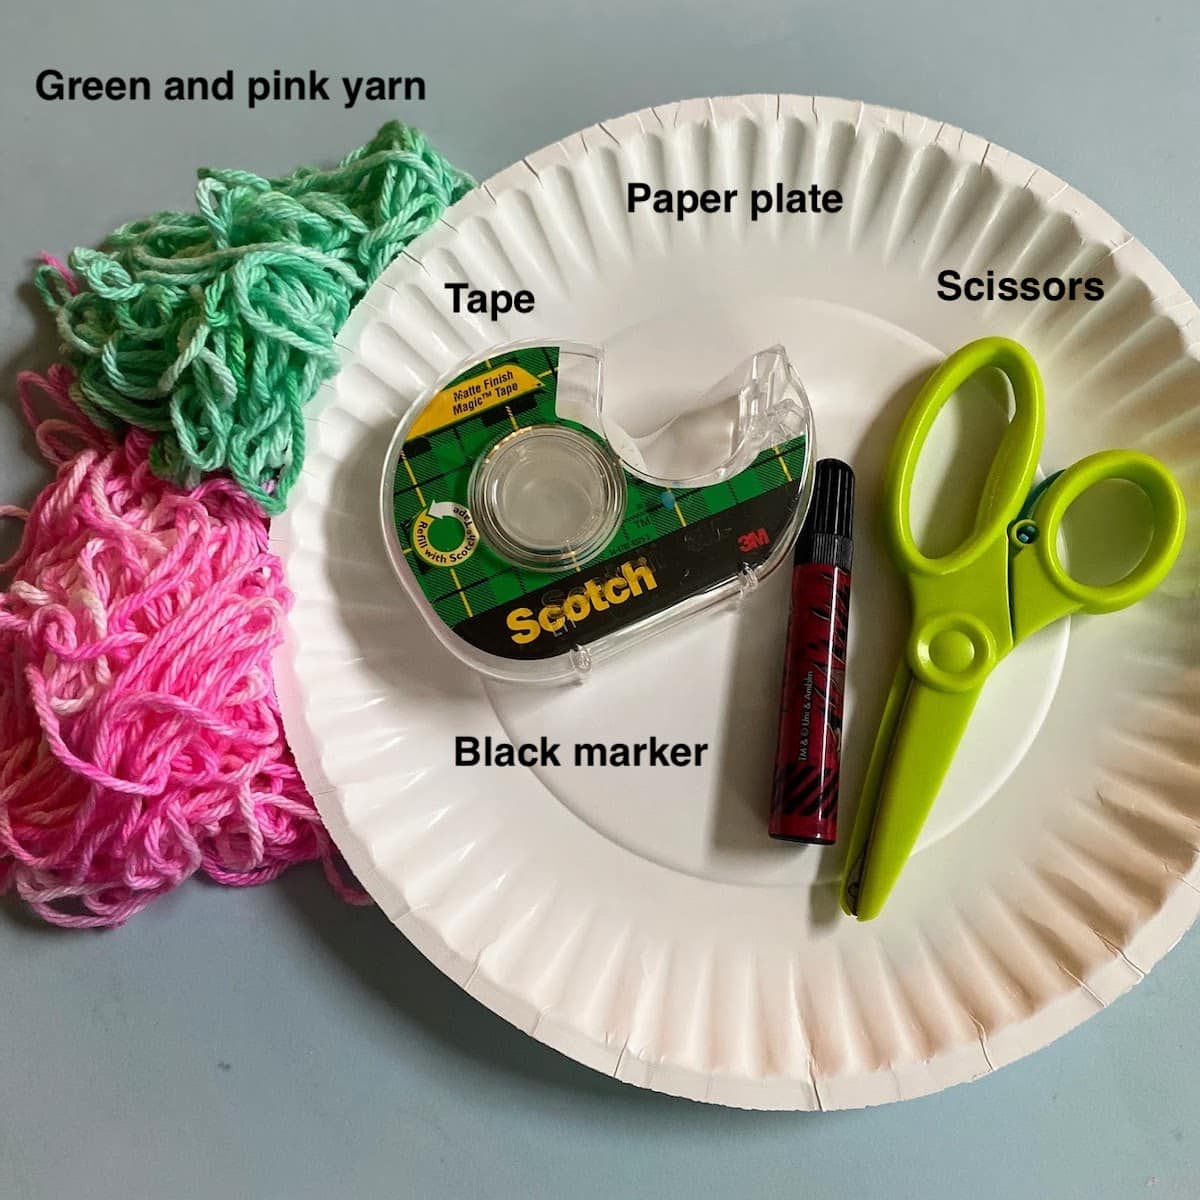
Notes on Supplies:
Scissors– We love these kid-friendly scissors.
Yarn– You can buy colored yarn or dye yarn on your own! We loosely followed Laughing Hens’ article on How to Dye Wool with Food Colouring, and the results were great! Be sure to prep dyed yarn ahead of time for an even smoother setup.
📝 Instructions
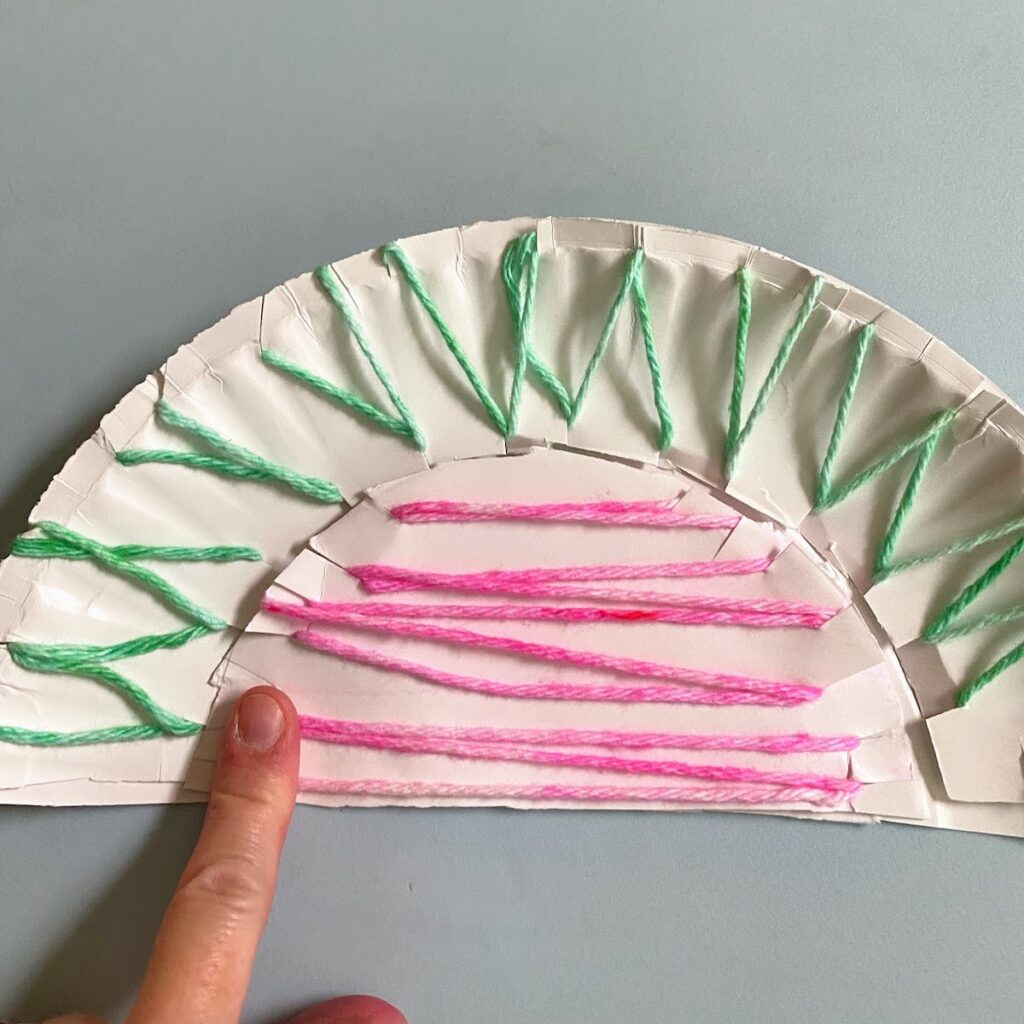
Step 1: Cut paper plate in half and set one half aside for later. Cut away the plate’s outer edge. This will be your watermelon’s rind.
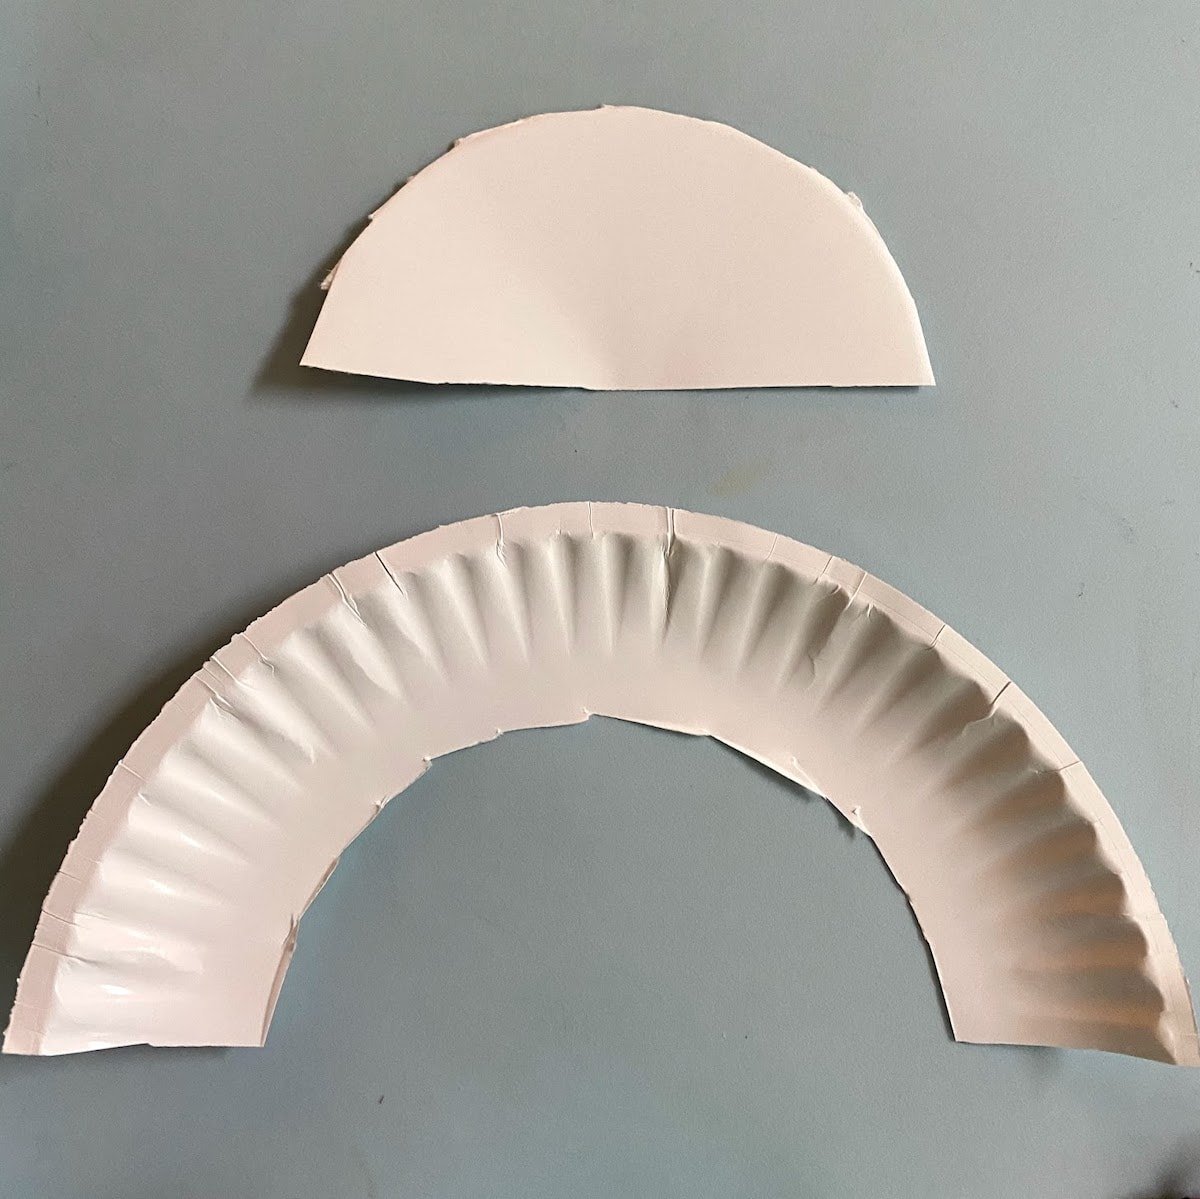
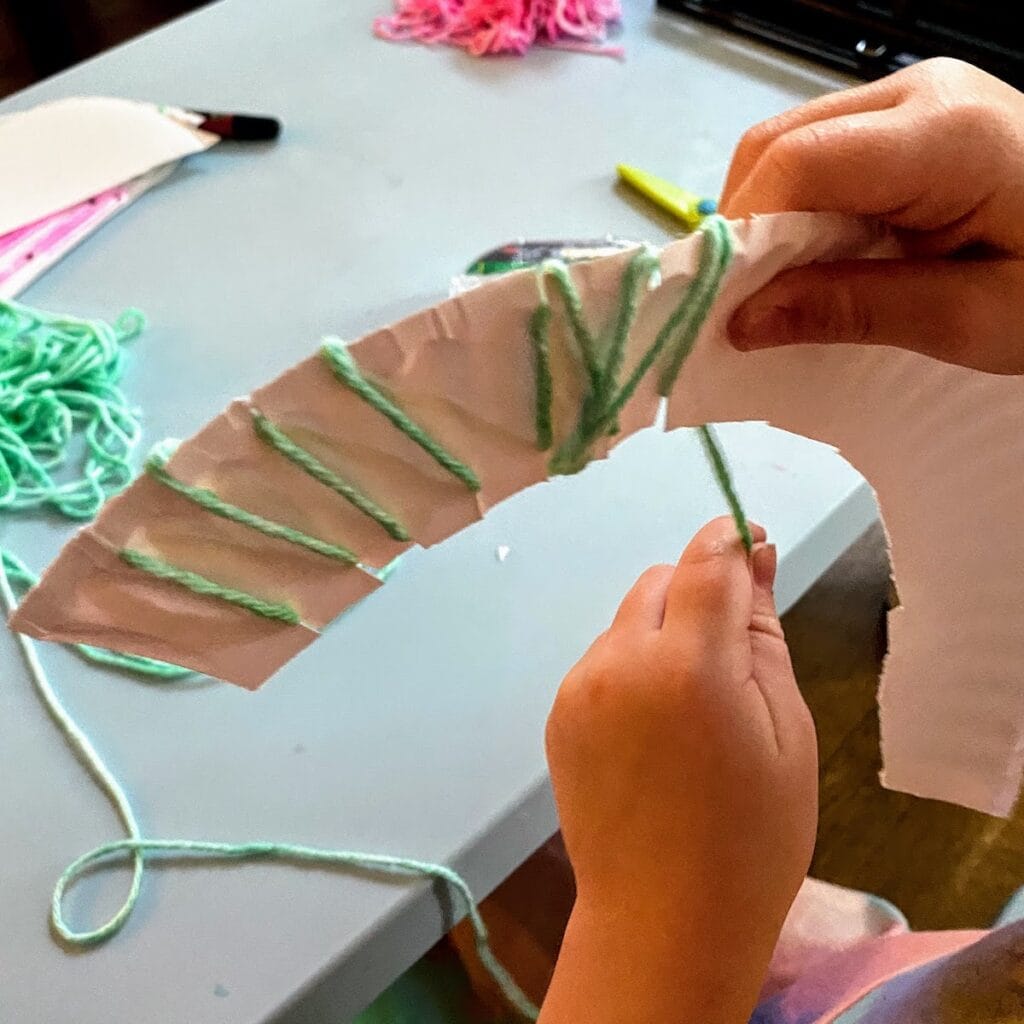
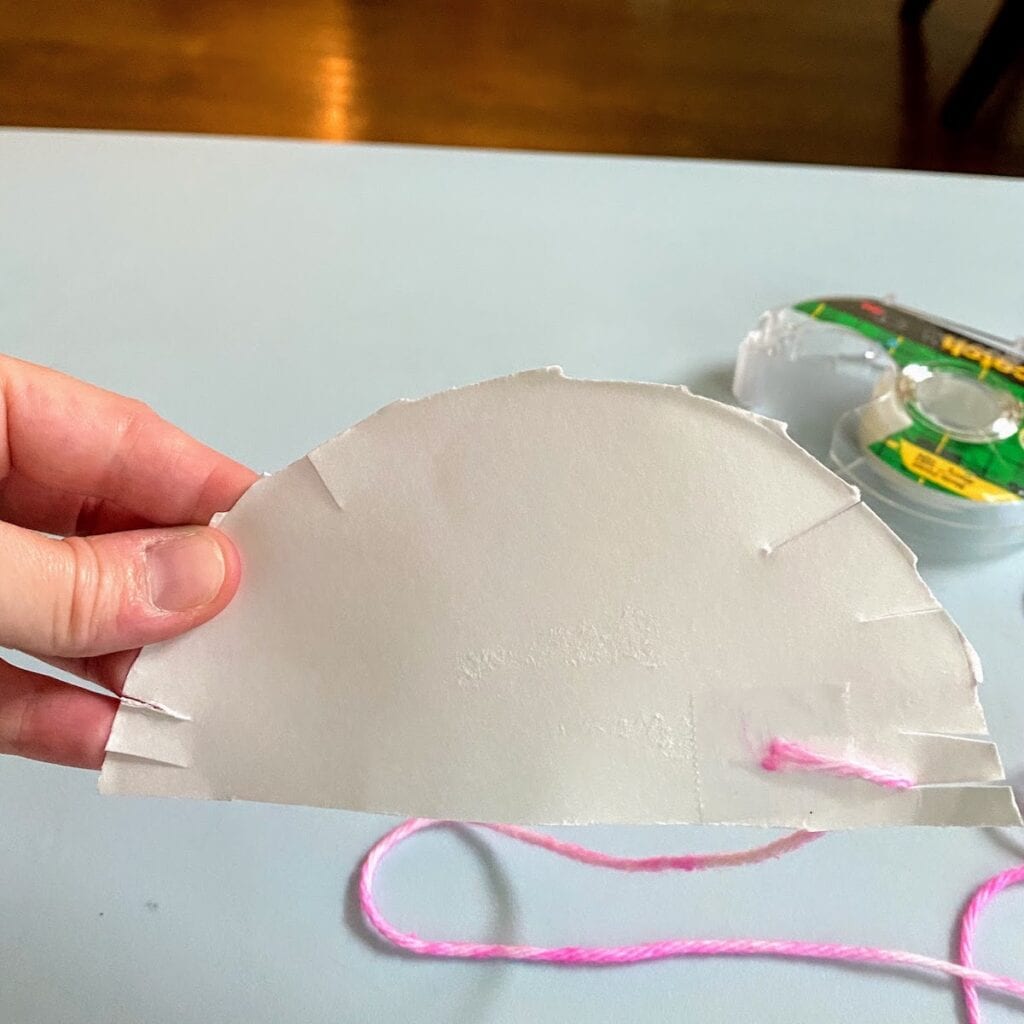
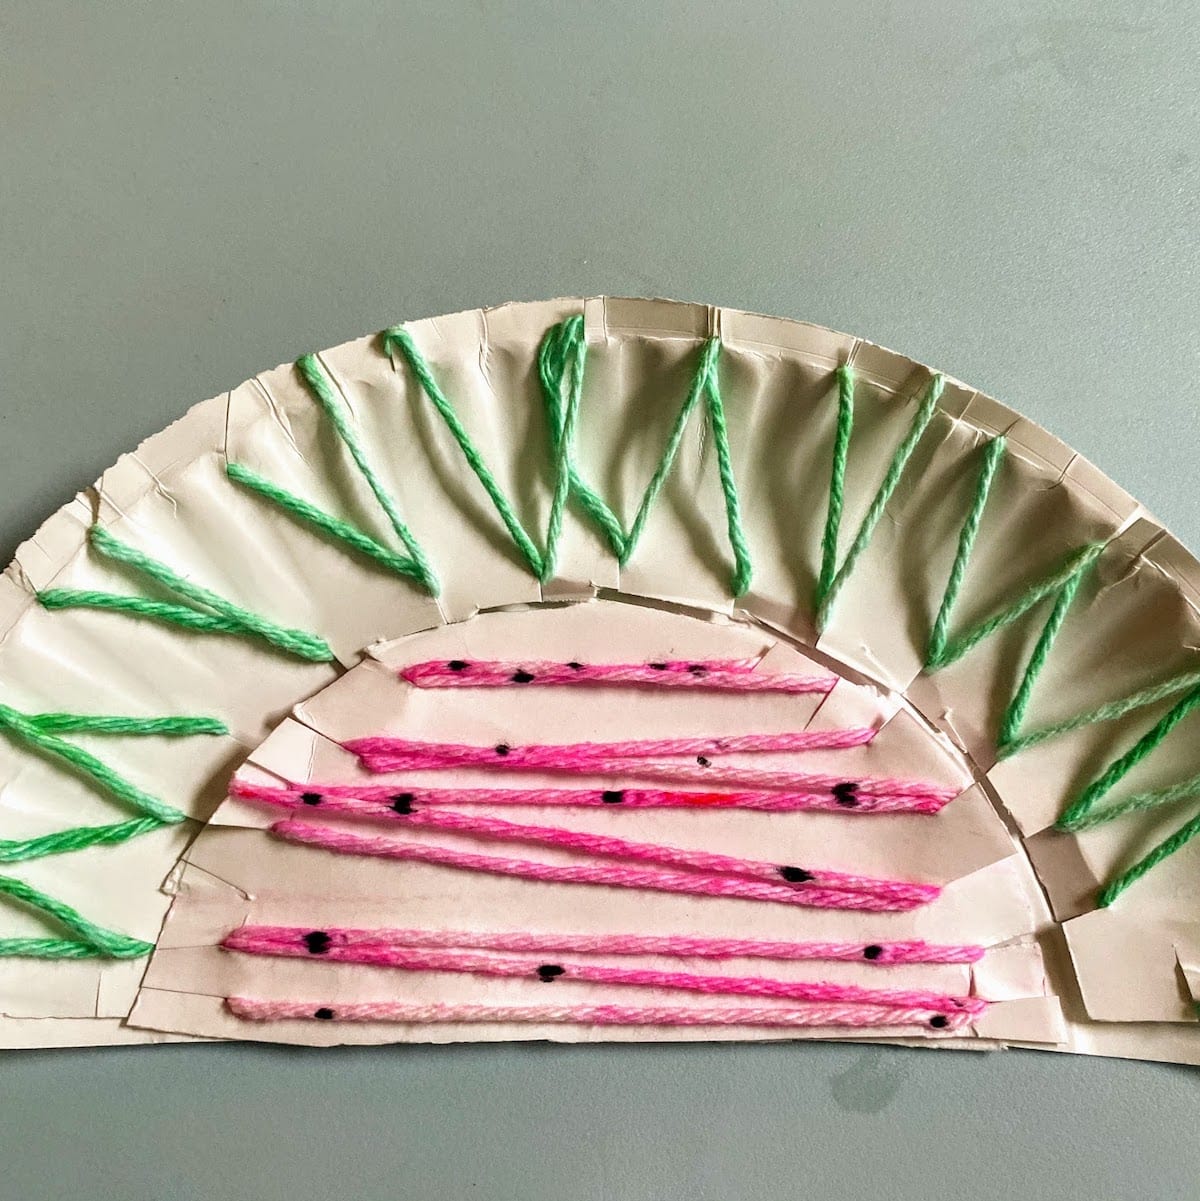
Step 2. Cut several small slits around the curved edges of your paper plate cutouts. These slits will be used to weave your yarn across the paper plate pieces to decorate your watermelon’s body and its rind. Use the slits to weave your pink yarn throughout your watermelon’s body, and your green yarn throughout the watermelon’s rind. Secure the ends of your yarn to the back of your watermelon pieces with tape.
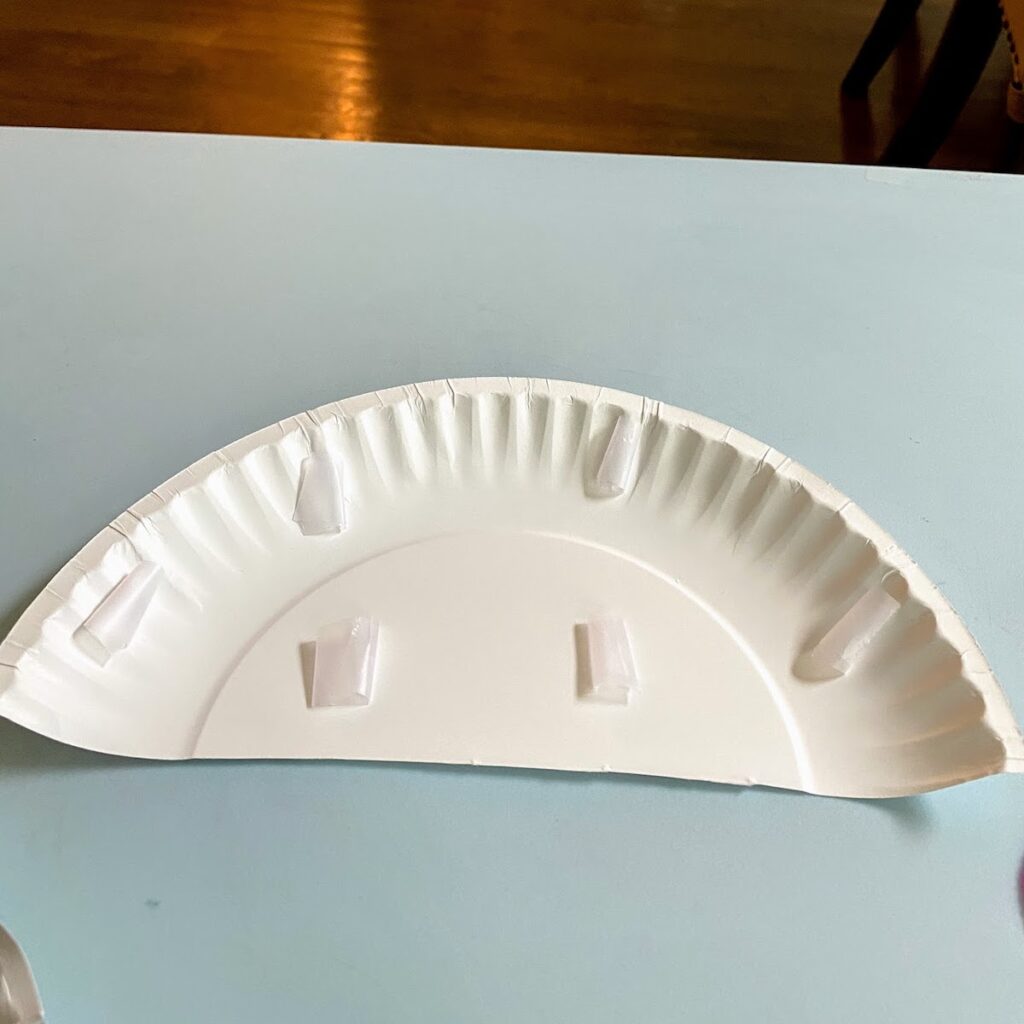
Step 3. Assemble your watermelon. Tape or paste your watermelon’s body and rind to the half of your paper plate that you had set aside.
Step 4. Add your watermelon’s seeds! Using a black marker or sharpie, place black dots on the pink yarn.
⏰ When to Use this Craft
This watermelon yarn craft is one of those go-to activities for those “I just need 10 minutes to cook” moments. It’s simple, engaging, and easy to set up—exactly what you need during the dinner rush (or anytime kids need a quick win). We love using simple crafts during meal prep because they give kids something fun to focus on while grown-ups cook—and often connect to the ingredients you’re already using.
Kids might also enjoy this paper plate craft for:
- Low-mess indoor play
- While you cook dinner
- Summer activity for kids
- Preschool or kindergarten fine motor practice
- Rainy day activity
🎨 Make it a Full Mealtime Activity
Turn this craft into part of the fun by pairing it with a watermelon-themed snack or recipe. Kids can work on their watermelon art while you prep, making the whole experience feel connected (and keeping little hands busy).
Try it while you prepare an easy watermelon chicken salad recipe, a quick watermelon smoothie, or simple fresh slices. It’s a fun, low-effort way to tie the activity into mealtime—without adding extra work.


Want more crafts?
Sign up below to get crafts and recipes straight to your inbox plus make sure to follow on your favorite social!

🍉 Watermelon Yarn Craft for Kids (Easy Paper Plate Craft)
Equipment
Supplies
- 1 Paper plate (white is ideal)
- Pink and green yarn
- Tape (or glue)
- 1 Black marker or sharpie
Instructions
- Cut paper plate in half and set one half aside for later. Cut away the plate's outer edge. This will be your watermelon's rind.
- Cut several small slits around the curved edges of your paper plate cutouts. These slits will be used to weave your yarn across the paper plate pieces to decorate your watermelon's body and its rind. Use the slits to weave your pink yarn throughout your watermelon's body, and your green yarn throughout the watermelon's rind. Secure the ends of your yarn to the back of your watermelon pieces with tape.
- Assemble your watermelon. Tape or paste your watermelon's body and rind to the half of your paper plate that you had set aside.
- Add your watermelon's seeds! Using a black marker or sharpie, place black dots on the pink yarn.