Simple Homemade Mini Peanut Butter Cups

These easy homemade Mini Peanut Butter Cups are so delicious (borderline irresistible) and so fun to make. Why buy them when you can make ’em from scratch and get all the cred?! Whether you are searching for the perfect Valentine Day chocolates 💝 or just have a hankering for something sweet, this is the recipe for you!

Want to Save this Recipe or Activity?
Enter your email and we will send it straight to your inbox! You’ll also get the latest posts from Platein28!
By submitting this form, you consent to receive emails from Platein28.
I gotta say…our mini peanut butter [PB] cups really are so damn good. I made sure of it – tweaking the recipe and perfecting technique FIVE different times until the PB cups got my kids’ approval. Toughest critics, am I right?! But after Batch #5, I almost had to hide the peanut butter cups from the kids 🤣
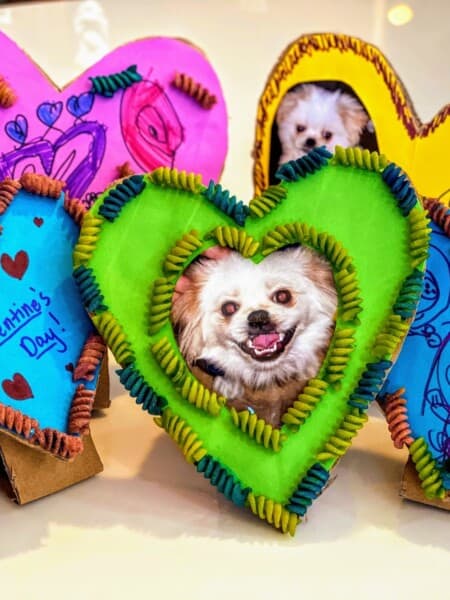
If you’re in the market for more homemade Valentine’s Day treats, check out our yummy Heart-Shaped Strawberry Yogurt Bites.

Why Make Homemade Peanut Butter Cups
- Delicious!
- Great for Valentine’s parties & gifts! 💝
- Cheaper than store bought!
- Fun to decorate!
- Kids can make these with you – easy!

🛒 Supplies
Equipment
You definitely need a mini cupcake tin and cupcake papers. And I would highly recommend a mini silicone spatula and pastry brush. BUT the rest can be finagled – just use what you got!

- Mini cupcake tin & cupcake liners – These are essential supplies.
- Mini silicone spatula & pastry brush – I can’t recommend these enough! Thermoworks makes amazing high heat resistant silicone cooking tools.
- 2 bowls or large Pyrex – One for the melted chocolate (make sure it’s microwave-friendly) and one for the PB mix.
- A couple spoons or teaspoons – for scooping the chocolate and PB mix.
- Hand mixer (optional) – I like this for mixing together the PB, powdered sugar and butter. BUT you could also use a sturdy spoon. Just don’t use a whisk – the PB will get stuck in it.
Ingredients
There are only five ingredients in this PB cup recipe…six if you include sprinkles! Easy-peesy.

- Semi-sweet chocolate chips – Go with semi-sweet, if possible. I tried this recipe with milk chocolate chips and it was cloyingly sweet.
- Coconut oil – This is for softening the chocolate a bit. I found that the chocolate was otherwise too hard to bite into, causing the PB to ooze out the sides.
- Peanut butter – I recommend Adam’s creamy, peanut butter with no added sugar.
- Powdered sugar – This sweetens the peanut butter and helps with the consistency.
- Butter – Butter (preferably unsalted) also helps with the peanut butter’s consistency.
- Sprinkles – [optional] If you use sprinkles, get the kind that are a little softer (almost chalky in consistency) because the harder ones don’t work well on the bite.

📝 How to Make Mini Peanut Butter Cups

STEP 1: Microwave chocolate chips (& coconut oil) in 30-second increments until fully melted (stirring in between). Add papers to muffin tin.

STEP 2: Scoop melted chocolate into each cavity, brushing chocolate up the sides of the papers. Refrigerate tin for 5 minutes.

STEP 3: Mix together PB, powdered sugar and butter. Scoop PB mix into cups, on top of the chocolate.

STEP 4: Add melted chocolate on top of PB, covering PB completely.

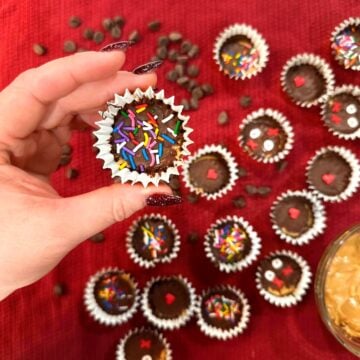
STEP 5: Top with sprinkles (optional). Freeze tin for 5 minutes or more, until ready to serve!
FINAL: Your delicious mini peanut butter cups are ready to be devoured!
✔️ Expert Tips & Tricks
- Time ⏰ Note: This recipe takes 28 minutes, but you may need a little extra time at the end for freezing the PB cups.
- So your chocolate doesn’t burn or seize, microwave it for only 30 seconds at a time, stirring in between. Mine took around 2 minutes total, but every microwave is different.
- Don’t skip the brushing of the chocolate in Step 2. If you don’t draw the chocolate up the sides of the papers, the PB cups will fall apart a little when you unwrap them.
- Tip on scooping: dip a (tea)spoon into the bowl of melted chocolate and use a mini spatula to scrape the mixture out of the (tea)spoon and into the cupcake cavity. Same goes for the peanut butter. This is sticky business, so you need a couple tools!
- Eyeball 👀 the amount of chocolate and PB that goes into each cup, aiming for a quarter as much peanut butter as chocolate. I shoot for 1/2 – 3/4 teaspoon for each chocolate layer, and 1/4-1/2 teaspoon for the PB layer.
- After each chocolate layer, deploy our Tap & Shake technique 🫨🤣 Gently tap the tin on the counter and shake the tin front to back and side-to-side until the chocolate has spread enough to cover either the bottom of the paper or the PB.
- If your chocolate hardens a little between Steps 1 and 4, pop the bowl of chocolate back in the microwave for another 15-20 seconds.
- You may have leftover chocolate, FYI.

❓ FAQs
I recommend using semi-sweet chocolate chips. I have made this with milk chocolate chips and the result was way too sweet. And I added a little coconut oil to make the chocolate softer.
While some use a double-boiler, I think the easiest way to melt chocolate is in the microwave. Just microwave the chocolate in short, 30-second spurts, stirring after each time. Any longer and your risk the chocolate burning or seizing.
Definitely use creamy peanut butter. Crunchy could be good, but that’s a whole different thang. I like to use a more natural peanut butter 🥜 with no added sugar because you’ll be adding in powdered sugar anyway.
Once hardened, your PB cups can hang out in a sealed container / bag on the counter at room temperature (or in the fridge) for up to a week.
💝More Valentine’s Day Treats & Crafts


Want more 28-minute recipes?
Sign up below to get crafts and recipes straight to your inbox plus make sure to follow on your favorite social!
🤎🧡 Mini Peanut Butter Cups
Equipment
- 2 bowls or large Pyrex
- spoons or teaspoons
- hand mixer (optional)
Supplies
- 1 1/2 cups semi-sweet chocolate chips
- 3/4 tsp coconut oil (or a very rounded 1/2 teaspoon)
- 1/2 cup peanut butter (creamy)
- 2 Tablespoons powdered sugar
- 1/2 Tablespoon unsalted butter (room temperature)
- Valentines-themed sprinkles (soft sprinkles)
Instructions
- Melt chocolate! Pour chocolate chips and coconut oil into a microwave-safe bowl or large Pyrex. Microwave the chocolate in 30 second-increments, stirring with a mini spatula in between, until the chocolate is completely melted. Meanwhile, add liners to the cupcake tin.
- 1st chocolate layer & refrigerate! Scoop melted chocolate into each cupcake cavity – less than a teaspoon. Then use a mini pastry brush (or small spoon) to draw/brush the chocolate 2/3 up the sides of the papers. Place tin in fridge for 5 minutes.
- Peanut butter layer! Meanwhile, make your peanut butter mixture. Combine peanut butter, powdered sugar and butter in a bowl, using a hand mixer (preferably) or sturdy spoon. Remove tin from fridge and scoop 1/4 – 1/2 teaspoon of peanut butter mix into each cupcake cavity (on top of the chocolate).
- Final chocolate layer! Now top off the peanut butter with a scoop of the melted chocolate (just enough to cover the peanut butter completely – less than a teaspoon).
- Freeze & serve! Top each cup with some fun, colored sprinkles (this is optional). Then put tin in freezer for at least 5 minutes before serving.
Notes
- Time ⏰ Note: This recipe takes 28 minutes, but you may need a little extra time at the end for freezing the PB cups.
- So your chocolate doesn’t burn or seize, microwave it for only 30 seconds at a time, stirring in between. Mine took around 2 minutes total, but every microwave is different.
- Don’t skip the brushing of the chocolate in Step 2. If you don’t draw the chocolate up the sides of the papers, the PB cups will fall apart a little when you unwrap them.
- Tip on scooping: dip a (tea)spoon into the bowl of melted chocolate and use a mini spatula to scrape the mixture out of the (tea)spoon and into the cupcake cavity. Same goes for the peanut butter. This is sticky business, so you need a couple tools!
- Eyeball 👀 the amount of chocolate and PB that goes into each cup, aiming for a quarter as much peanut butter as chocolate. I shoot for 1/2 – 3/4 teaspoon for each chocolate layer, and 1/4-1/2 teaspoon for the PB layer.
- After each chocolate layer, deploy our Tap & Shake technique 🫨🤣 Gently tap the tin on the counter and shake the tin front to back and side-to-side until the chocolate has spread enough to cover either the bottom of the paper or the PB.
- If your chocolate hardens a little between Steps 1 and 4, pop the bowl of chocolate back in the microwave for another 15-20 seconds.
- You may have leftover chocolate, FYI.