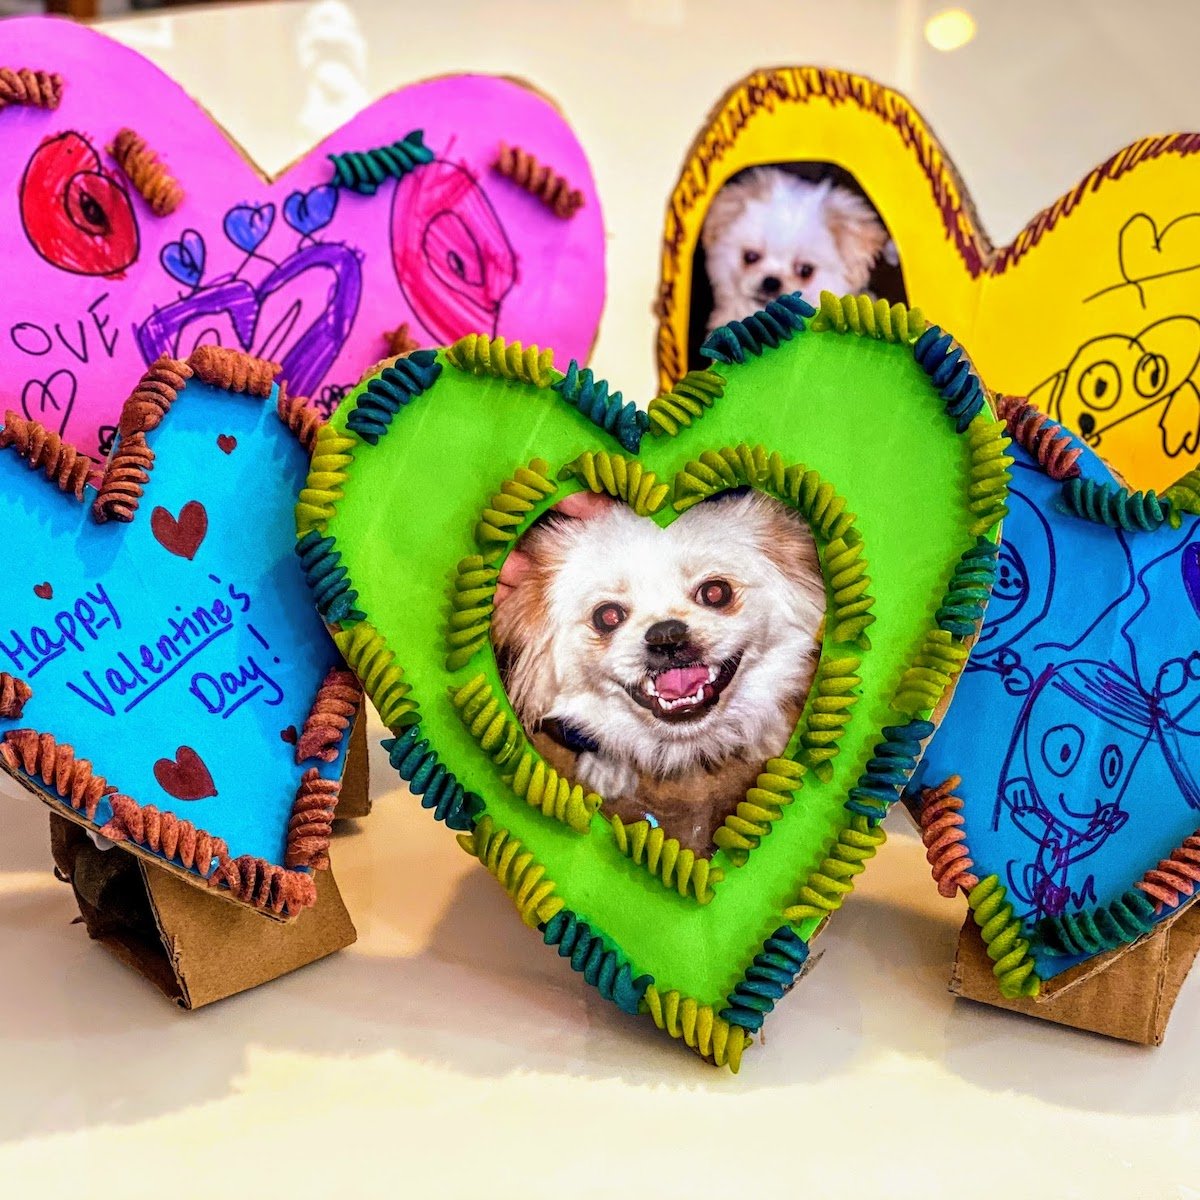
The Best DIY Cardboard Frame with Pasta
Want to Save this Recipe or Activity?
Enter your email and we will send it straight to your inbox! You’ll also get the latest posts from Platein28!
By submitting this form, you consent to receive emails from Platein28.
👌 Why We Love DIY Cardboard Frames
Simple Supplies- You likely have all the key supplies around the house, including dry pasta!
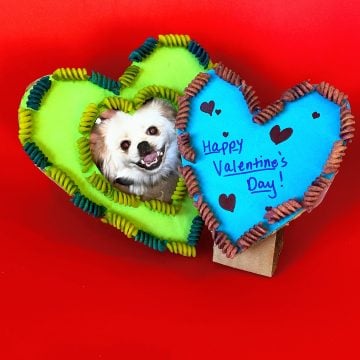
Great homemade gifts- These heart-shaped DIY cardboard frames make great, low-cost homemade gifts for loved ones. And they are perfect Valentine’s Day gifts.
Customizable– Kids can fill their frames with photos or simply draw pictures of their family members. Plus, you don’t have to make it a standing frame. You could tape the heart to a wall or use a hole puncher and string to hang it.
Fun for all ages– I know these Valentines frames are supposed to be kids crafts. But I – the adult – couldn’t stop making them. It’s seriously so fun. And it’s satisfying when you see your heart shaped frame standing up on its own.
Fine motor skills. Our DIY cardboard craft allows kids to put their developing cutting and coloring skills to good use.
🛒 Supplies
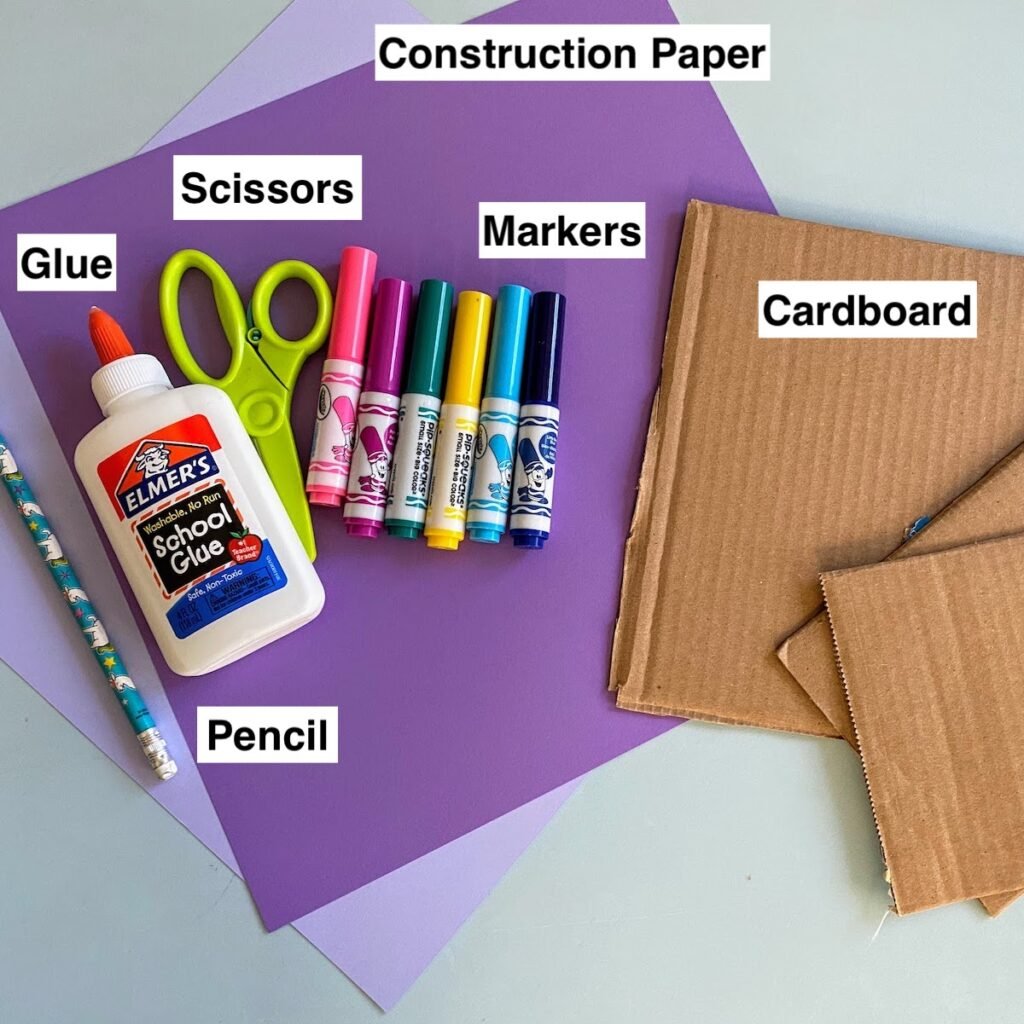
Notes on Supplies:
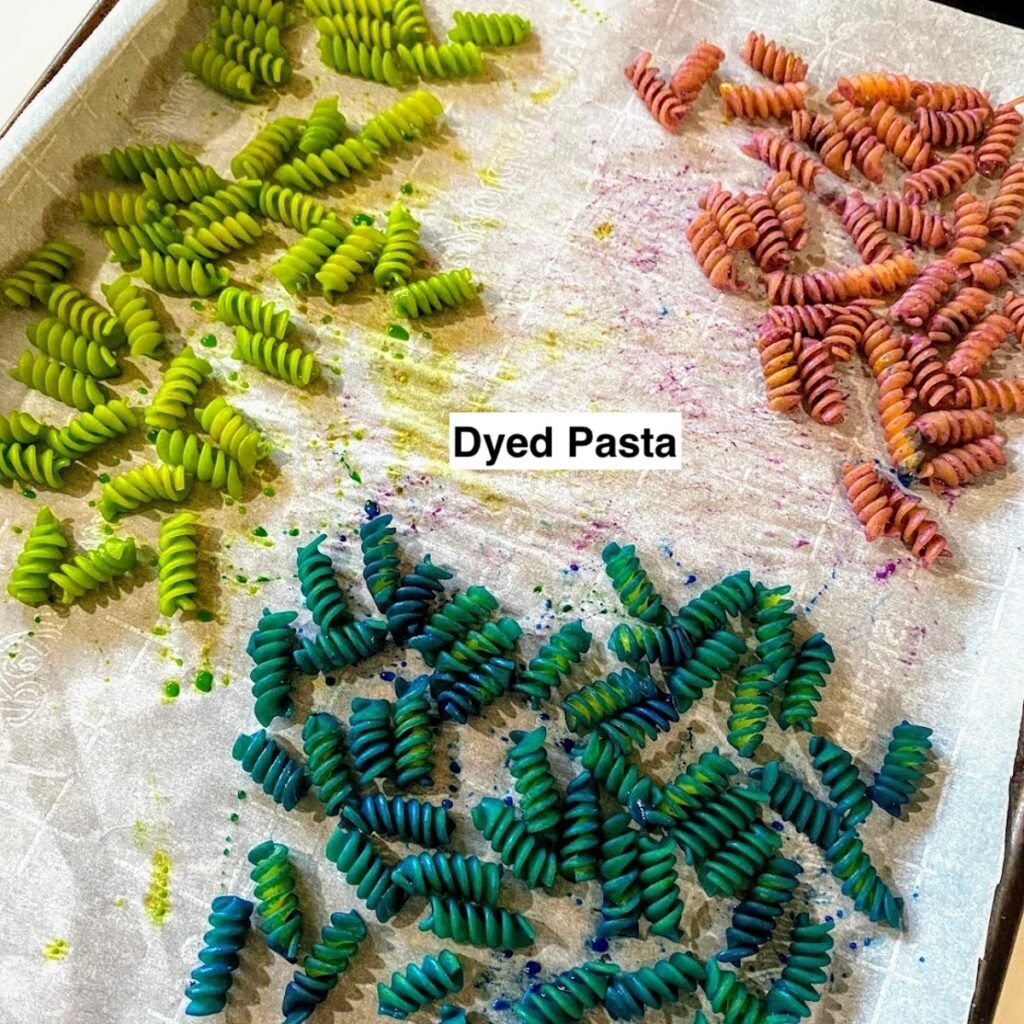
Dyed pasta– Follow the instructions on how to dye pasta when coloring your pasta of choice (you’ll just need food coloring, white vinegar, and pasta). We like rotini because its grooves really hold the food coloring well and they are a cool shape for crafts. But any pasta will work!
Cardboard– If you’re trying to get rid of it, this is an excellent reuse of your cardboard!
Scissors– Cutting cardboard can be tough, so adults may want to use sharper scissors to help with this task.
💟 How to Make a DIY Cardboard Frame with Pasta
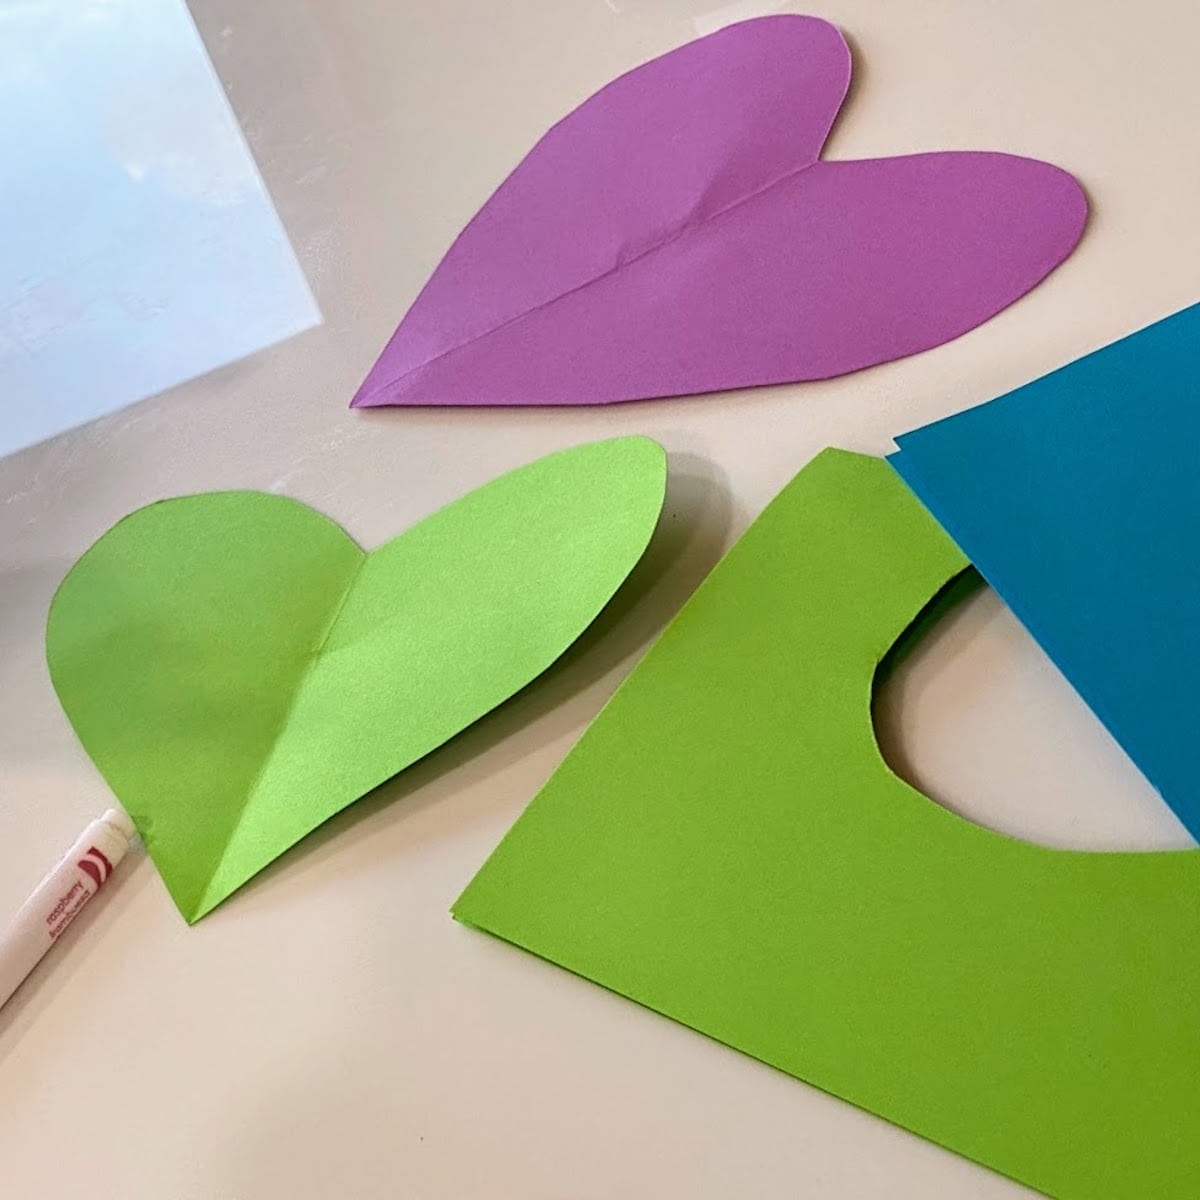
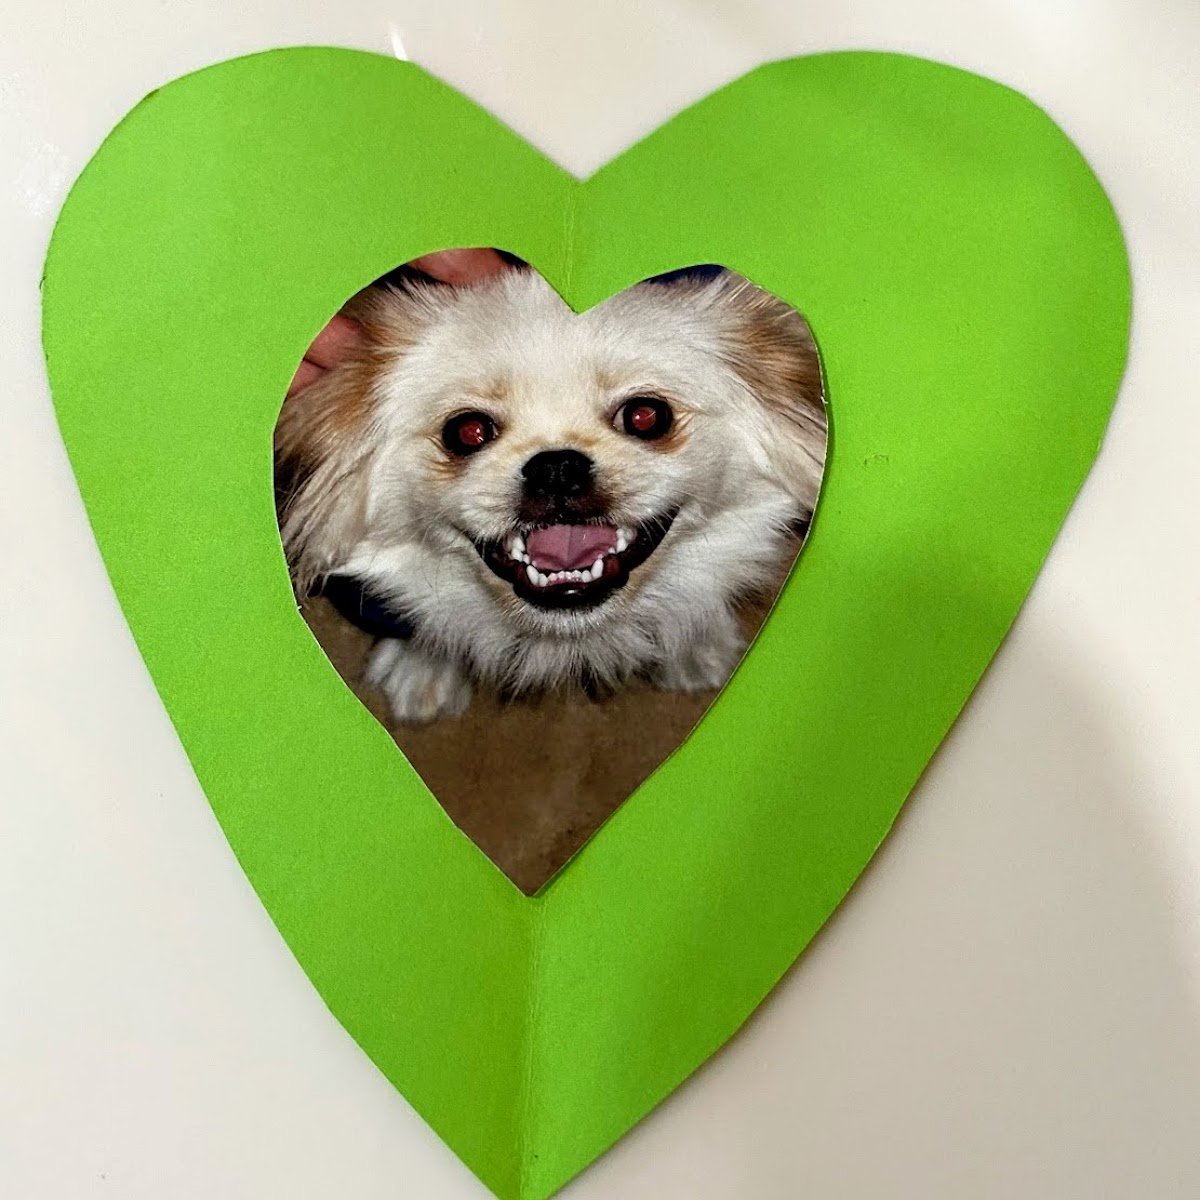
Step 1: Make the frame’s heart background: Fold a piece of colored construction paper in half lengthwise and draw a half-heart shape along the folded edge. Cut out your paper heart.
Step 2: Add your photo. Cut a photo into a heart that’s a little smaller than the paper heart. Glue the photo onto the middle of the paper heart.
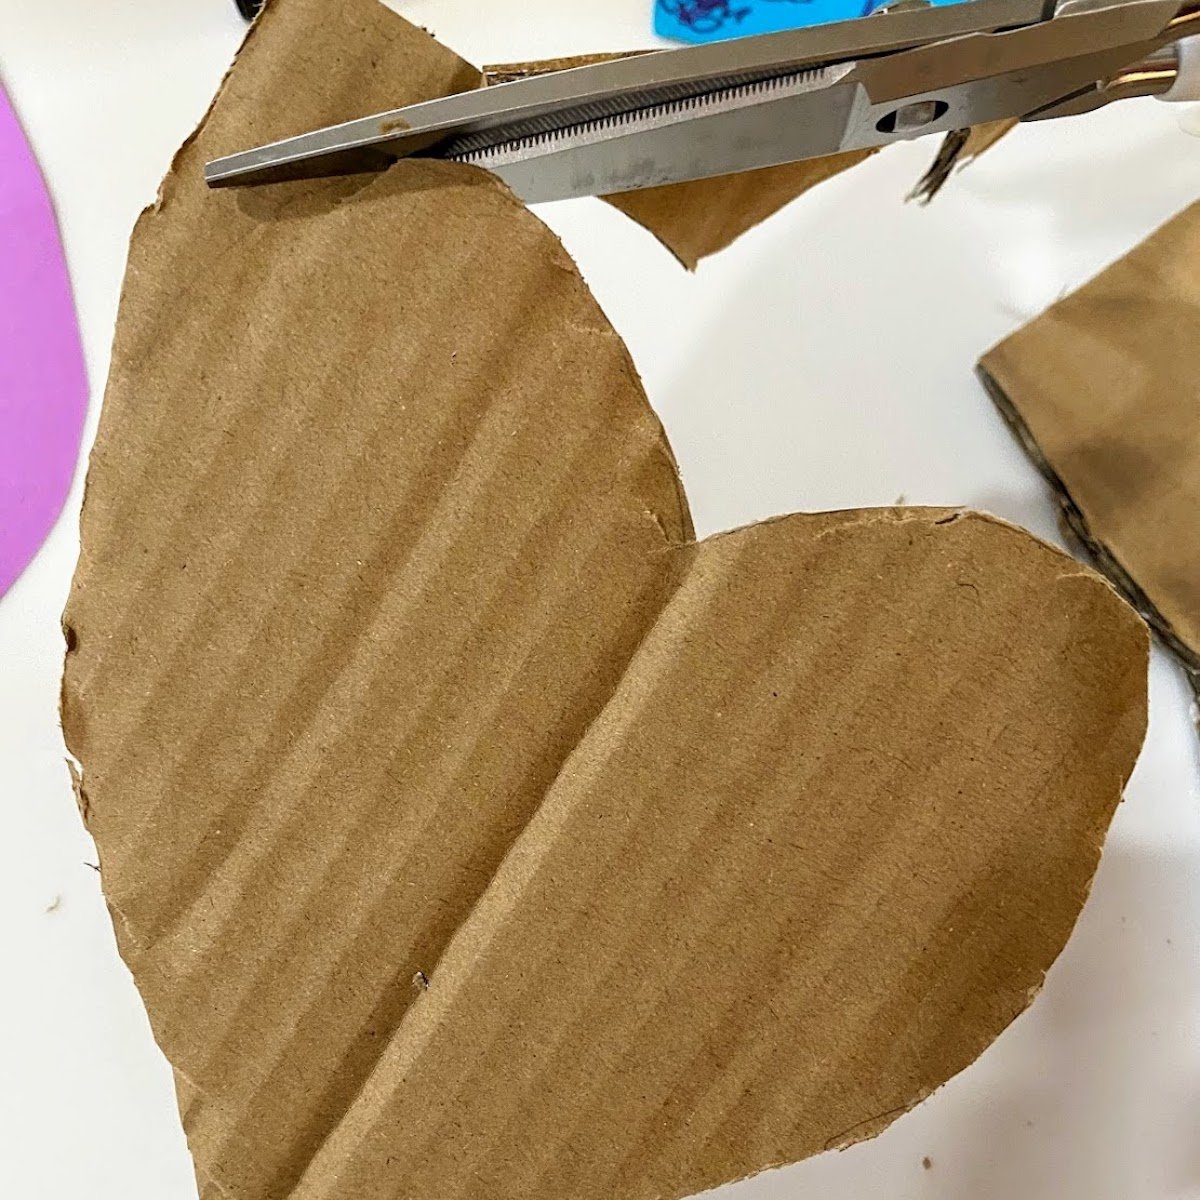
Step 3: Make your cardboard backing. Put your paper heart on top of a piece of cardboard and trace lightly with a pencil. Then cut out the cardboard heart. Glue your paper heart with photo onto the cardboard heart.
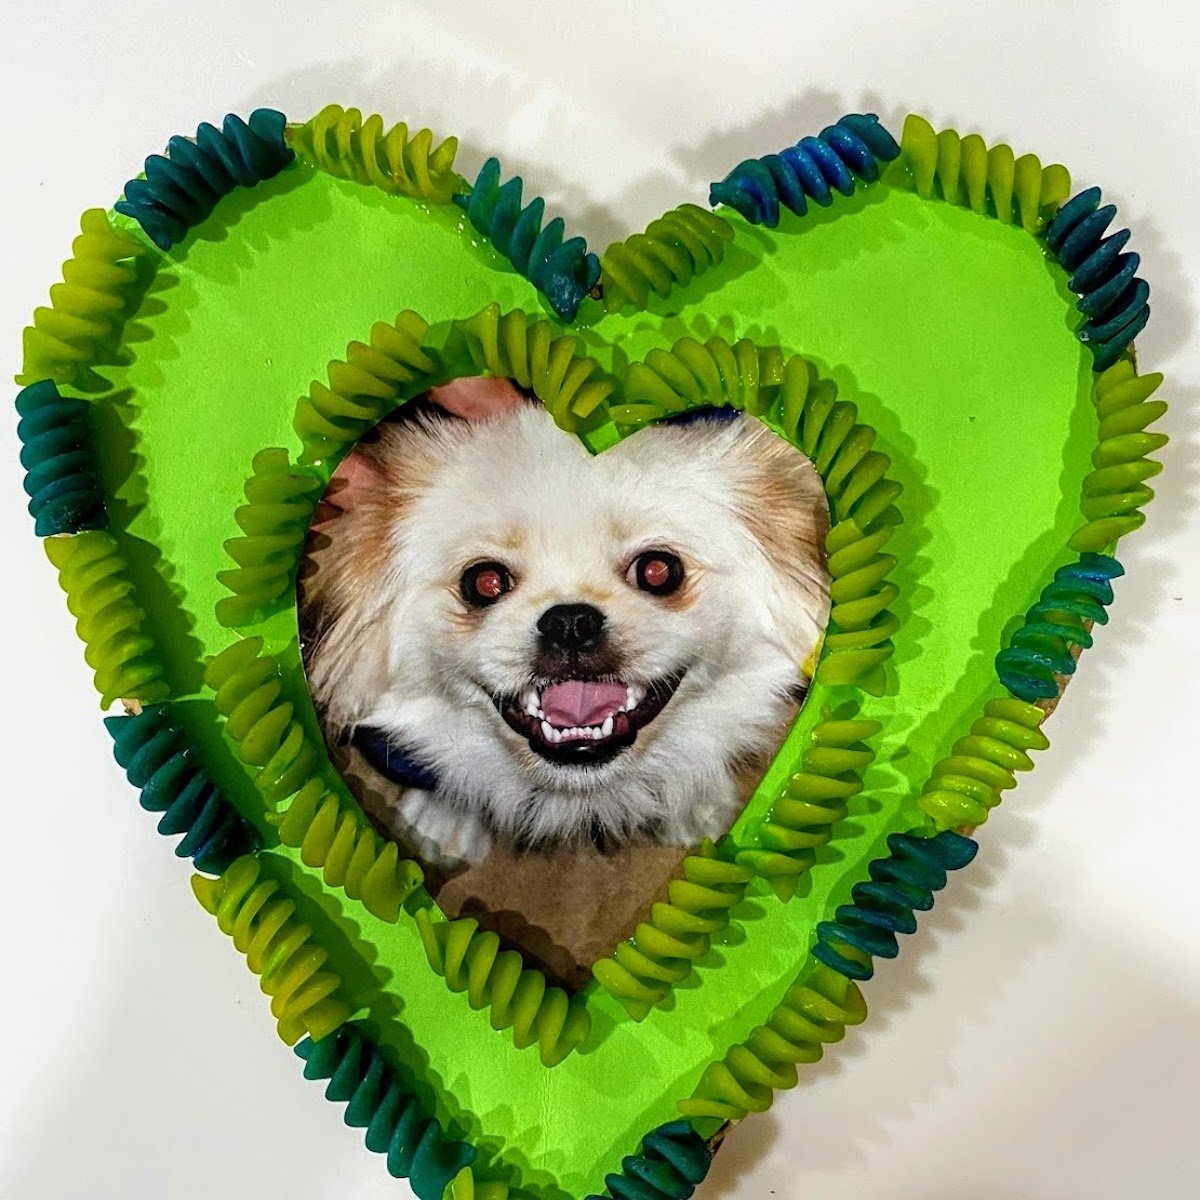
Step 4: Decorate your frame!: Now decorate your frame however you like! Glue on your dyed pasta, use stickers and glitter, or write a personalized note. Whatever you want!
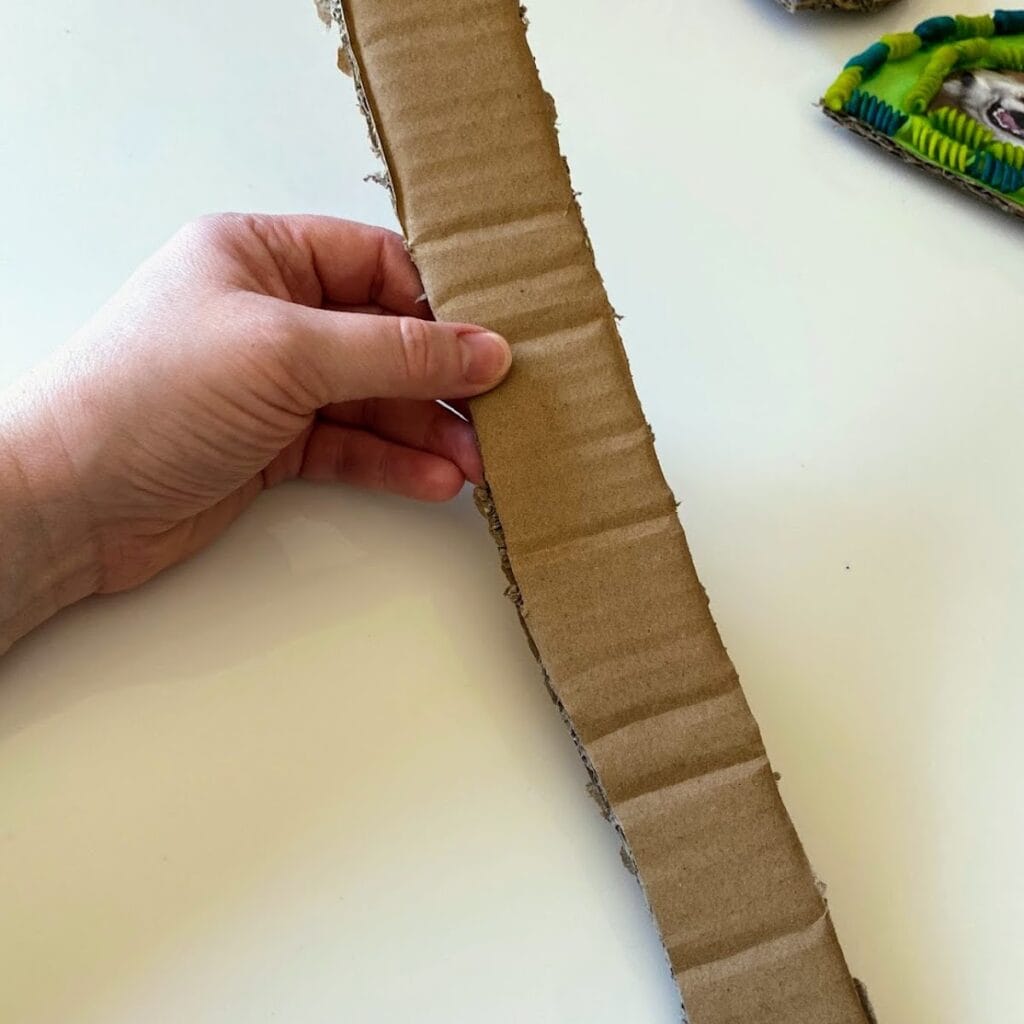
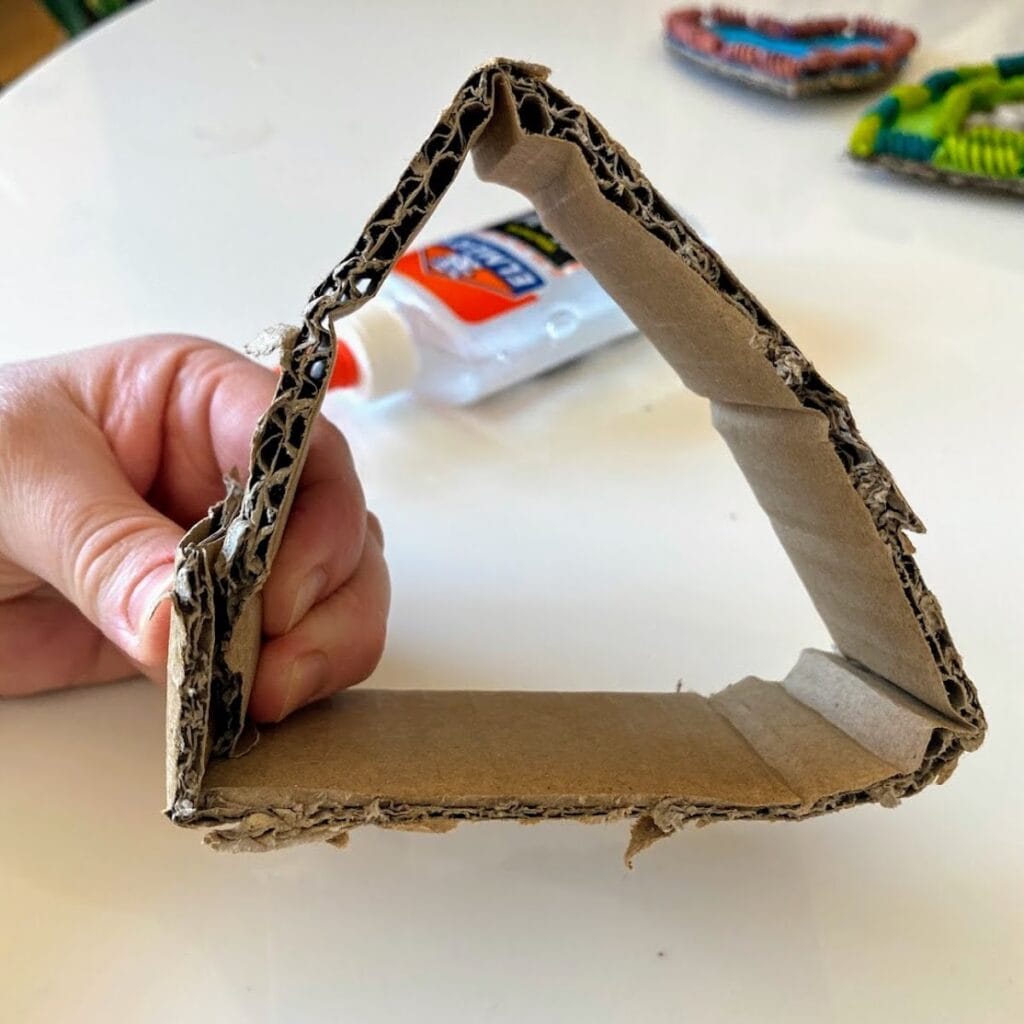
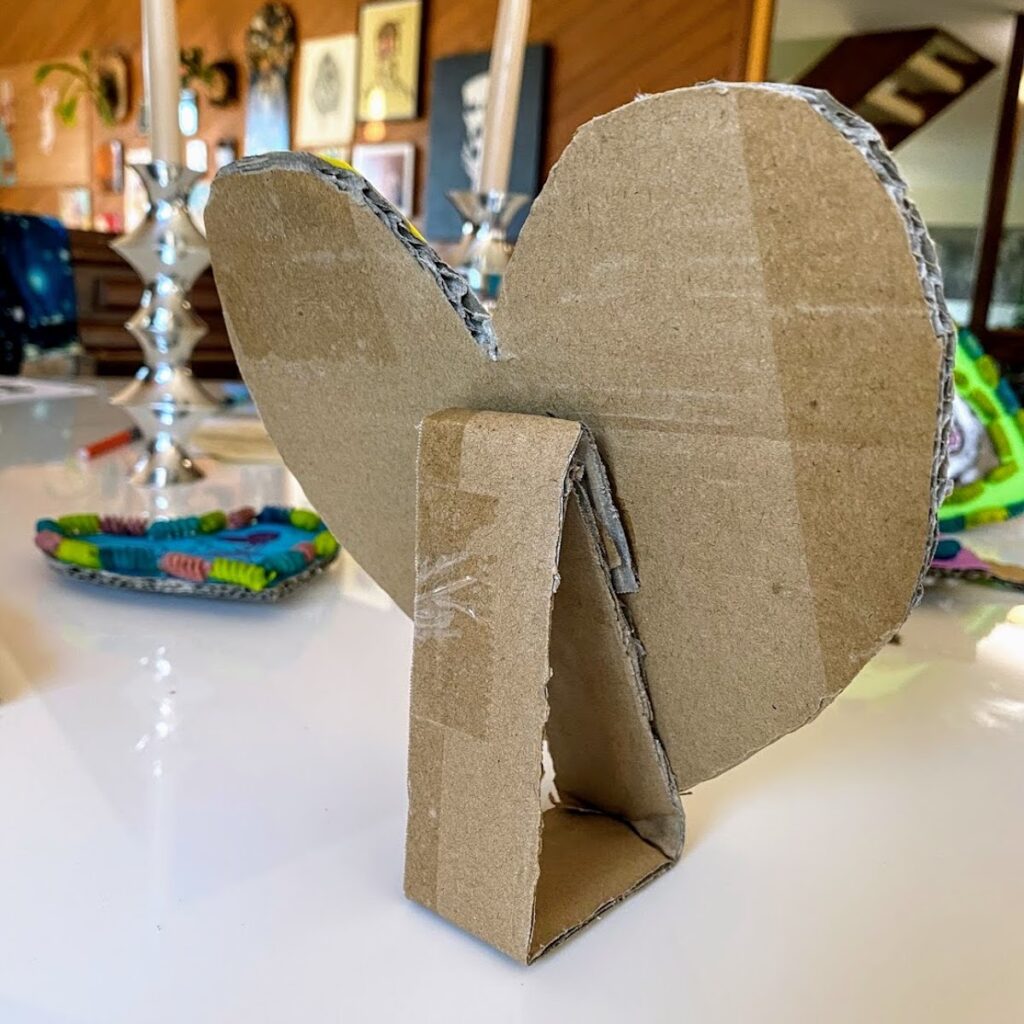
Step 5: Make it stand: Cut out a long strip of cardboard that’s maybe 1 1/2″ wide. Fold and glue it into a triangle, as pictured below, sealing the ends together. Once the heart and the stand have dried, flip your heart upside down and glue the stand to the back of the heart.
✏️ Expert Tips & Tricks
- Instead of adding a photo, kids can also draw in their own images.
- Follow our instructions on how to dye pasta for tips on coloring your pasta of choice.
- Make sure a little bit of the stand extends below the tip of the heart so that the frame can stand.
- Use a rock or paper weight to hold down your frame’s stand as it dries.
🧶 Other Cool DIY Crafts
Follow Platein28 on Pinterest, Instagram and Facebook and Sign up for our newsletter for all the latest recipes and crafts!
DIY Cardboard Frame with Pasta
Equipment
Supplies
- Pencil
- Markers, crayons or colored pencils
- Glue
- 1-2 sheets Construction paper
- 1 Photograph
- 1-2 squares cardboard
- 1/3 cup dyed pasta
Instructions
- Make the frame's heart background: Fold a piece of colored construction paper in half lengthwise and draw a half-heart shape along the folded edge. Cut out your paper heart.
- Add your photo. Cut a photo into a heart that's a little smaller than the paper heart. Glue the photo onto the middle of the paper heart.
- Make your cardboard backing. Put your paper heart on top of a piece of cardboard and trace lightly with a pencil. Then cut out the cardboard heart. Glue your paper heart with photo onto the cardboard heart.
- Decorate your frame! Now decorate your frame however you like! Glue on your dyed pasta, use stickers and glitter, or write a personalized note. Whatever you want!
- Make it stand: Cut out a long strip of cardboard that's maybe 1 1/2" wide. Fold and glue it into a triangle, sealing the ends together. Once the heart and the stand have dried, flip your heart upside down and glue the stand to the back of the heart.
Notes
- Instead of adding a photo, kids can also draw in their own images.
- Follow our instructions on how to dye pasta for tips on coloring your pasta of choice.
- Make sure a little bit of the stand extends below the tip of the heart so that the frame can stand.
- Use a rock or paper weight to hold down your frame’s stand as it dries.
Want more 28-minute recipes and crafts? Sign up and get recipes straight to your inbox!