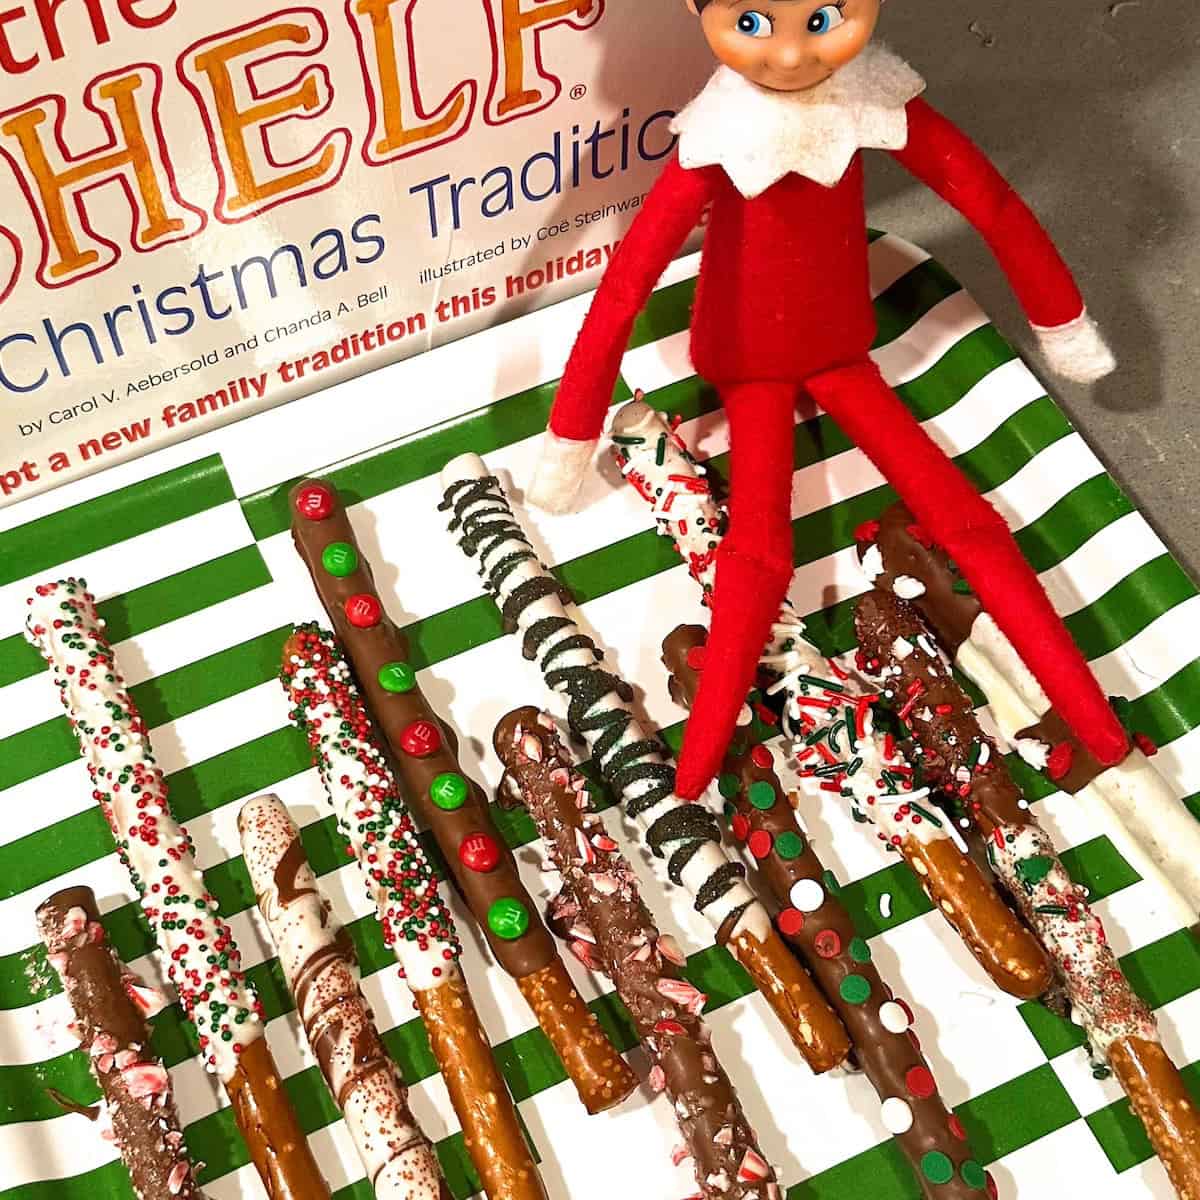
Chocolate Dipped Christmas Pretzels

I made these Christmas pretzels with all four kids last week and it was such a fun, messy time! 🤣 Because the pretzels are so easy to make, the kids got to focus on just being creative and goofy. I’ll give you some guidelines in this post (e.g. like how to melt your candy wafers), but truly this recipe is an exercise in doing whatever makes you happy! Creative vibes all the way…
Want to Save this Recipe or Activity?
Enter your email and we will send it straight to your inbox! You’ll also get the latest posts from Platein28!
By submitting this form, you consent to receive emails from Platein28.
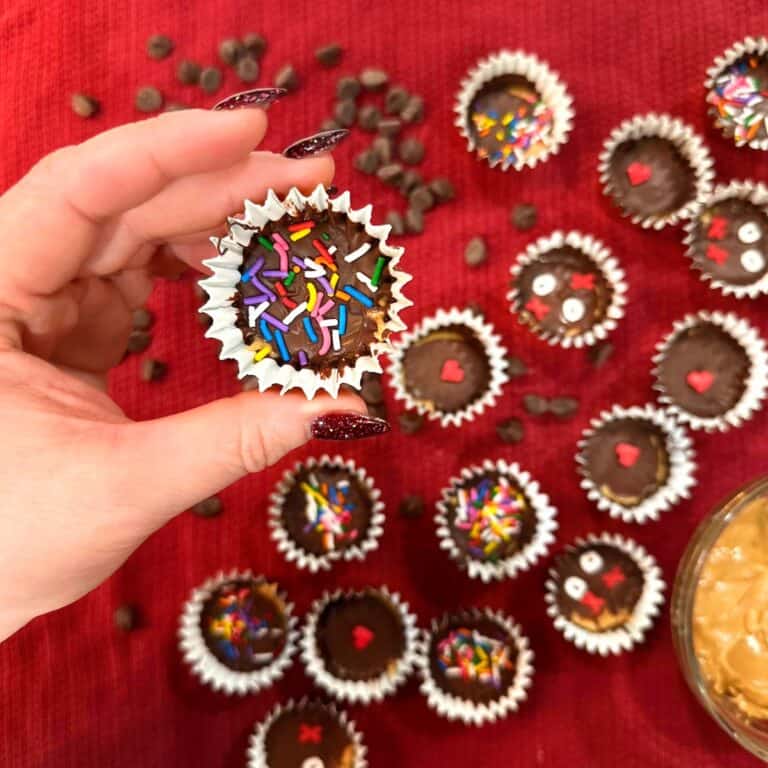
For more fun and edible holiday crafts, check out our 🦌 Graham Cracker Reindeer, 🎅 Strawberry Santa Hats and 🎄Christmas Rice Krispie Treats!
🥨 Why Make Christmas Pretzels?
✔️ Easy ✔️ Kid-friendly ✔️ Colorful ✔️ Fun ✔️ Satisfying ✔️ Festive ✔️ Fast

🍭 Ingredients & Supplies
You don’t need a lot for this crafty recipe. But you do need a few speciality items – pretzel rods, melting wafers, and candy decorations of your choice. I was able to find all ingredients at my local grocery store.
What We Used
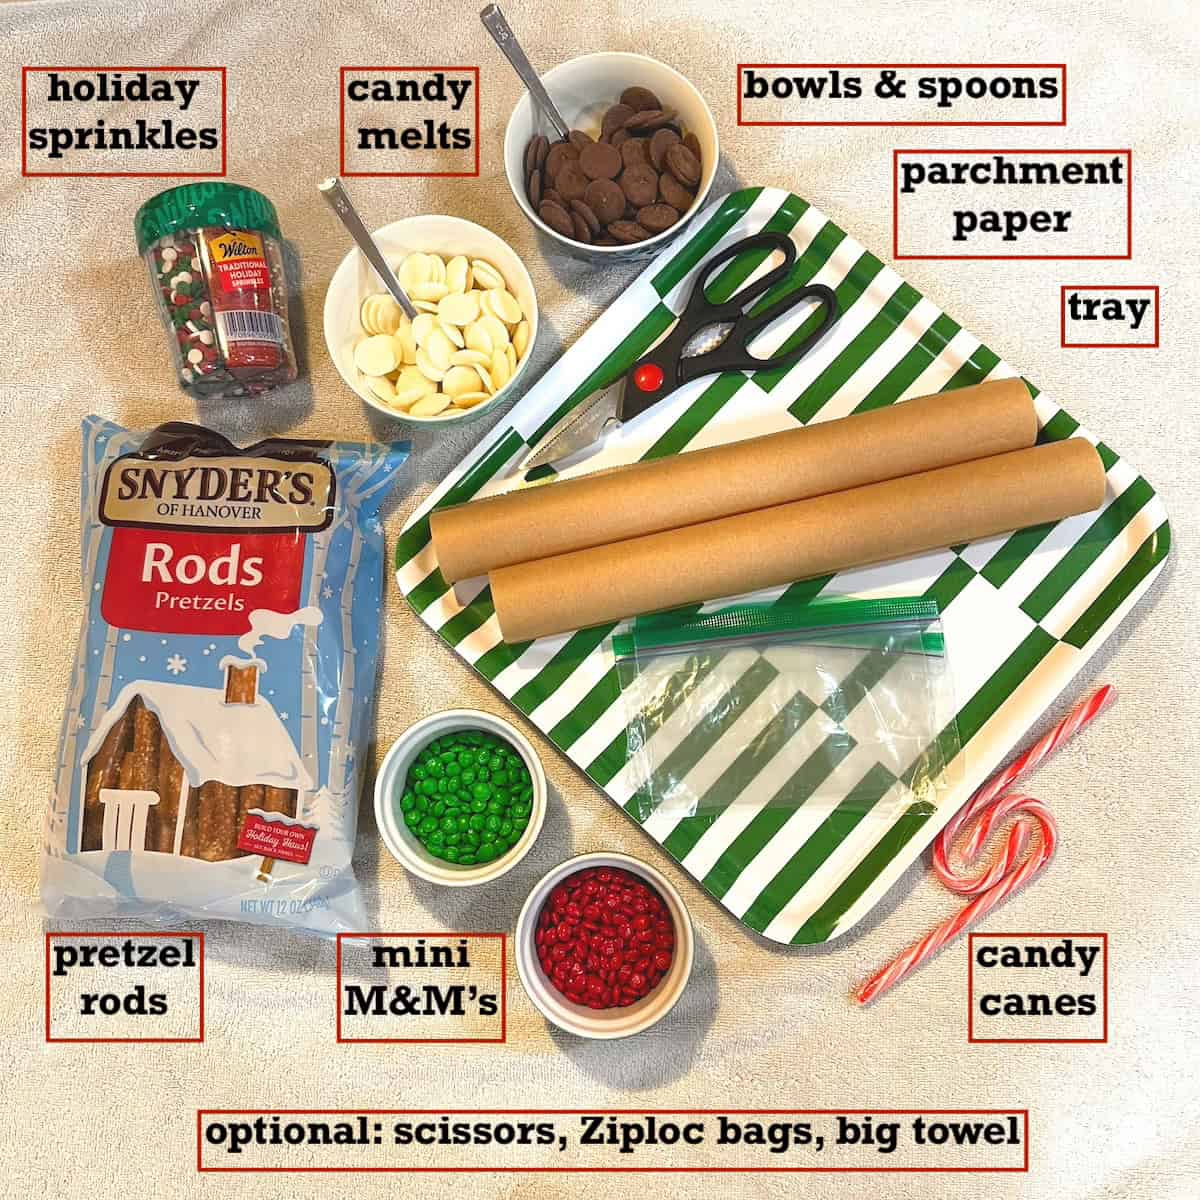
- Pretzel rods
- Melting wafers (aka candy melts): we used white vanilla flavored candy melts and milk chocolate flavored candy melts.
- Decorations: Christmas sprinkles, mini M&M’s and crushed candy canes.
- Basic kitchen supplies: tray (or baking sheet), parchment paper, 2 small bowls & spoons.
- Optional: a large towel (for the mess), and small Ziploc bags & scissors (to make your own DIY piping bag).
Substitutions
- Melting wafers: you can also use food coloring to dye your white candy melts green or red.
- Other decorations: frosting, candy eyeballs, any small candy.
- Basic stuff: instead of a tray, use a baking sheet or cutting board. And wax paper can be used in place of parchment paper.
🤔 What are Candy Melts?

Candy melts, or melting wafers, are small discs that can be melted similarly to chocolate. There are lots of ways to use melting wafers, including dipping or decorating, like a frosting. Once applied, the melted candy cools fairly quickly at room temperature. But refrigeration speeds up the process. The wafers usually come in flavors like vanilla, milk chocolate, and occasionally dark chocolate. White candy melts are great because you can add food coloring after melting and make some cool colors. Some of the most recognized brands for candy melts are Wilton and Ghirardelli.
📋 Instructions

Step 1: Melt candy wafers in the microwave.

Step 2: Dip and coat pretzels in the melted candy.

Step 3: Decorate pretzels and place on tray. Refrigerate for 5 minutes.

Step 4: Melt different-colored candy wafers, and add drizzle to the coated pretzels!

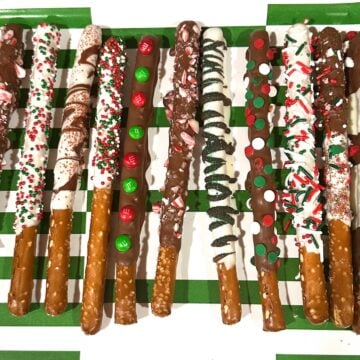
🎨 Decoration Ideas
There are so many ways to decorate your Christmas pretzels. Some ideas: sprinkle mini M&M’s, Christmas sprinkles, or crushed candy canes onto the dipped pretzel rods; make mini Rudolphs using candy eyeballs and red frosting for a nose; make a candy cane pattern with alternating white and red candy melts; use green melting wafers to mimic a Christmas tree (using slanted, colored piping and M&M’s as ornaments); make a peppermint bark flavor using melted milk chocolate and crushed candy cane bits.

The weirdest and most fun part of these Christmas pretzels was crushing the candy canes. All my kids were clamoring to do it next! On our first try, we tried using a heavy rolling pin and sort of failed. What worked better was the flat side of a meat mallet. But three warnings: (1) make a safe surface to pound on (e.g. baking sheet or sturdy cutting board), (2) don’t pound too hard (our table was literally shaking, haha), and (3) keep small fingers out of the way.


✔️ Expert Tips & Tricks
- Be careful melting the candy wafers. To start, make sure your bowls are microwave-safe. Microwave wafers for 45 seconds, stir, and then repeat once. If they’re still not melted, heat again for no more than 10 seconds at a time.
- For smaller batches of pretzels, there’s no need to refrigerate after decorating. You can just leave the pretzels to dry on the counter.
- For larger batches of pretzels, it’s best to refrigerate them because it speeds up the hardening/drying process. To make it fun for your kiddo, have them set this adorable cat timer 😸⏲️ to 5 minutes every time your refrigerate a batch.
- If you want a more even drizzle on your pretzels, you can make a DIY piping bag. Just cut a tiny hole in the bottom corner of a small Ziploc bag, add some melted candy wafers, seal the bag, and squeeze gently to drizzle.
- To crush candy canes, we recommend using the flat side of a meat mallet. Just be cautious of little hands getting in the way.

❓FAQ
This craft is best using pretzel rods because they are bigger and have more surface area to decorate. But you could use pretzel twists, dipping them completely in the candy melts and adding some sprinkles or crushed candy canes. You might needs tongs or tweezers to move them, though.
If you don’t have parchment paper, use wax paper. You can also spray aluminum foil, plastic wrap, a baking sheet, or just your counter with cooking spray.
Store your coated pretzels in a sealed plastic bag or container for up to a week.
If you’re giving your Christmas pretzels out as gifts, you can place 2-4 pretzels in individual cellophane bags and tie them at the top with ribbon. You can also place them in medium Ziploc bags and decorate the outside with stickers and bows.
🎄 More Holiday Crafts and Snacks


Want more crafts?
Sign up below to get crafts and recipes straight to your inbox plus make sure to follow on your favorite social!
🧑🎄 Chocolate Dipped Christmas Pretzels
Equipment
- Parchment paper or wax paper
- 1 tray or baking sheet
- 2 small bowls
- 2 spoons or small spatulas
- large towel optional (for mess)
- small Ziploc bags optional (to make a piping bag)
- Scissors optional (to make a piping bag)
Ingredients
- vanilla flavored melting wafers
- milk chocolate flavored melting wafers
- pretzel rods
- Christmas-themed sprinkles
- mini M&M's
- candy canes
Instructions
- Lay parchment paper on top of your tray. Then pour a handful of white melting wafers into a small bowl. Microwave for 45 seconds, stir, and repeat once more.
- Dip a pretzel rod into the melted candy to coat the tip. Then use a spoon to coat the pretzel with the melted candy. Lightly tap the dipped pretzel against the edge of the bowl to discard the excess. Leave the bottom 1/3 of the pretzel naked.
- Place your coated pretzel(s) on the tray. OR, while the pretzel coating is still wet, decorate with sprinkles, mini M&M's, or crushed candy canes. Lay pretzel(s) on the tray and place in fridge for 5 minutes.
- Meanwhile, melt your chocolate candy melts (as in Step 1). Grab a coated pretzel from your fridge tray. Dip a spoon into the melted chocolate candy and hold it above the pretzel, drizzling the chocolate back and forth. Repeat Step 3.
Notes
- Be careful melting the candy wafers. Use microwave-safe bowls. Microwave wafers for 45 seconds, stir, and then repeat once. If they’re still not melted, heat again for no more than 10 seconds at a time.
- For smaller batches of pretzels, leave the pretzels to dry on the counter.
- For larger batches of pretzels, it’s best to refrigerate them because it speeds up the hardening/drying process. Have your kiddo set this adorable cat timer 😸⏲️ to 5 minutes every time your refrigerate a batch.
- If you want a more even drizzle on your pretzels, make a DIY piping bag. Just cut a tiny hole in the bottom corner of a small Ziploc bag, add some melted candy wafers, seal the bag, and squeeze gently to drizzle.
- To crush candy canes, we recommend using the flat side of a meat mallet. Just be cautious of little hands getting in the way.
The nutrition facts provided are calculated using a third-party tool and are estimates only. Actual nutritional content may vary based on the ingredients and brands you use, as well as portion sizes. For accurate results, please consult a registered dietitian or nutritionist.