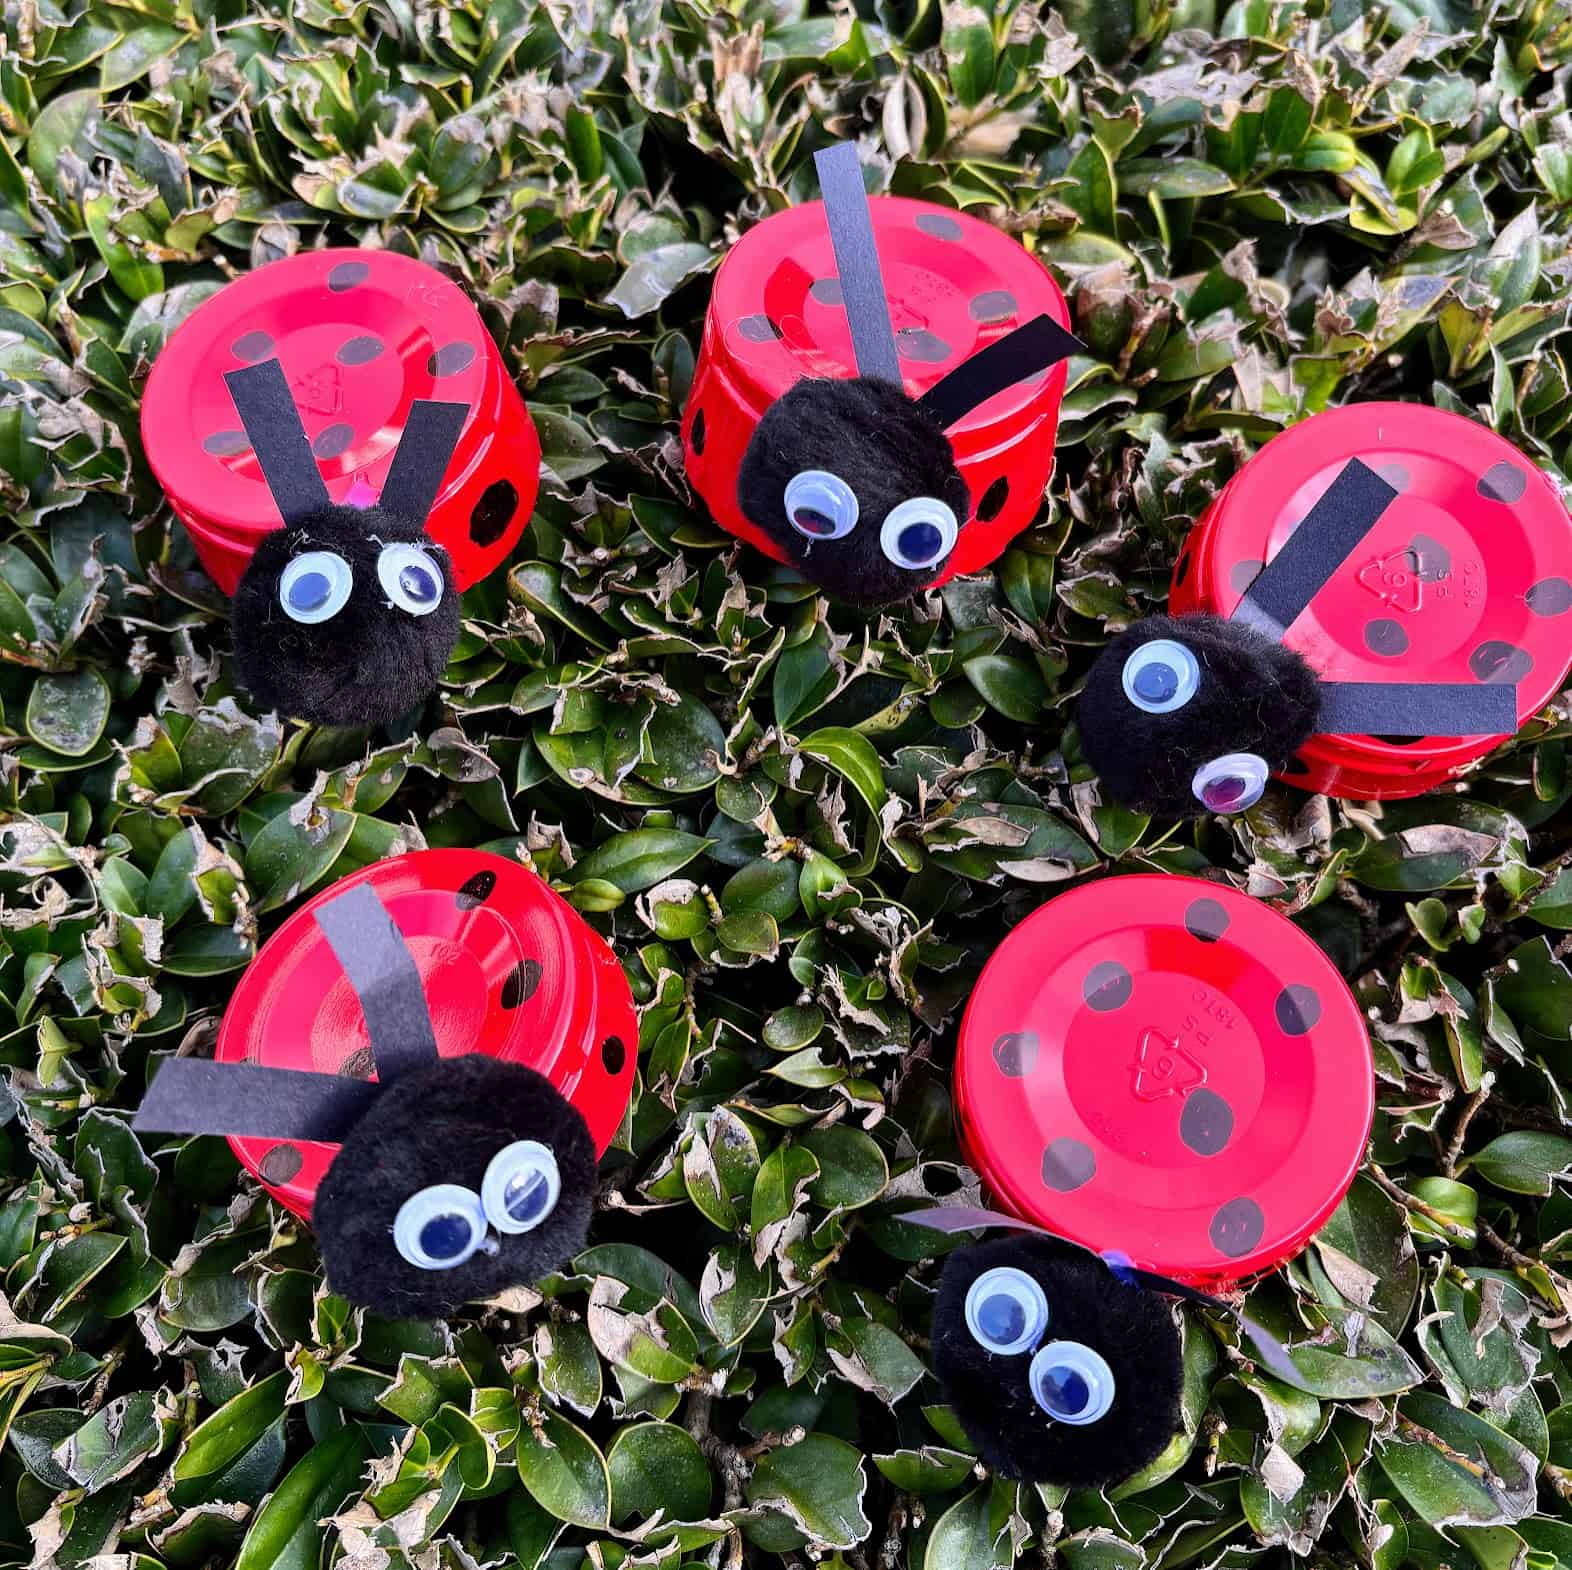
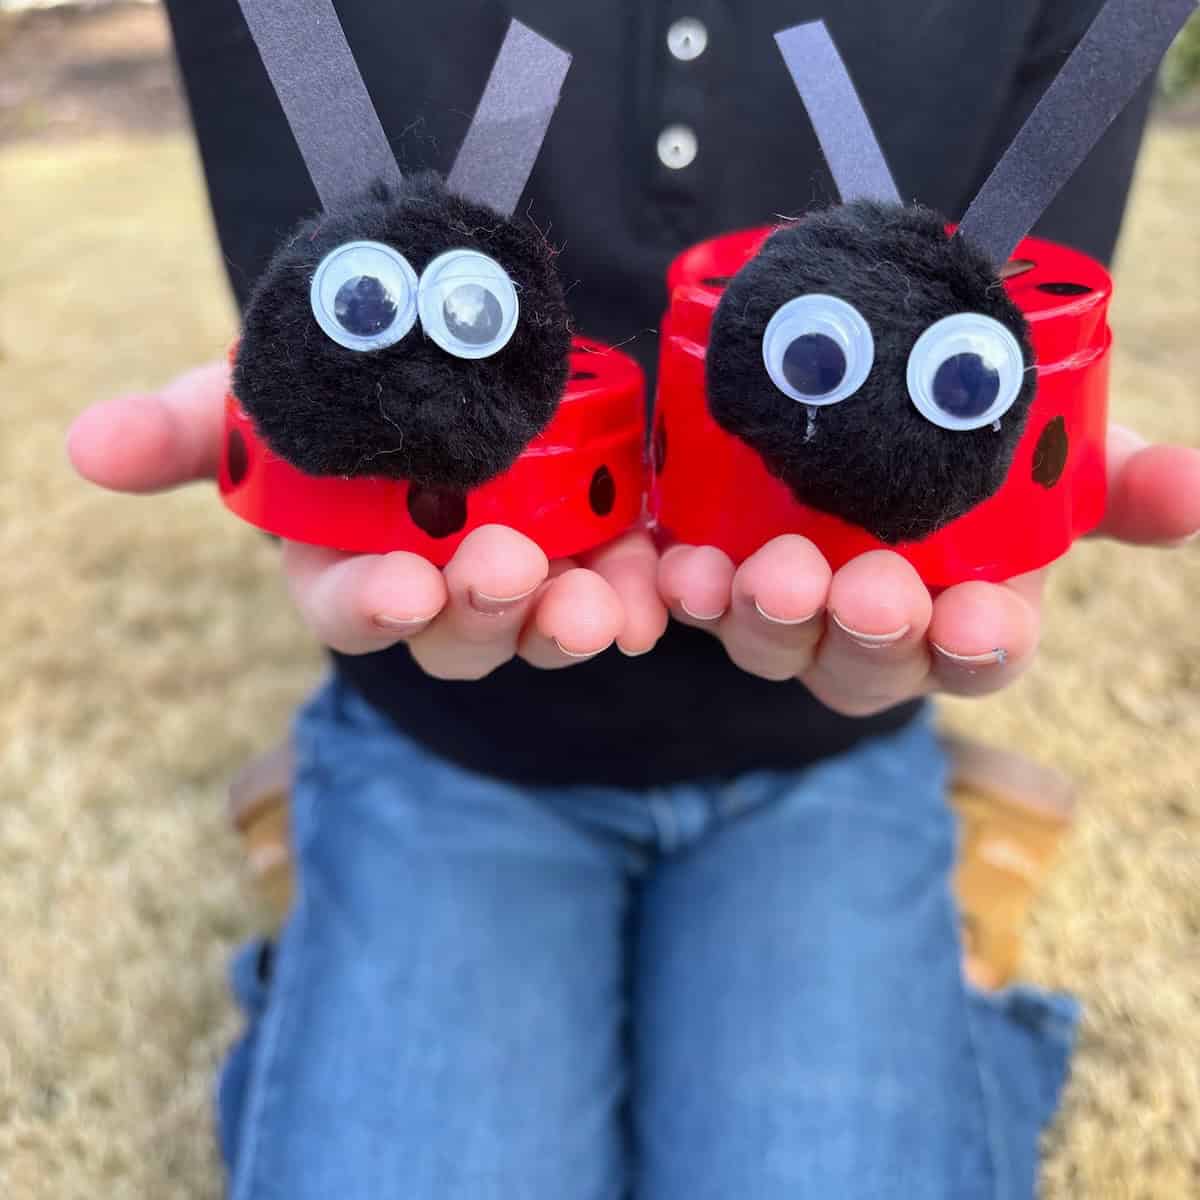
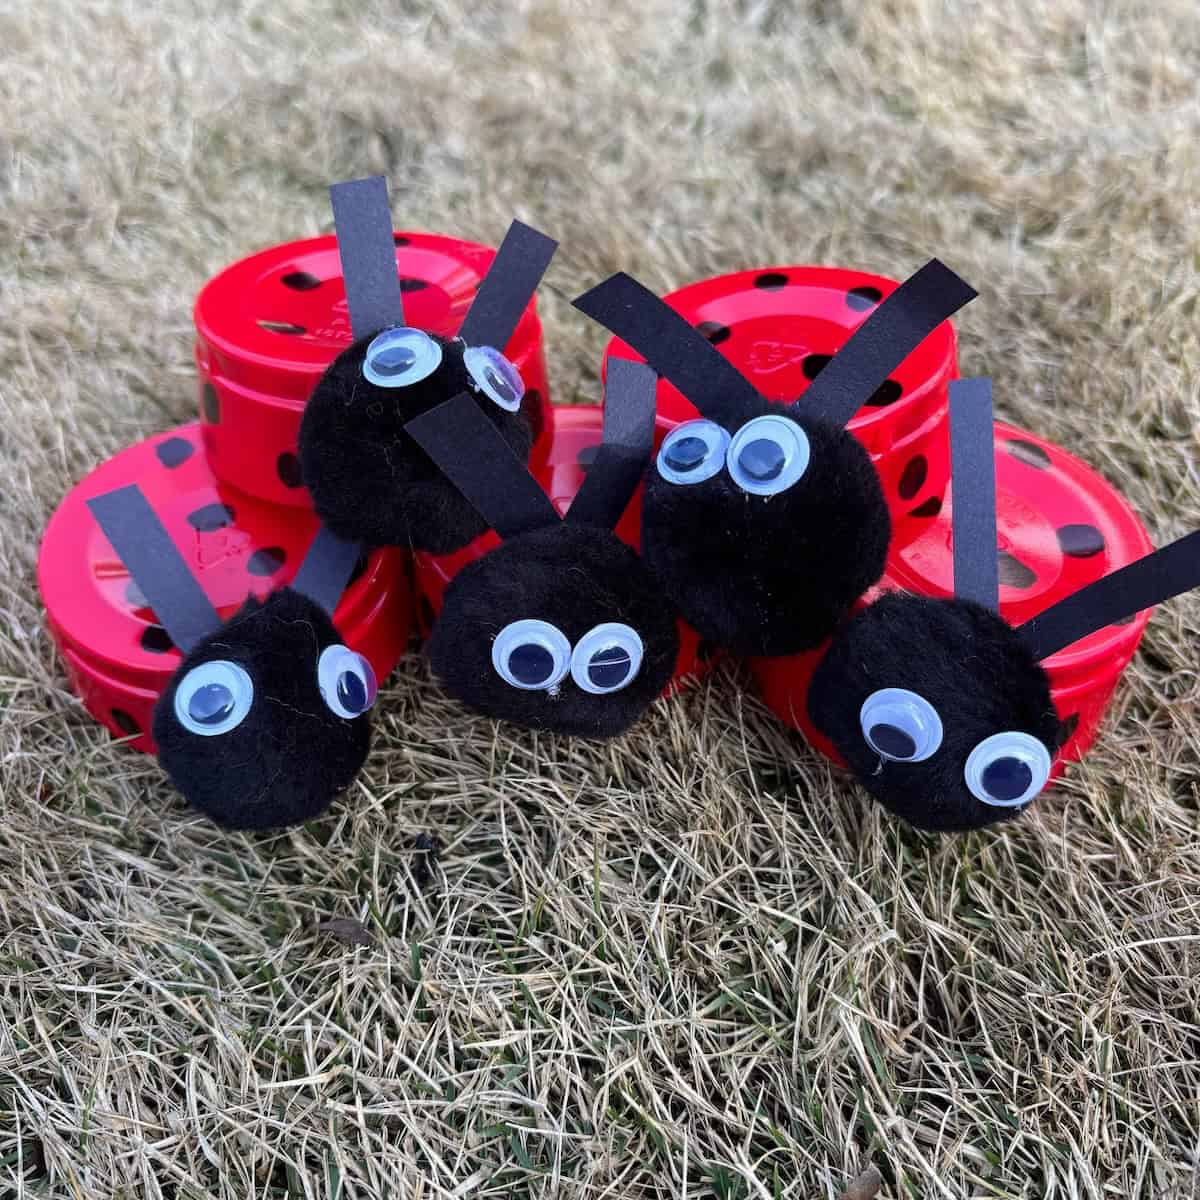
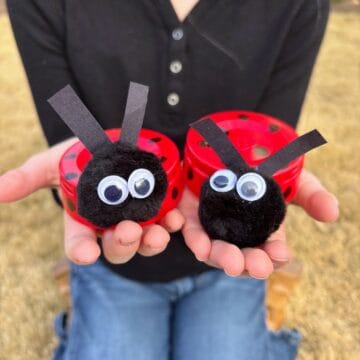
Party Cup Ladybug Craft

Welcome spring with this fun and easy party cup ladybug craft! Using just a red party cup, pom poms, and a few simple supplies, kids can create adorable ladybugs for pretend play or spring decorations. It’s a perfect way to spark creativity and get kids excited for the sunny season ahead!
Want to Save this Recipe or Activity?
Enter your email and we will send it straight to your inbox! You’ll also get the latest posts from Platein28!
By submitting this form, you consent to receive emails from Platein28.
If you love spring and summer crafts, be sure to check out our cork honeybees, bow tie butterflies and paper plate sunflowers! Or decorate for the season by making these lovely bunny candy dishes or homemade flower vases made from recycled containers. Who knew that decorating for spring could be so simple and fun?!

Why We Love this Ladybug Craft
- Minimal mess. No paint needed for this simple spring craft—just some basic cutting, gluing, and coloring!
- Decorative! These party cup ladybugs are perfect for table decor, plus they’re an easy and cheap way to decorate for spring!
- An upcycled craft. These DIY ladybugs are crafted from plastic party cups—new or cleaned and reused. Upcycling not only sparks creativity in kids but also teaches them the importance of conserving resources and caring for the environment.
- Fine motor skills. Our easy ladybug craft lets kids practice their cutting, coloring, and gluing skills. Plus, it’s so easy that they can do most of it on their own!
✂️ Supplies
Notes on key supplies are provided below. Please see the “how-to” card for a full list of supplies and quantities.
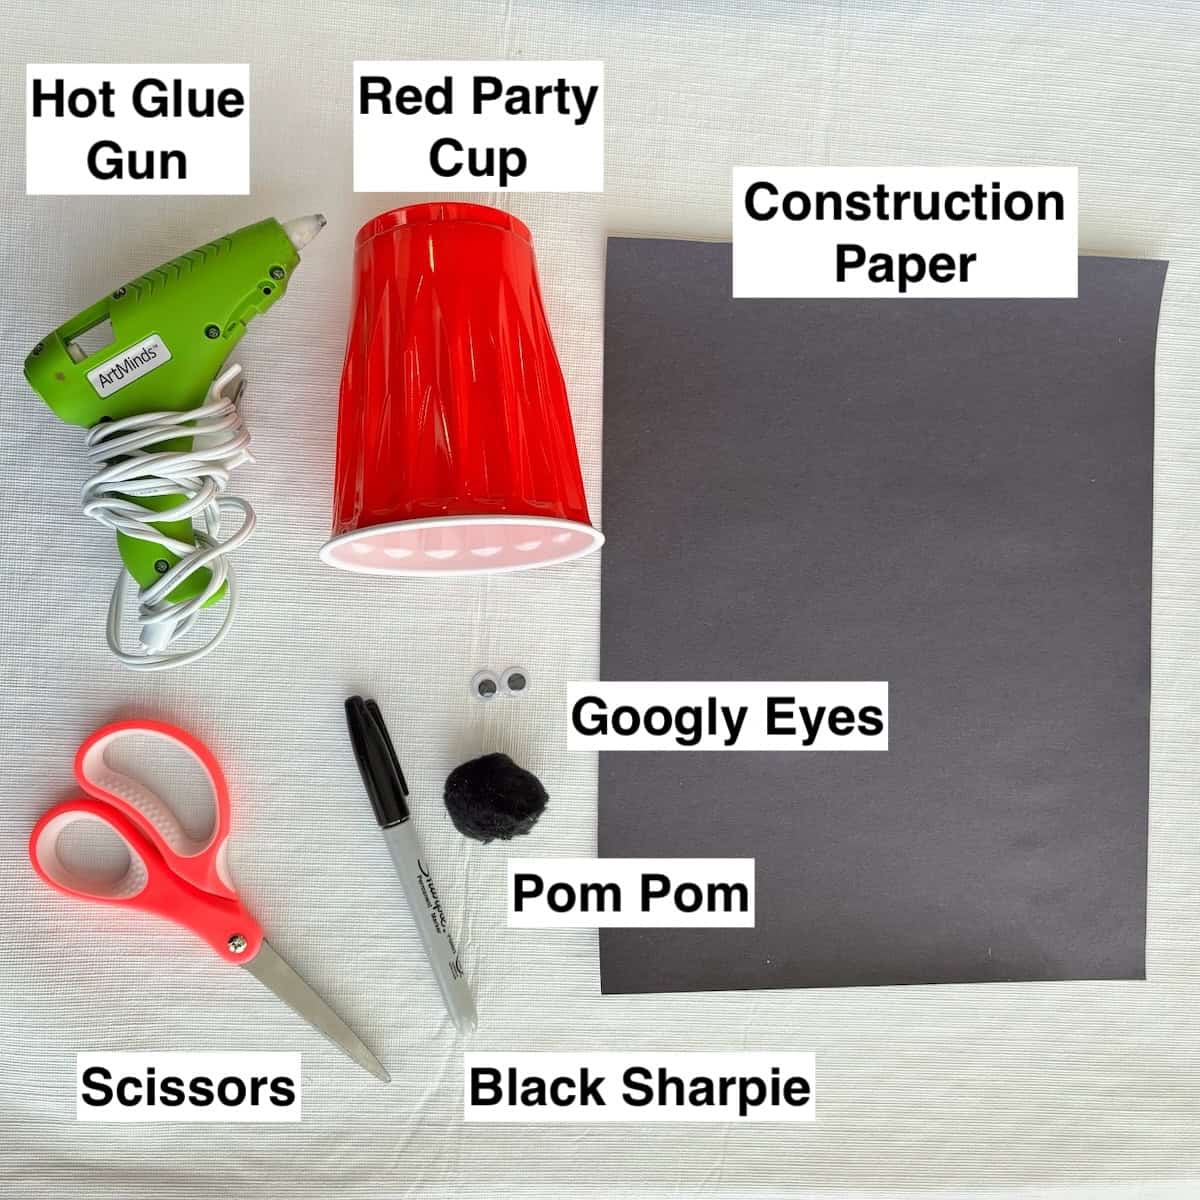
- Red party cup– emptied, washed and dried.
- Scissors
- Black Sharpie– to draw on your ladybug’s spots.
- Hot glue gun– TackyGlue should also work.
- Construction paper– cut into strips, to form your ladybug’s antennae.
- Pom Poms– large and ideally black, for the ladybug’s head.
- Googly Eyes– if you don’t have any you can simply draw on the eyes with a marker.
📋 Instructions
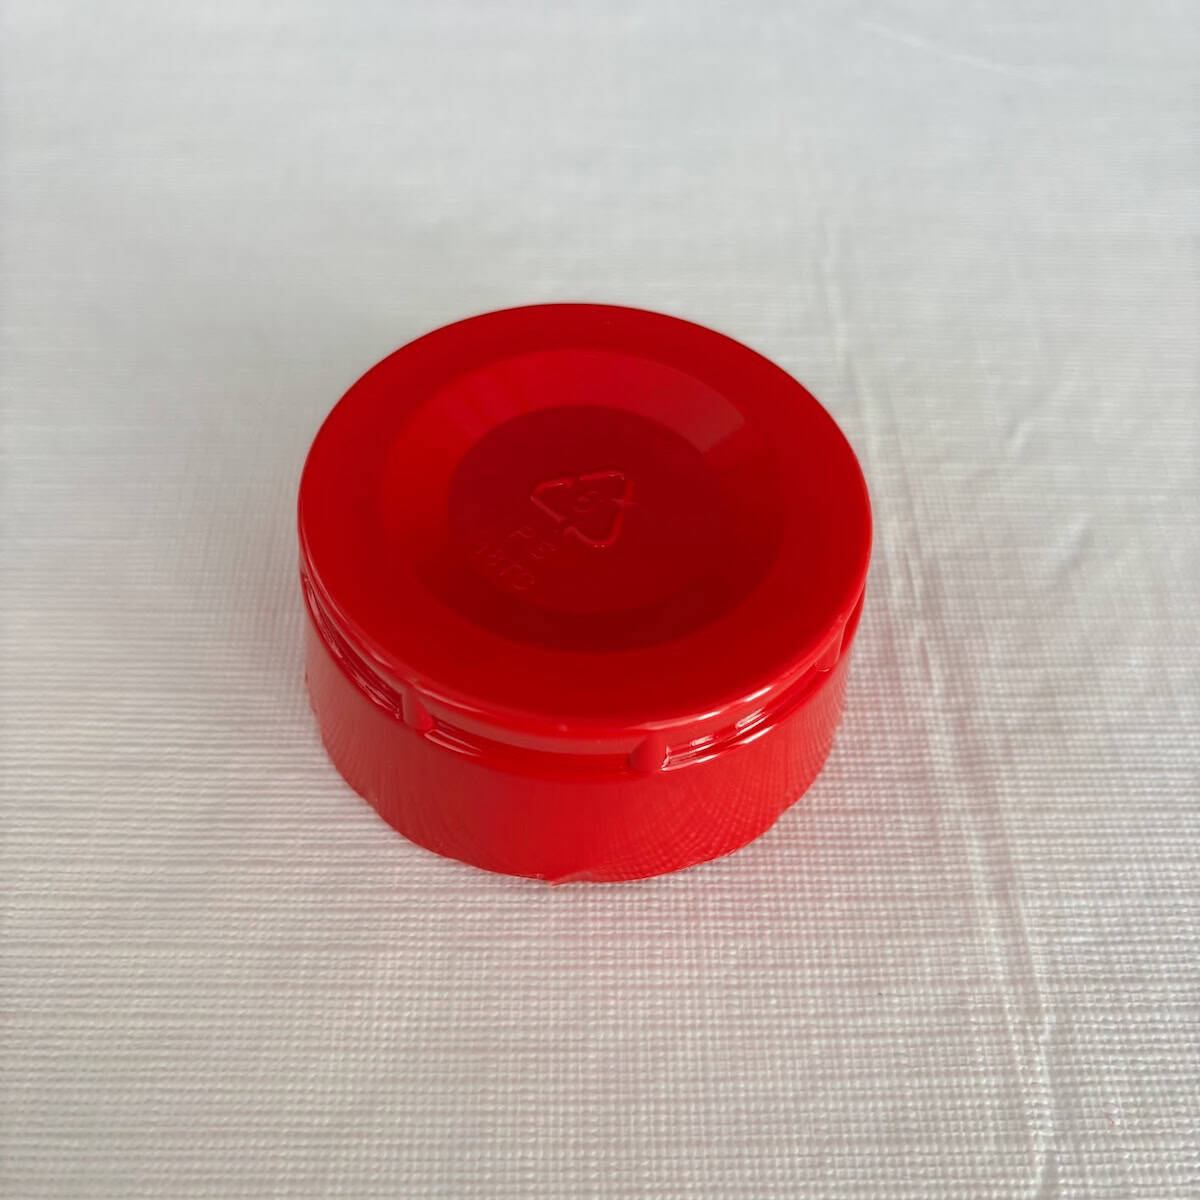
Step 1: Cut a 3-inch line from the rim of the party cup down toward the bottom. Then, cut around the base in a circular shape to remove it, creating the body of your ladybug.

Step 2: Use a Black Sharpie to add black spots on the top and sides of your ladybug.

Step 3. Cut two thin strips of black construction paper, each about 2 inches long, to create the ladybug’s antennae.

Step 4: Cross the black strips over each other at one end and glue them together using the hot glue gun. Then, glue the antennae to the back of a black pom pom.
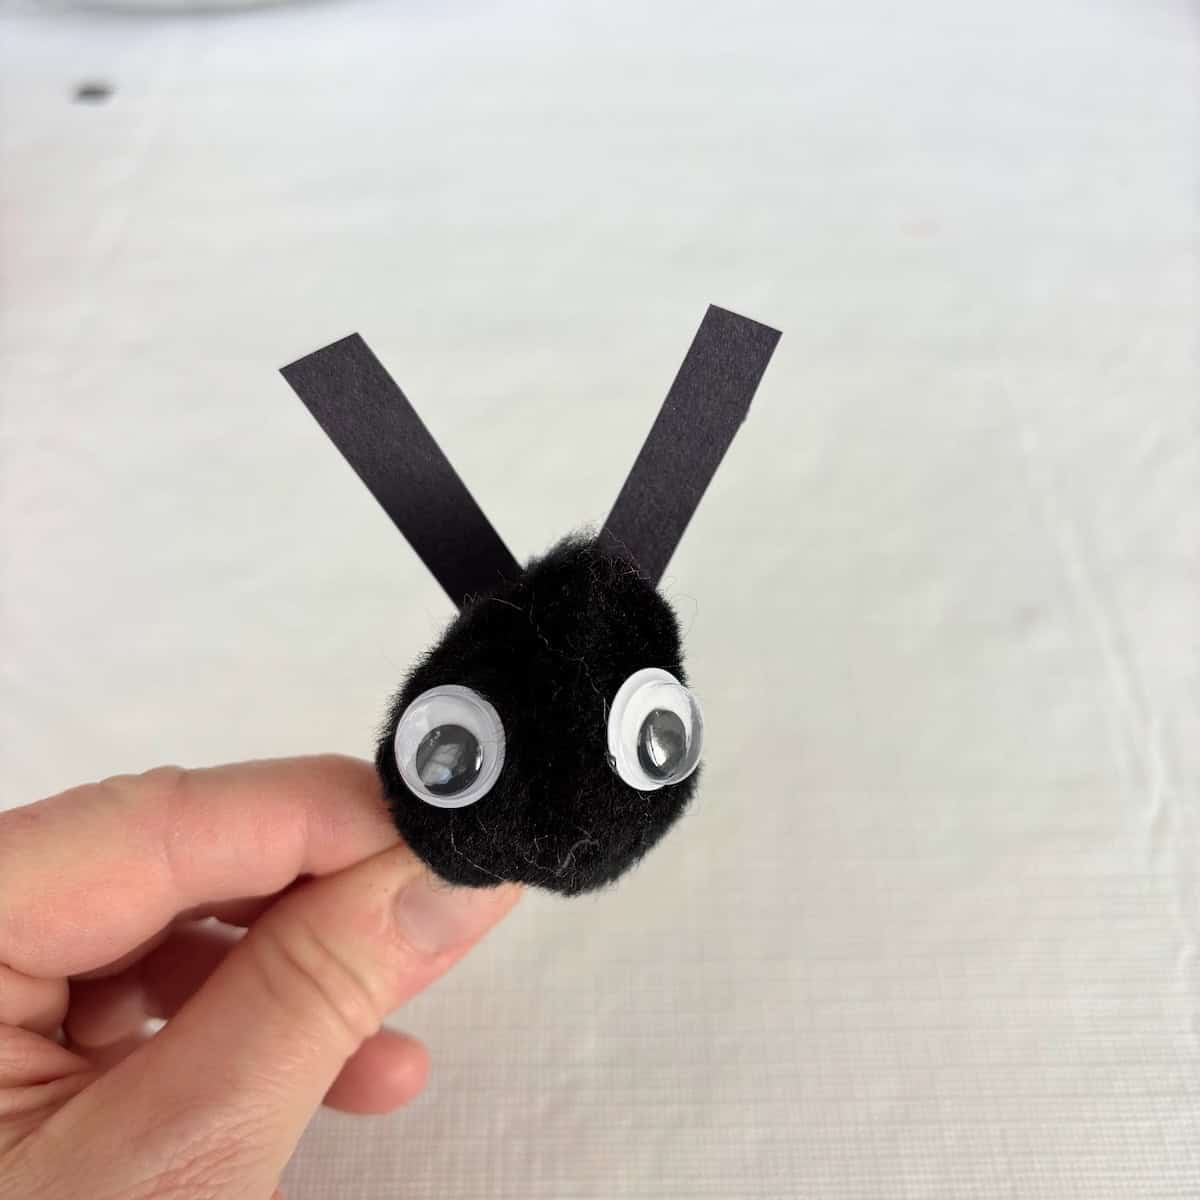
Step 5. Glue the googly eyes to the front of the black pom pom.
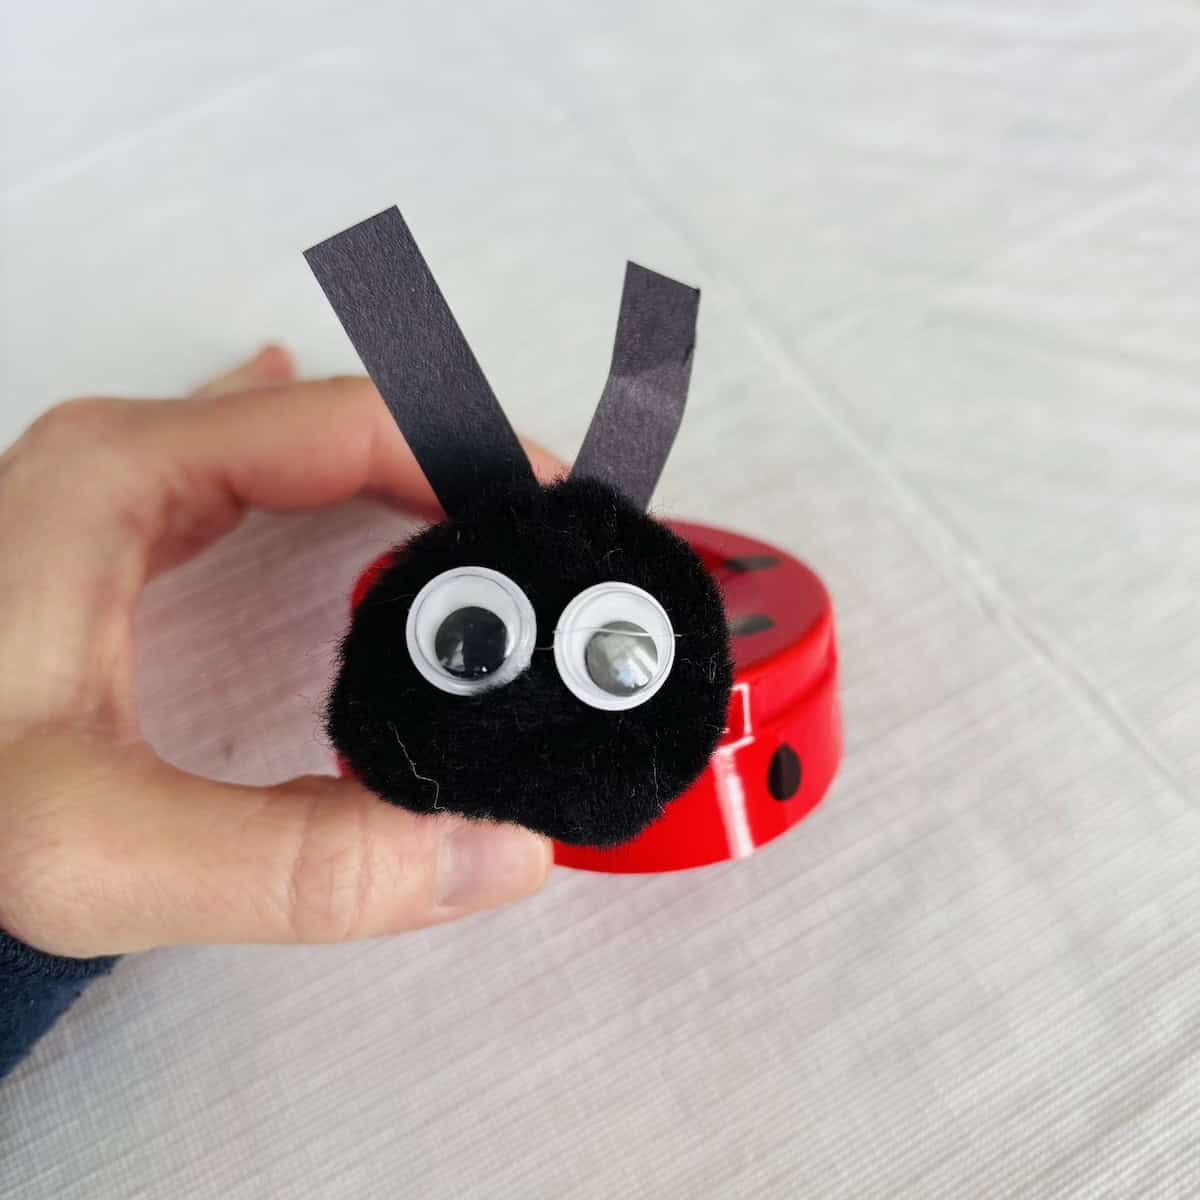
Step 6: Finally, glue the pom pom to the front of the ladybug.
✔️ Tips and Tricks
- Use the right kind of scissors to cut through the plastic party cup. We like Livingo student scissors for teens/adults and Westcott scissors for school-aged kids.
- To prevent smudging, let the marker dry completely before gluing on your ladybug’s head.
- Use a strong glue. We find that hot glue guns works best on plastic, or a strong craft glue like Aleene’s Original Tacky Glue.
- Help younger kids by doing the cutting and/or gluing for them, especially if using a hot glue gun.
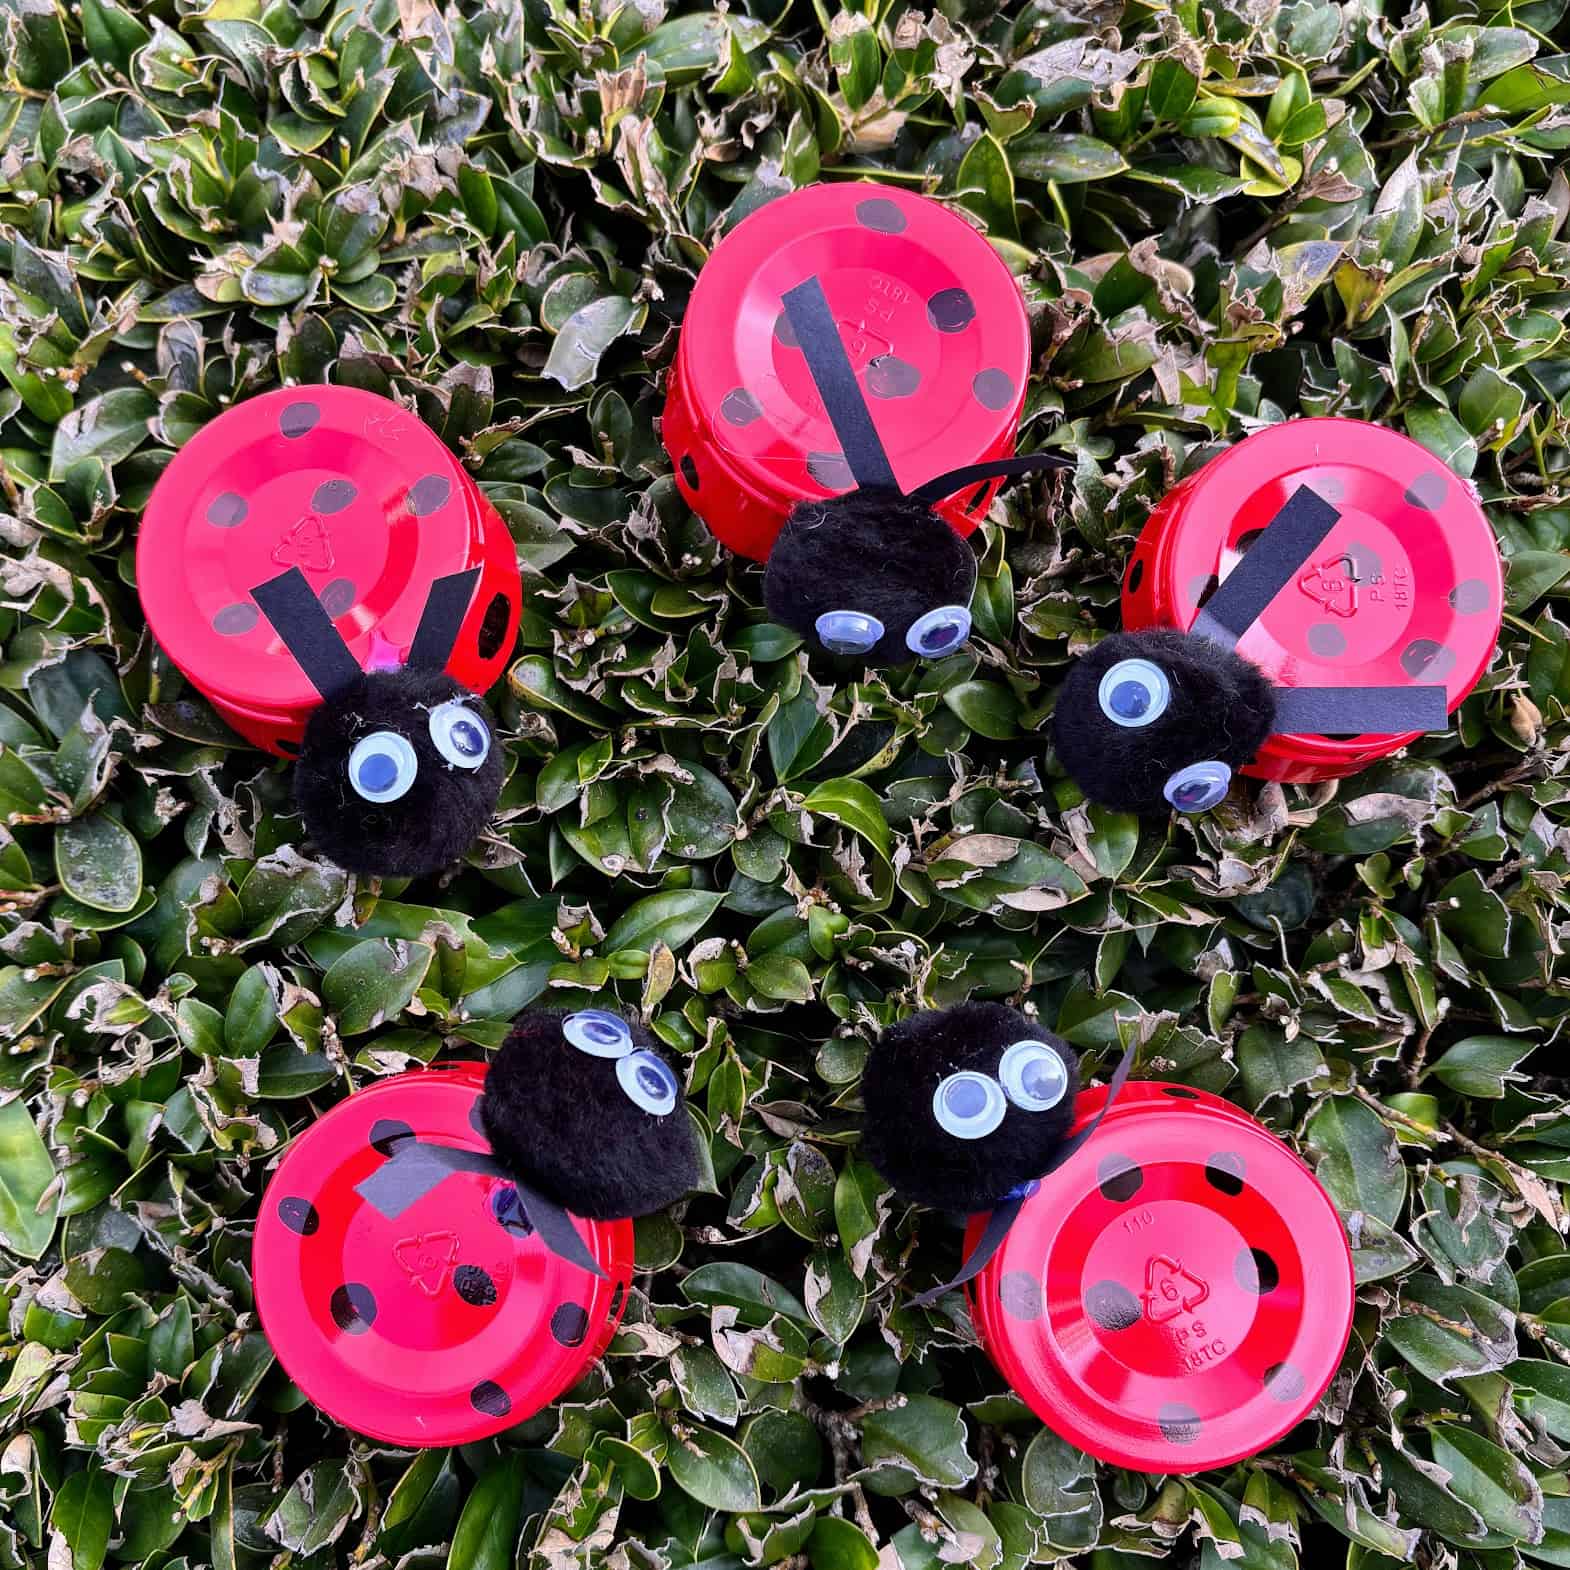
- Take ladybugs outside and hide them in the trees or grass for some fun playtime!
- Complete the fun by adding cork honeybees and bow-tie butterflies to your springtime craft session!
↪️ Variations and Substitutions
Red party cups- No party cups? No problem! Try using paper cups, painted rocks or seashells, upside-down red paper bowls, or egg carton sections painted red for your ladybug’s body.
Pom Poms- If you don’t have pom poms, try using a round piece of black construction paper or felt, a painted bottle cap, a cotton ball tinted with black paint, or even a black button for your ladybug’s head.
Google eyes- If you don’t have googly eyes, cut small circles from white paper or felt and draw black dots in the center to make simple, adorable eyes for your ladybug.
Construction paper- Swap paper antennae for something sturdier, like pipe cleaners or cardstock.
Glue- If you’d prefer not to use a hot glue gun, consider using Aleene’s Original Tacky Glue, which we love because it’s non-toxic and approved for classroom use. Elmer’s Craft Bond All Purpose Craft Glue is another great option!

Want more crafts?
Sign up below to get crafts and recipes straight to your inbox plus make sure to follow on your favorite social!
🐞 Party Cup Ladybugs
Equipment
- 1 Pair of scissors
Supplies
- 1 red party cup
- 1 Black Sharpie
- 1 piece construction paper (black )
- 1 large pom pom (black)
- 2 googly eyes
Instructions
- Cut a 3-inch line from the rim of the party cup down toward the bottom. Then, cut around the base in a circular shape to remove it, creating the body of your ladybug.
- Use a Black Sharpie to add black spots on the top and sides of your ladybug.
- Cut two thin strips of black construction paper, each about 2 inches long, to create the ladybug's antennae.
- Cross the black strips over each other at one end and glue them together using the hot glue gun. Then, glue the antennae to the back of a black pom pom.
- Glue the googly eyes to the front of the black pom pom.
- Finally, glue the pom pom to the front of the ladybug.
Video
Notes
-
- Use the right kind of scissors to cut through the plastic party cup. We like Livingo student scissors for teens/adults and Westcott scissors for school-aged kids.
-
- To prevent smudging, let the marker dry completely before gluing on your ladybug’s head.
-
- Use a strong glue. We find that hot glue guns works best on plastic, or a strong craft glue like Aleene’s Original Tacky Glue.
-
- Help younger kids by doing the cutting and/or gluing for them, especially if using a hot glue gun.
-
- Take ladybugs outside and hide them in the trees or grass for some fun playtime!
-
- Complete the fun by adding cork honeybees and bow-tie butterflies to your springtime craft session!