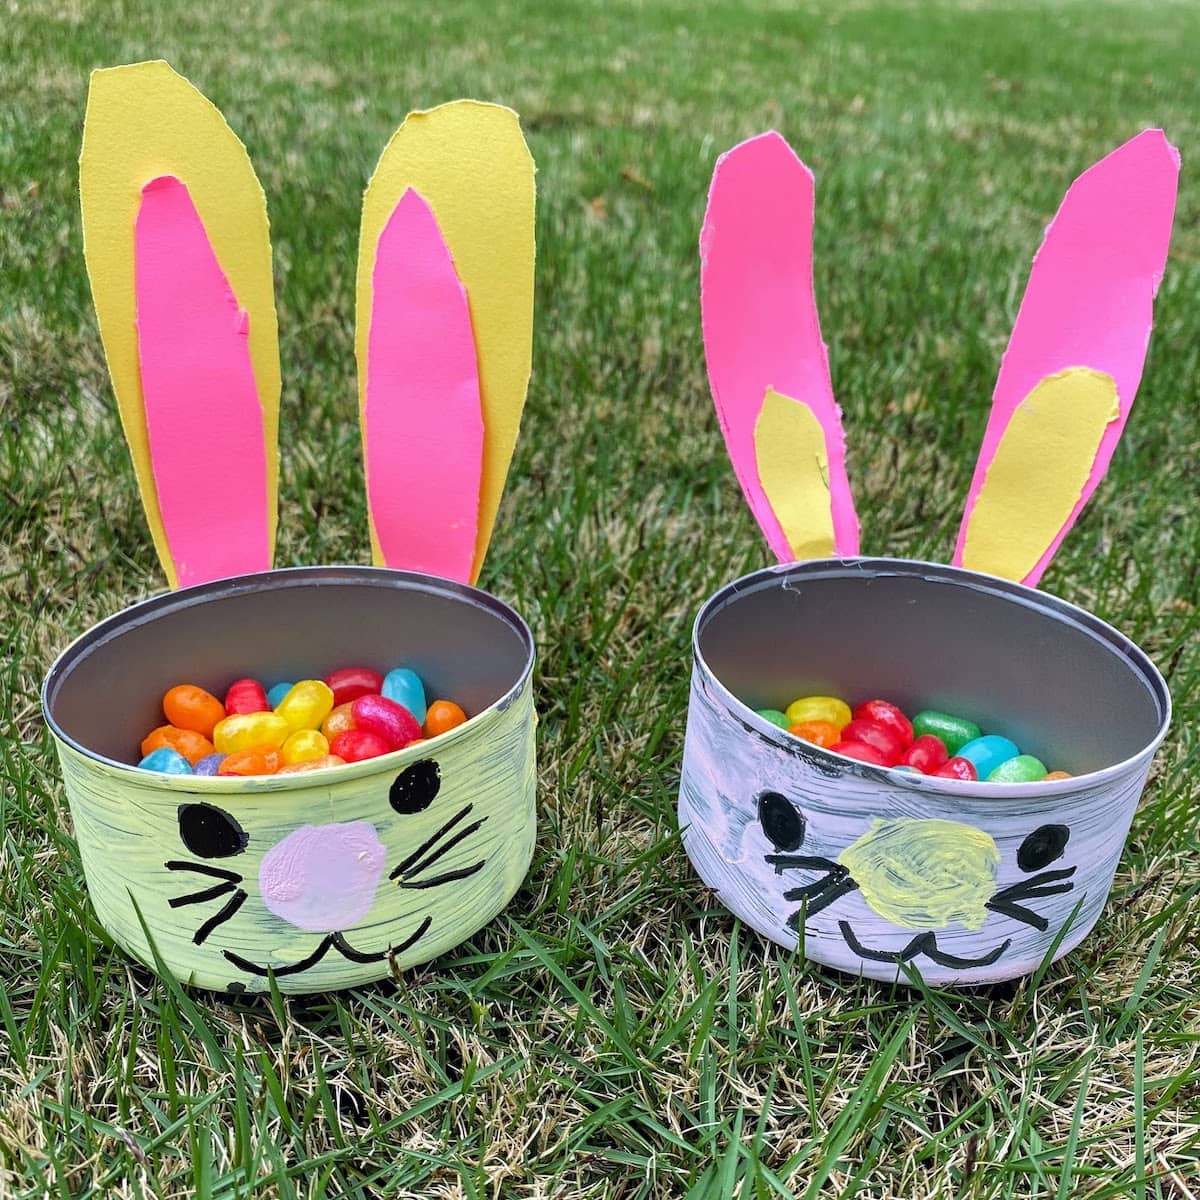
DIY Easter Bunny Candy Holder Craft for Kids

Looking for a cute and easy Easter craft to make with kids? These DIY Easter Bunny Candy Holders are a fun spring project that doubles as a sweet little treat container. With just a few simple supplies and a little creativity, kids can turn an ordinary container into an adorable bunny perfect for holding candy or small Easter treats.
Want to Save this Recipe or Activity?
Enter your email and we will send it straight to your inbox! You’ll also get the latest posts from Platein28!
By submitting this form, you consent to receive emails from Platein28.
Wondering why we recommend crafts during cooking time? Read more about the idea behind crafting while dinner cooks.

Why We Love this Craft
- An up-cycled craft– We LOVE repurposing our recyclables, so we came up with an idea to make adorable Easter tins out of our empty tuna cans. Note: If you love up cycled crafts, be sure too also check out our Tin Can Pencil Holder, Egg Carton Treasure Chest and Tissue Box Piggy Banks.
- Seriously cute! Who doesn’t love a cute bunny craft?!
- Simple for all ages– This was a very simple craft that my kids were able to do almost completely on their own. The only time we needed to get involved was when it came time to use the hot glue gun.
- Fine motor skills. Our Easter bunny candy holders allow kids to put developing cutting, folding, and painting skills to good use.
✂️ Supplies
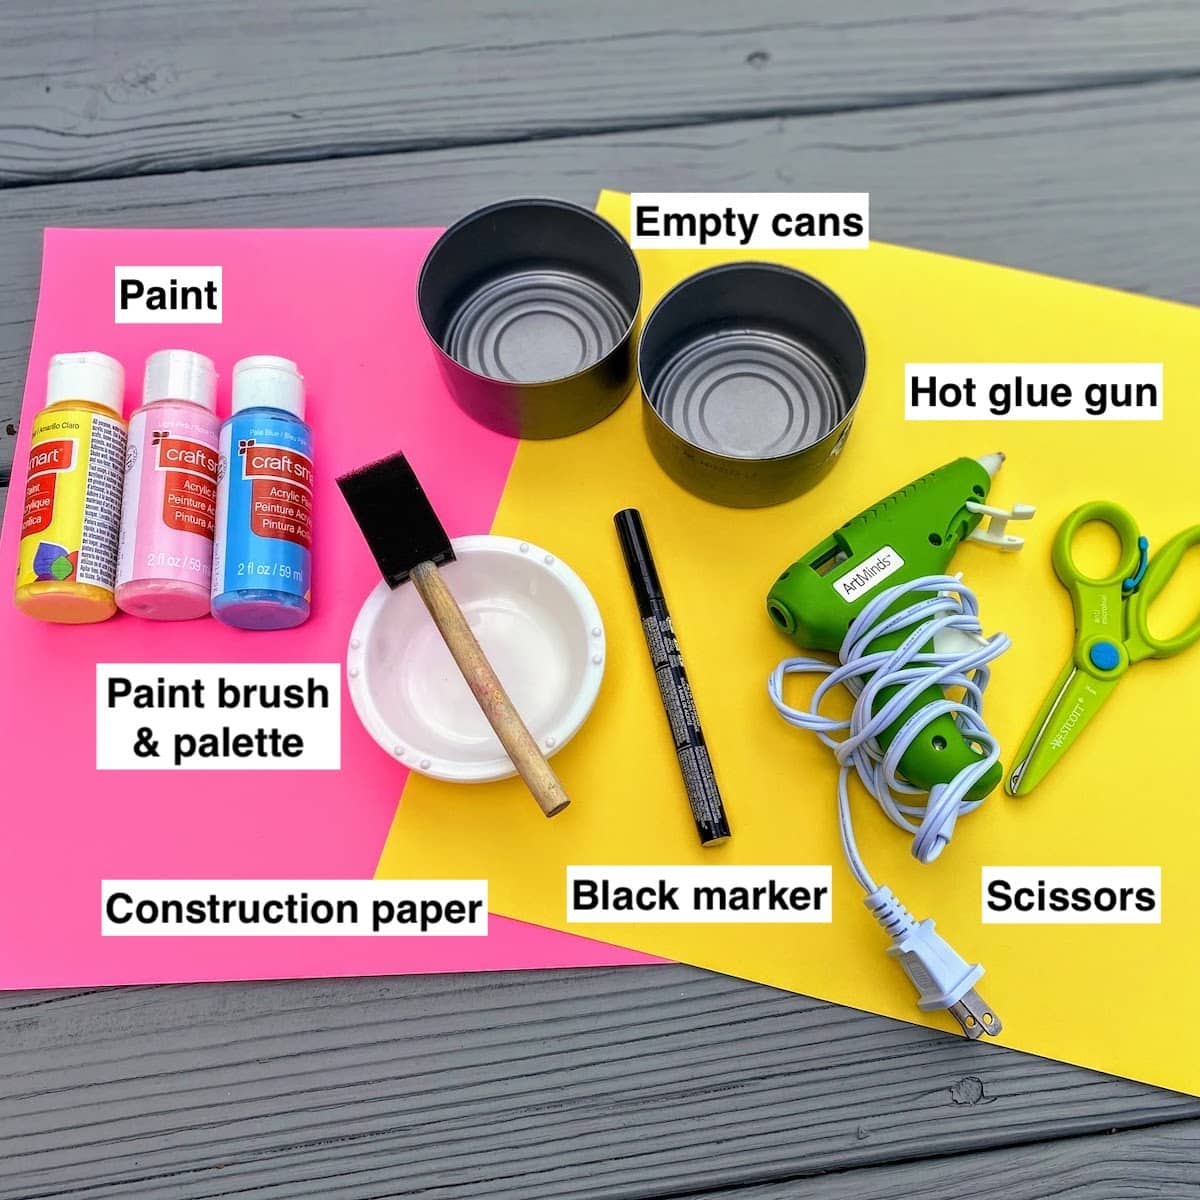
Notes on Supplies:
Empty cans– These should be clean and dry. We used tuna cans leftover from our Stovetop Tuna Casserole. To clean empty cans, we recommend washing them with soap and then soaking them in soapy water for a few extra minutes.
Scissors– We love these kid-friendly scissors by Westcott.
Paint– We recommend Acrylic paint for our Easter tins.
📝 Instructions
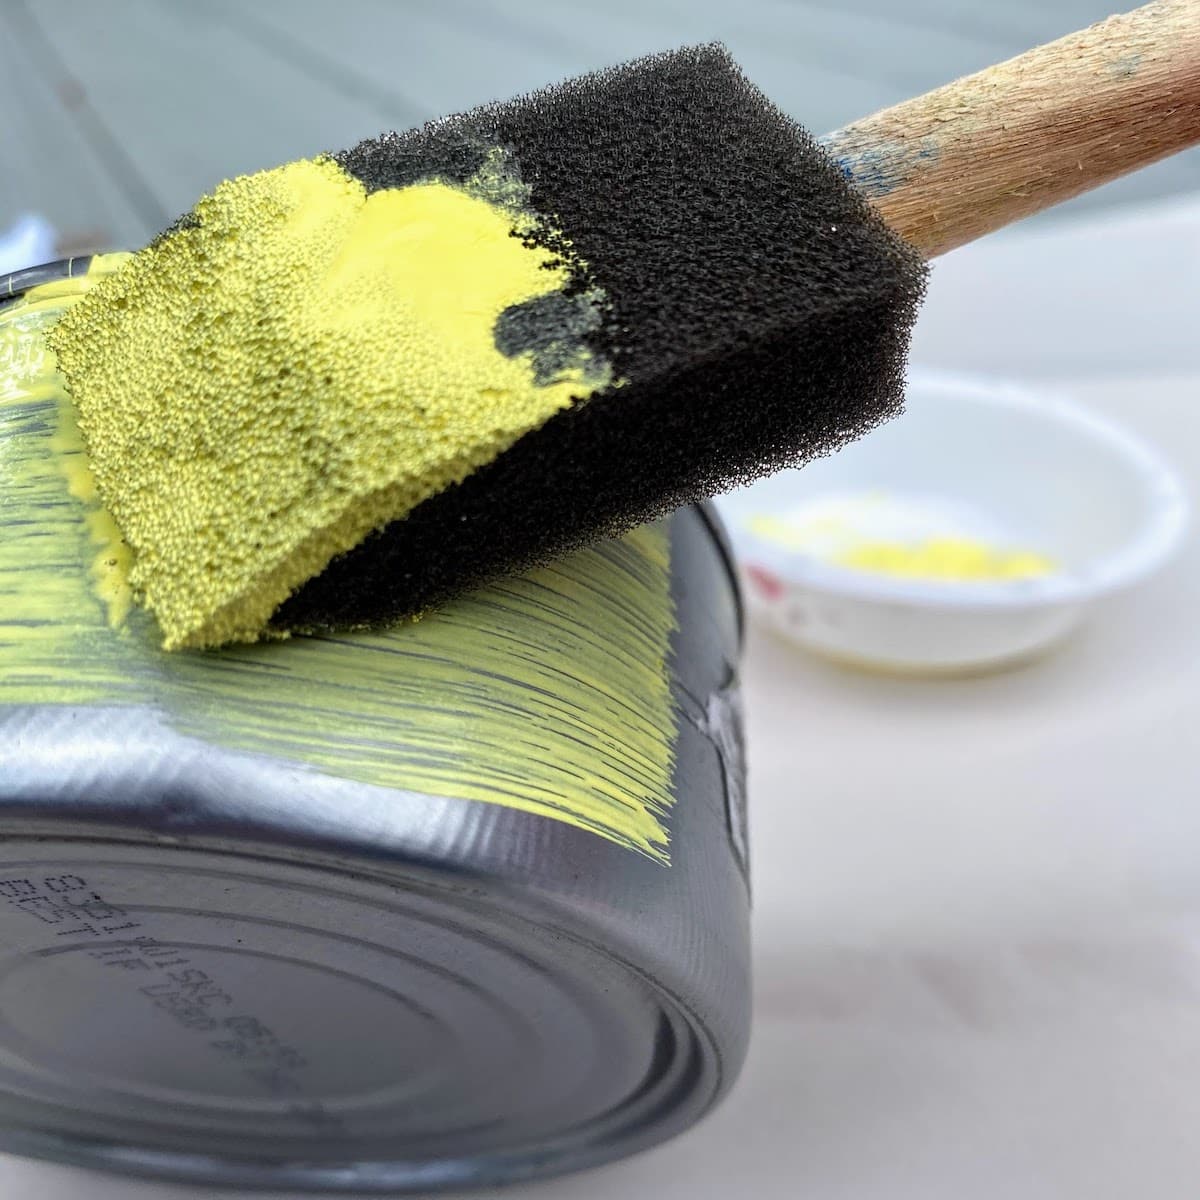
Step 1: Paint the outside of your can and set aside to dry.
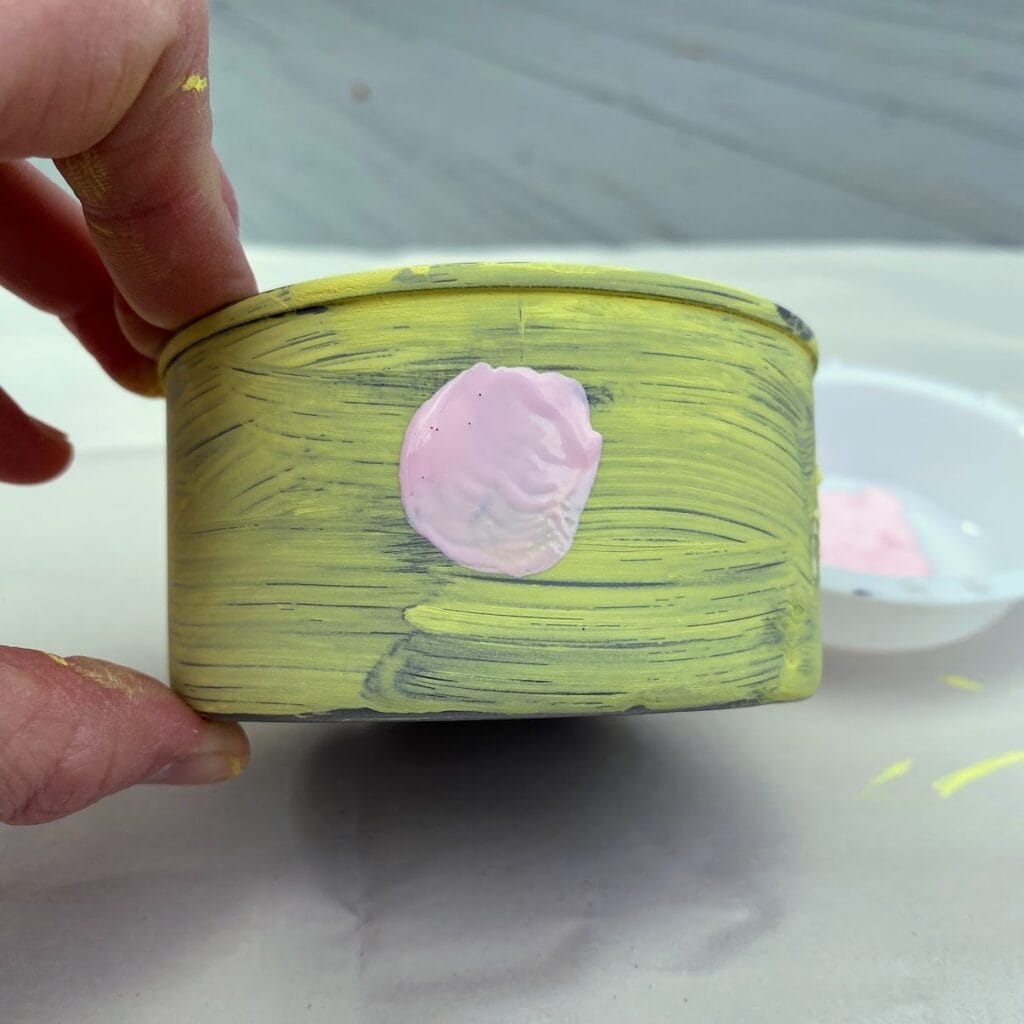
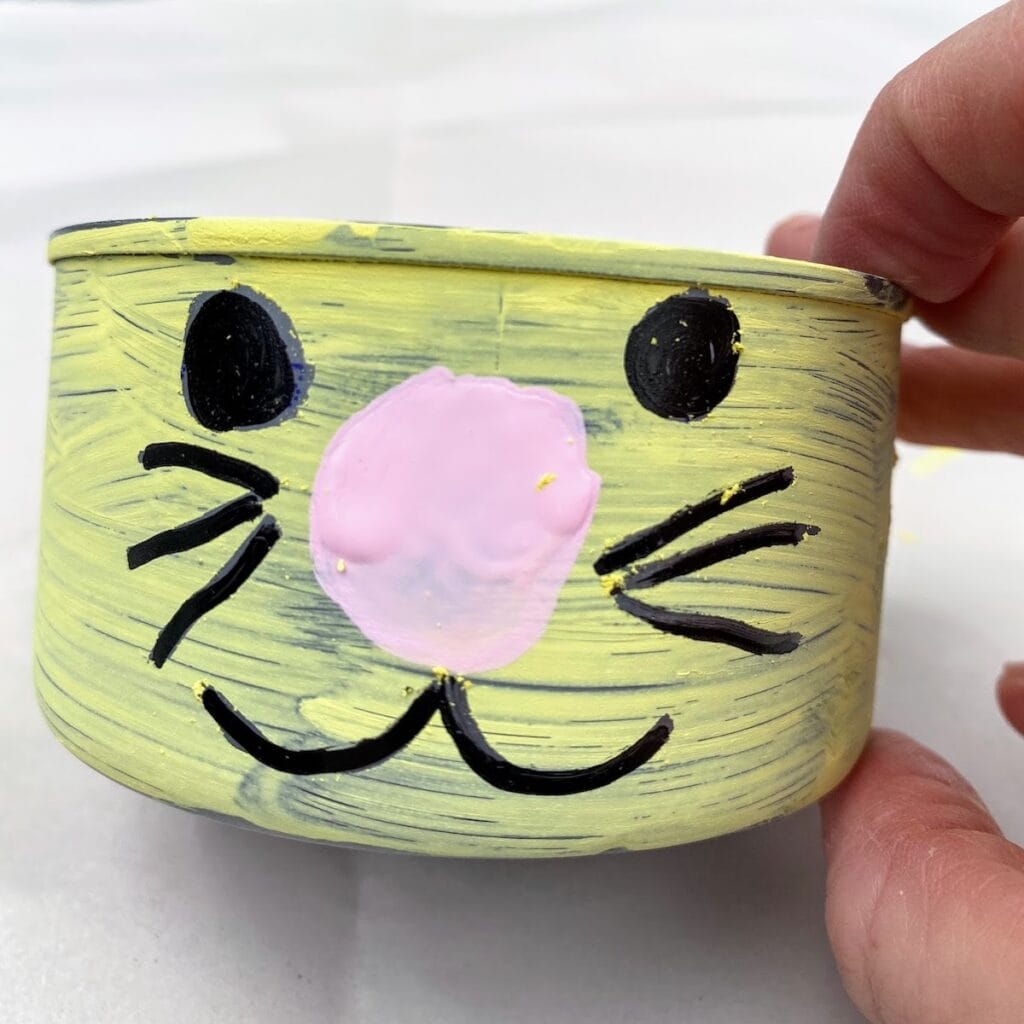
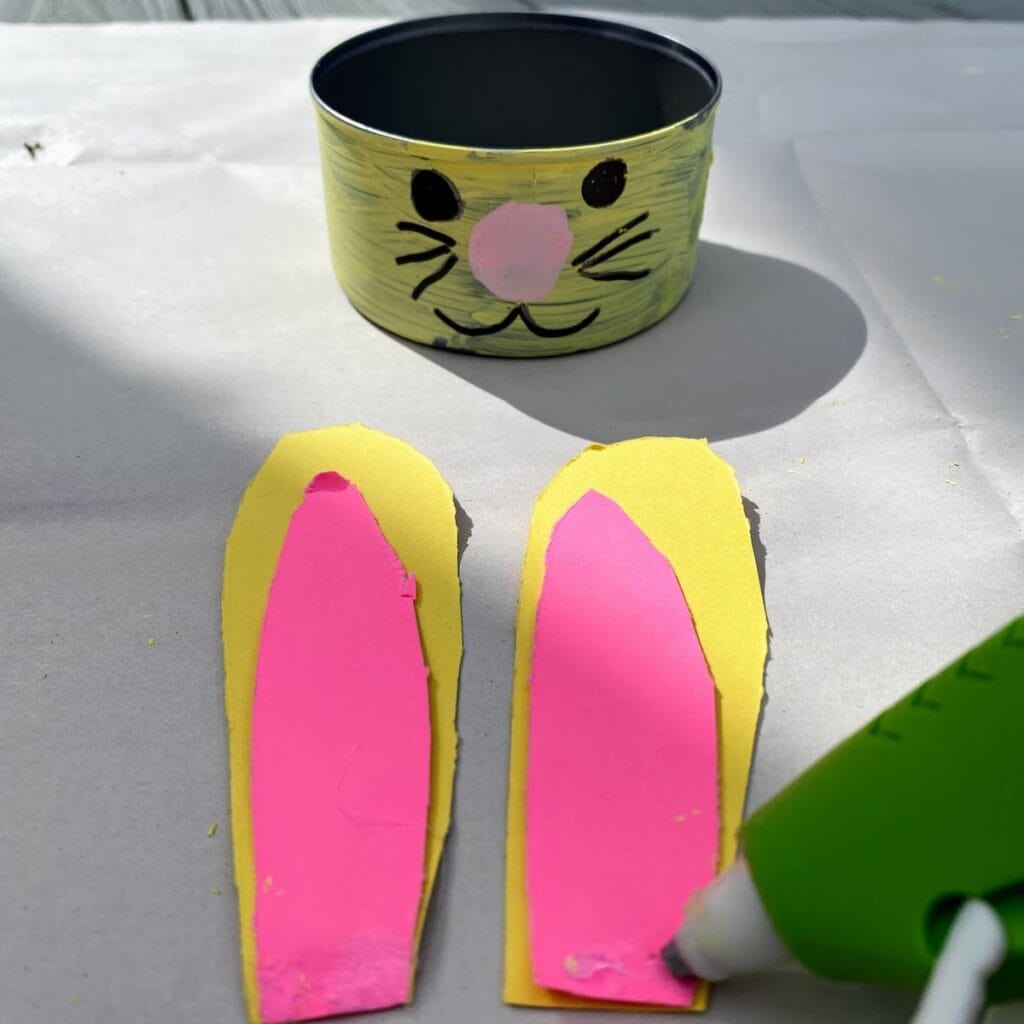
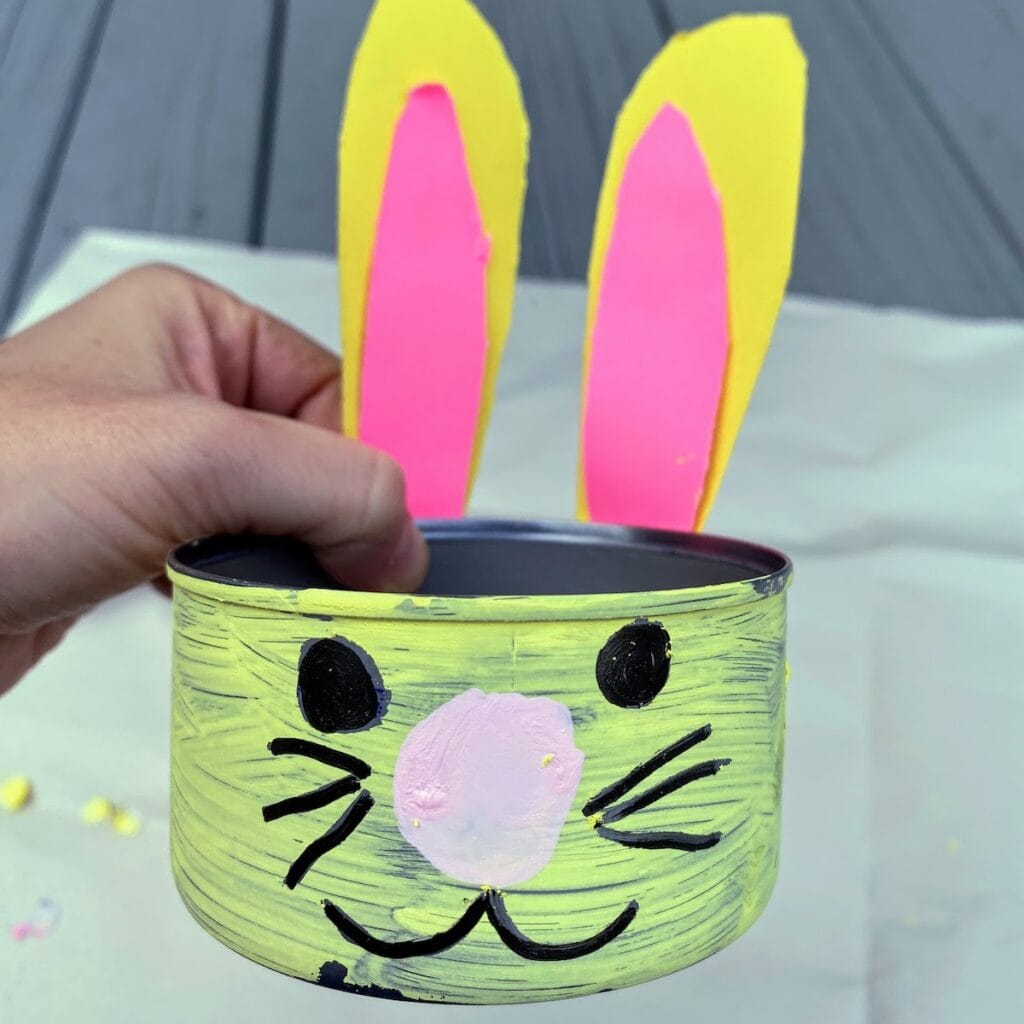
Step 2: Once your painted can is dry, paint a small round circle (your bunny’s nose!) in the middle of the front of your painted can. Using a black permanent marker, draw your bunny’s eyes, whiskers and mouth as pictured.
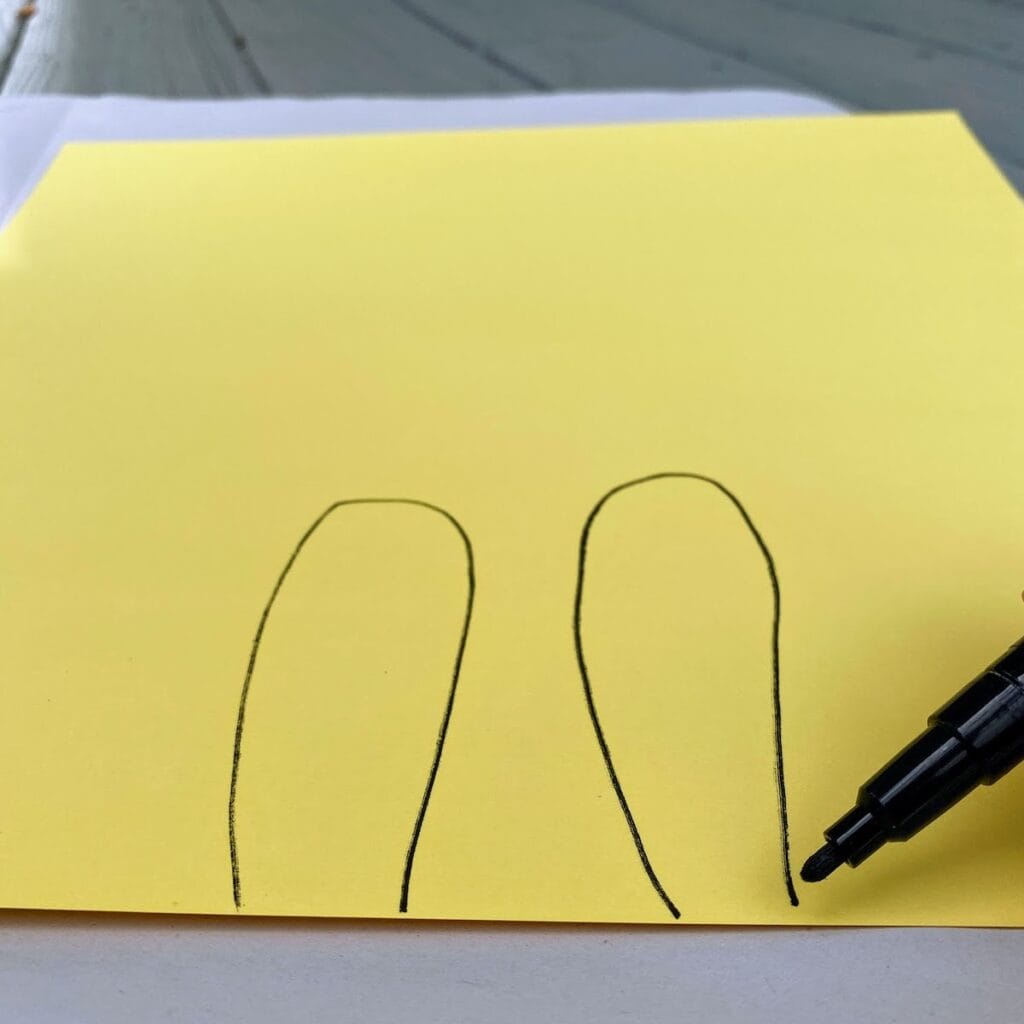
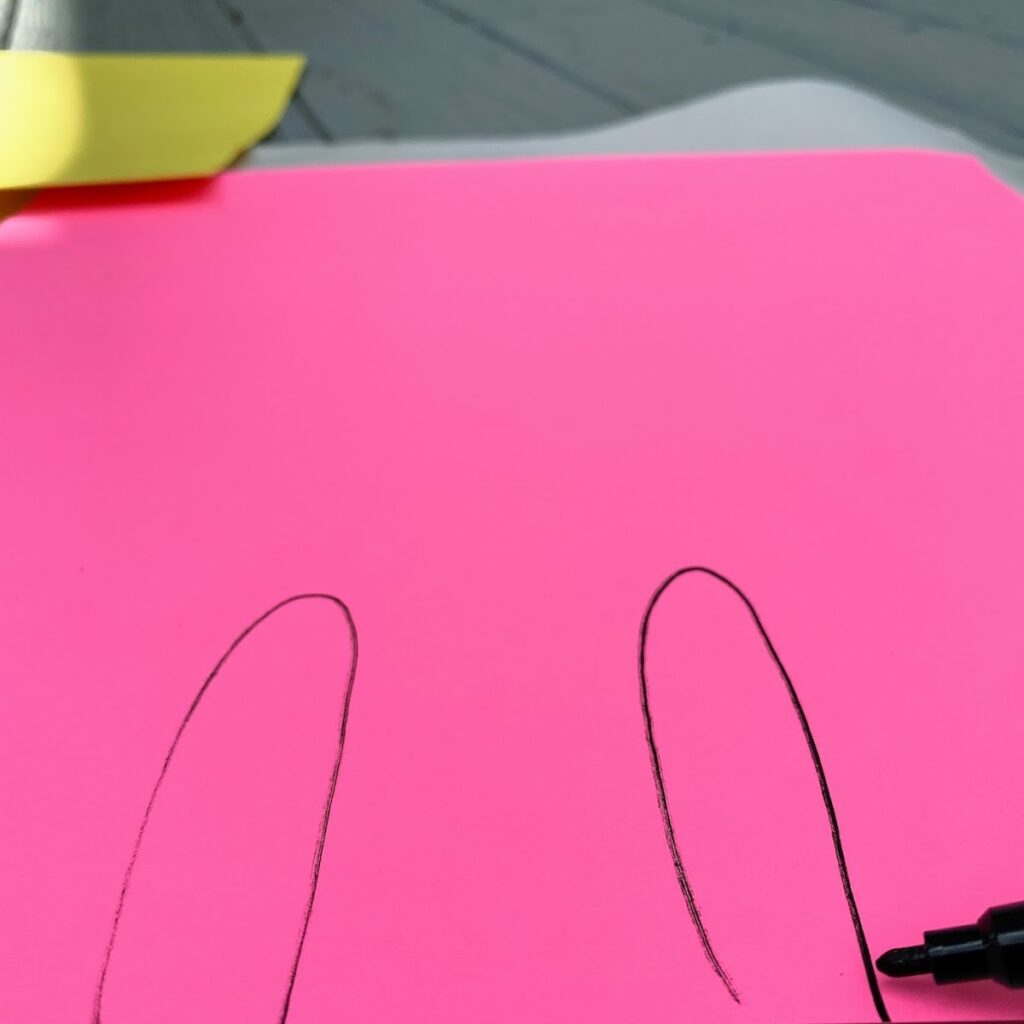
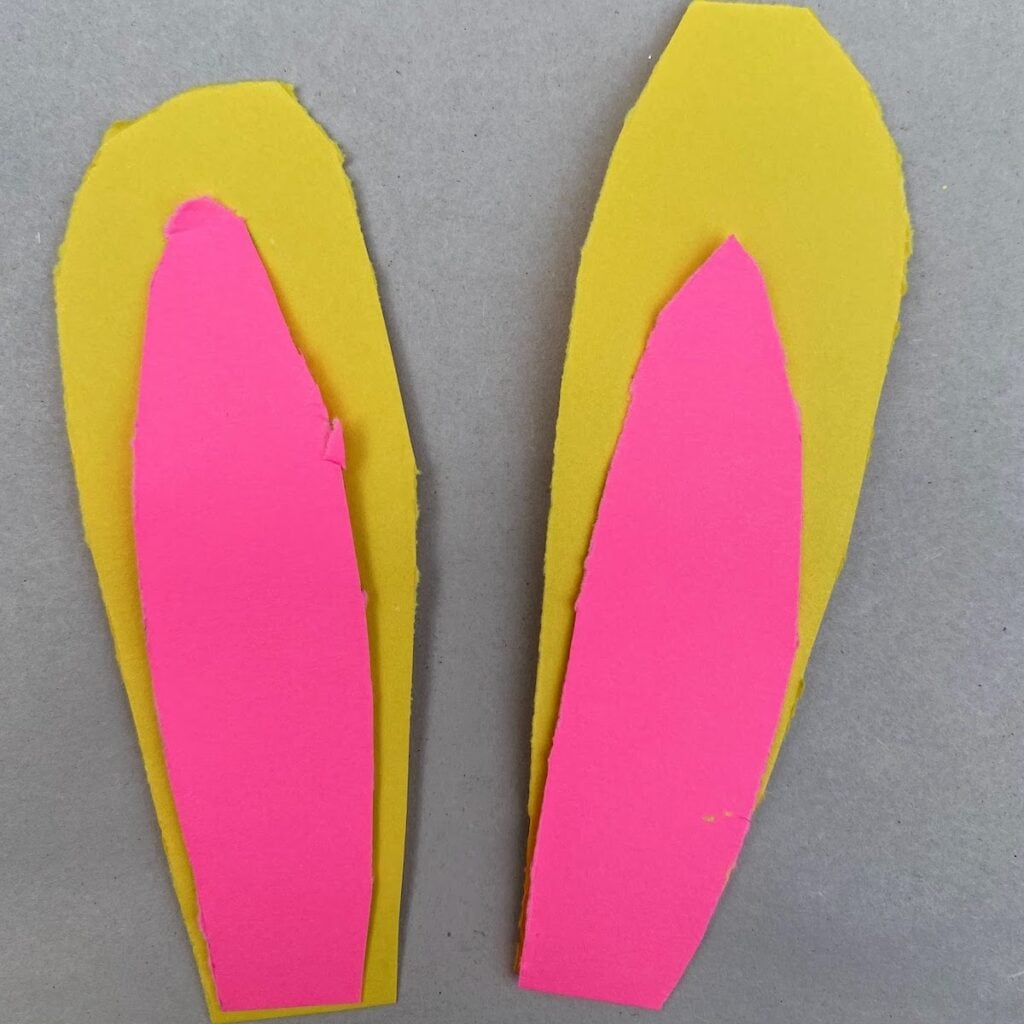
Step 3: Draw and cut out two bunny ears from construction paper. Cut out two smaller ear-shaped pieces of a different color. Glue the smaller pieces on top of the larger cutout ears.
Step 4: Using your hot glue gun, glue ears to the backside of your tin can. (Kids might need help with this step!)
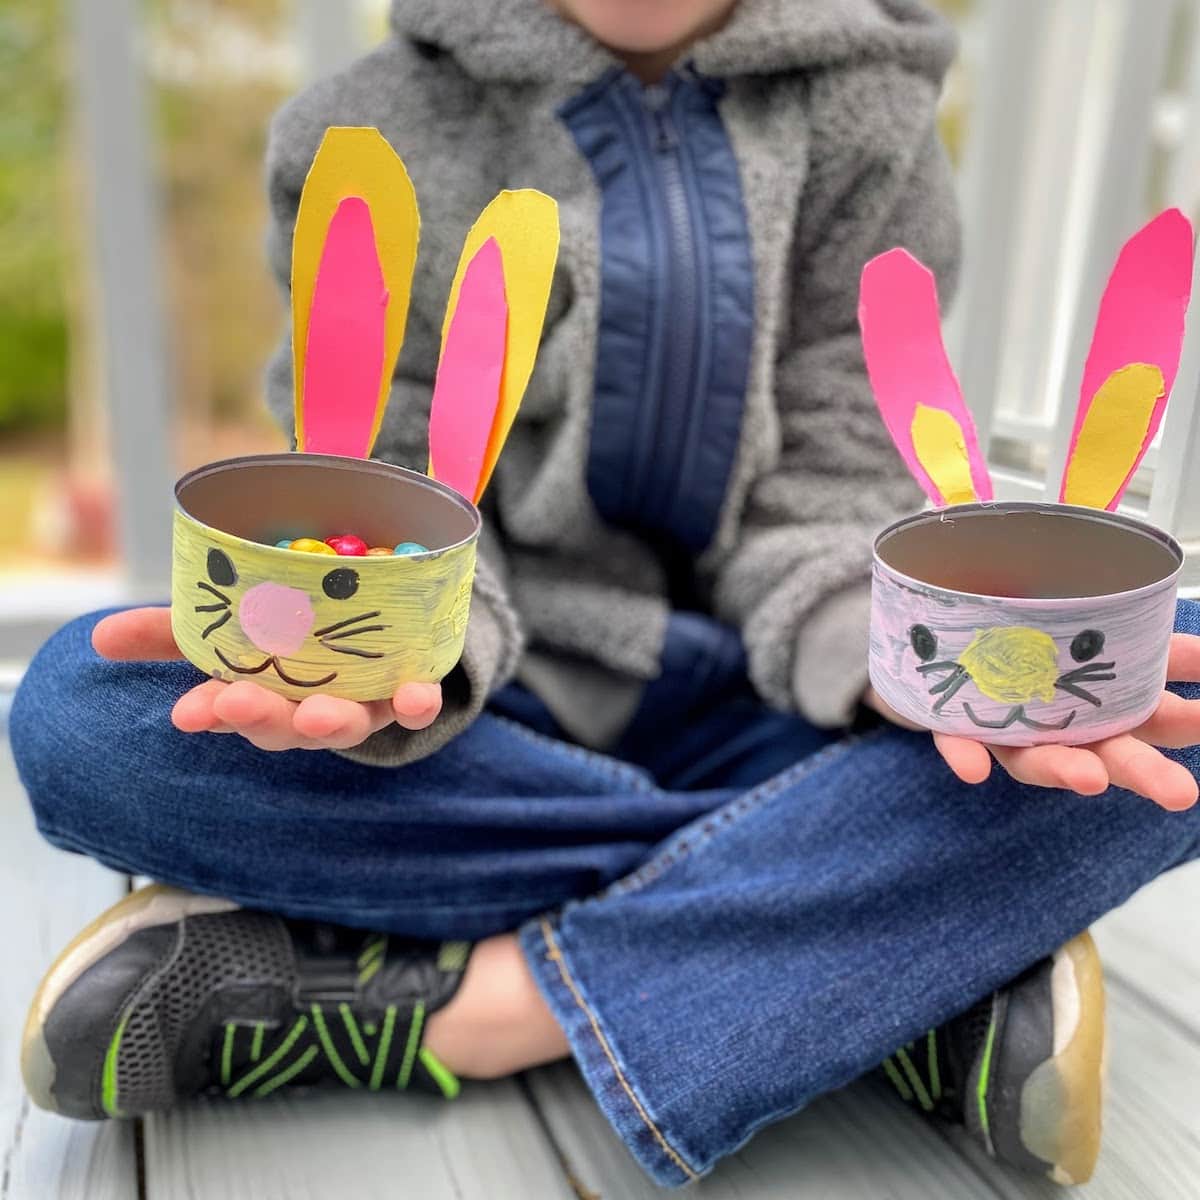
Now fill your Easter tins with your favorite Easter candy!
✏️ Expert Tips & Tricks
- Be sure to wait until your painted can is completely dry before drawing on the bunny’s facial features. Otherwise the marker and paint will blur together.
- While we used 7 oz tuna cans for our Easter craft, but just about any other empty container should work!
- These Easter treat holders can be used to hold candy or any other small snack, like peanuts, pretzels or small pieces of fruit.


Want more crafts?
Sign up below to get crafts and recipes straight to your inbox plus make sure to follow on your favorite social!

🐰 DIY Easter Bunny Candy Holder Craft for Kids
Equipment
- 1-2 Paint palette(s)
Supplies
- 2 Empty tuna cans (cleaned and dried )
- Acrylic paint (we used pink and yellow)
- Construction paper (we used pink and yellow)
- Black permanent marker
Instructions
- Paint the outside of your can and set aside to dry.
- Once your painted can is dry, paint a small round circle (your bunny's nose!) in the middle of the front of your painted can. Using a black permanent marker, draw your bunny's eyes, whiskers and mouth as pictured.
- Draw and cut out two bunny ears from construction paper. Cut out two smaller ear-shaped pieces of a different color. Glue the smaller pieces on top of the larger cutout ears.
- Using your hot glue gun, glue ears to the backside of your can. (Kids might need help with this step!)
Video
Notes
- Be sure to wait until your painted can is completely dry before drawing on the bunny’s facial features. Otherwise the marker and paint will blur together.
- While we used 7 oz tuna cans for our Easter tins, but just about any other empty container should work!
- Easter tins can be used to hold candy or any other small snack, like peanuts, pretzels or small pieces of fruit.