

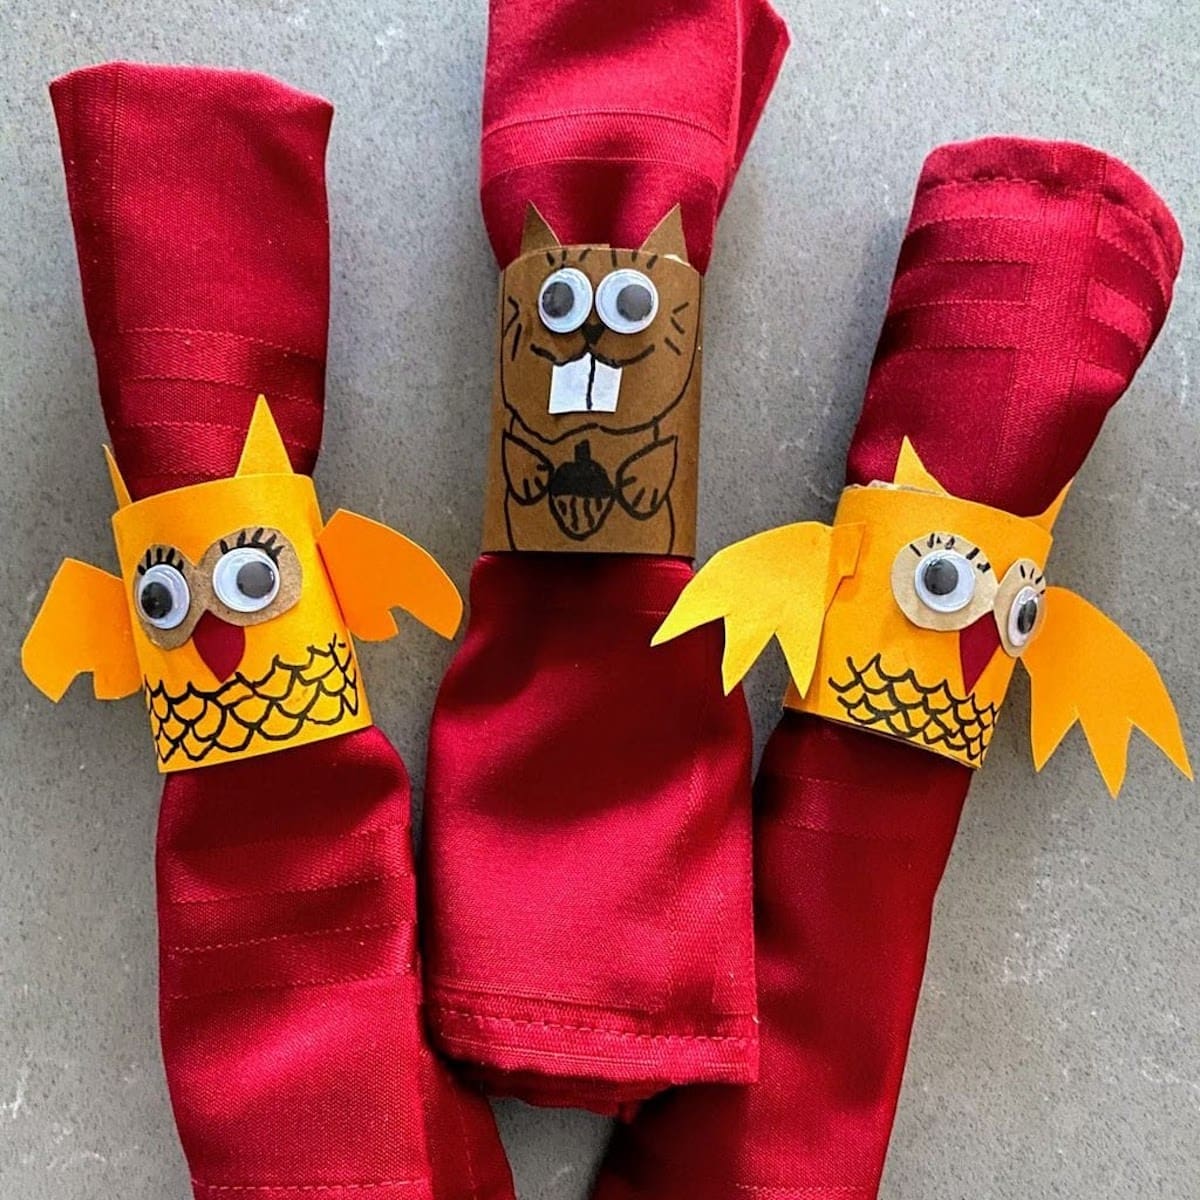
The Most Adorable DIY Napkin Rings
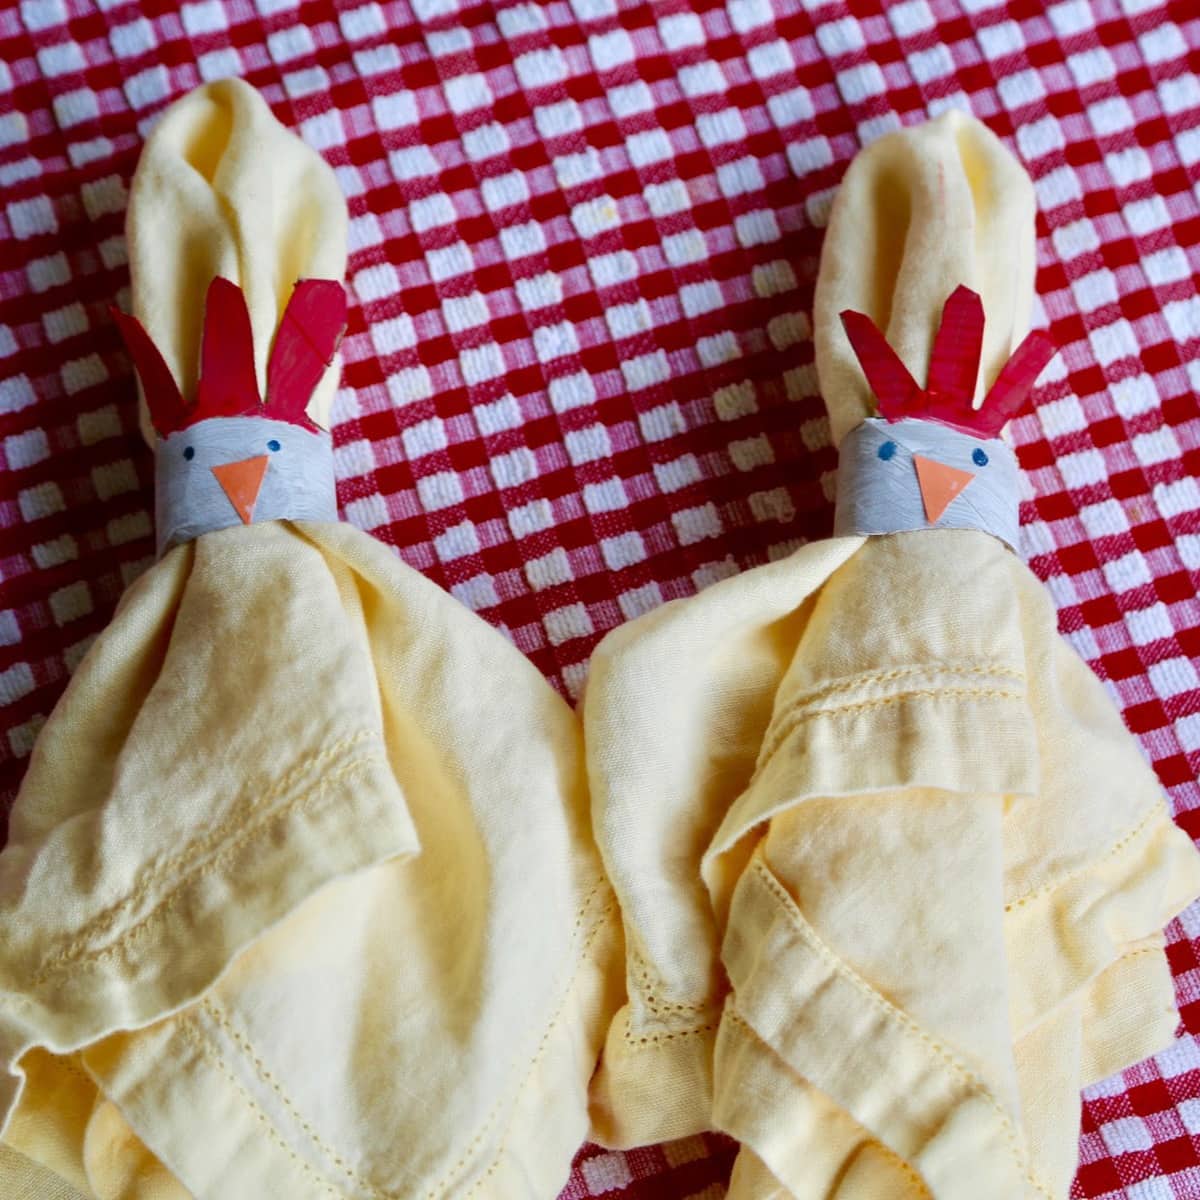
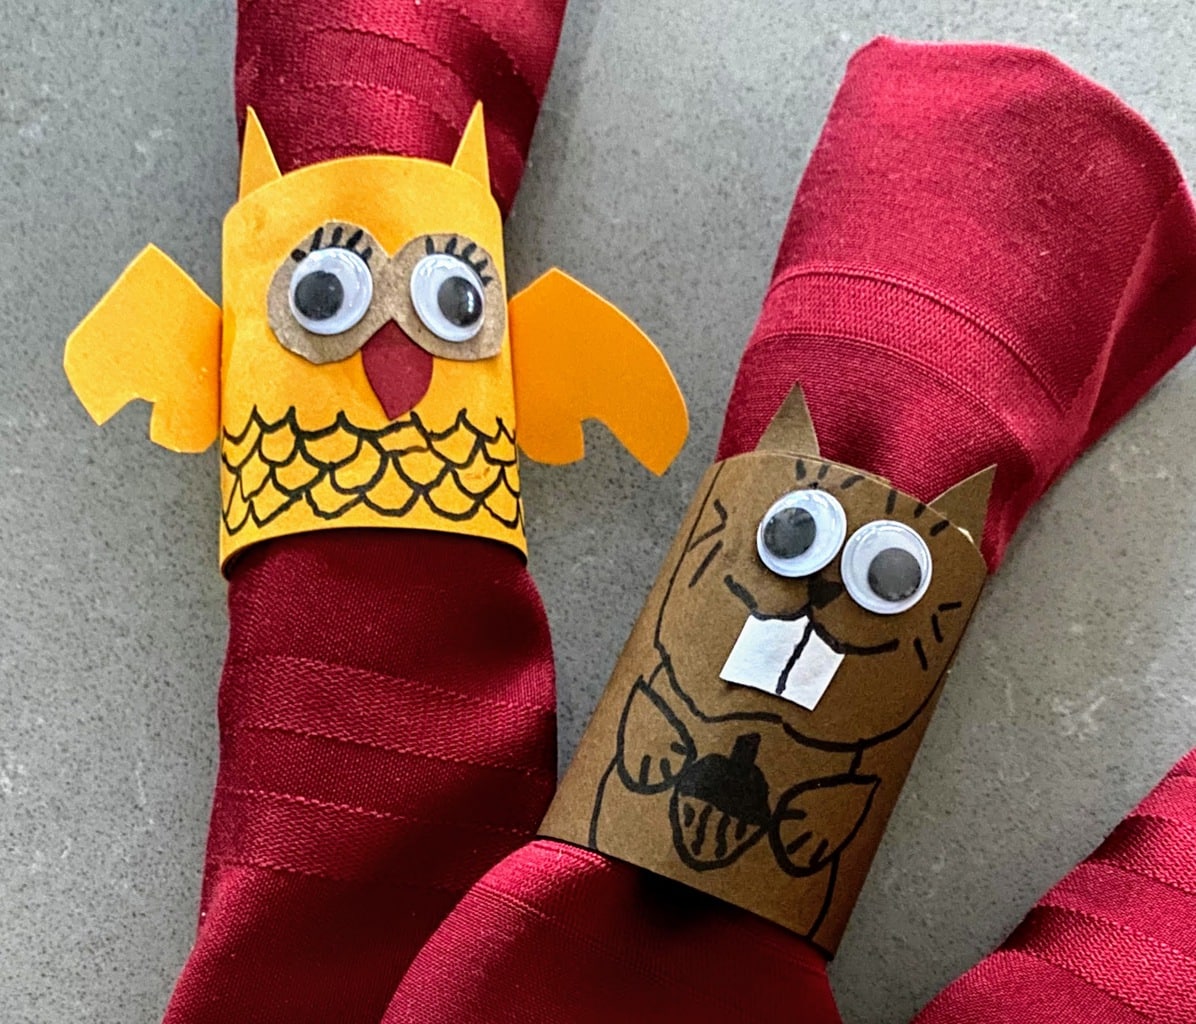
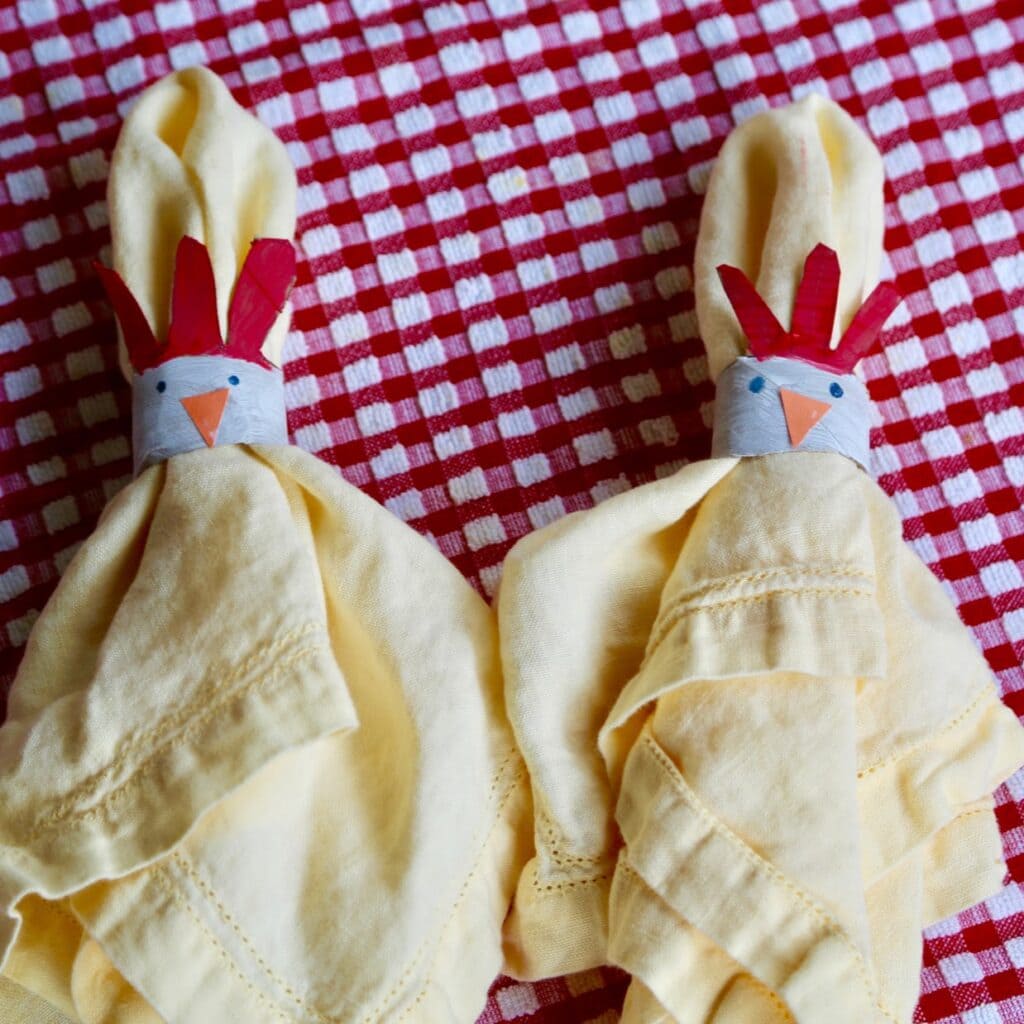
We love jazzing up our holiday table! There are so many ways to decorate our table setting or home for holidays, and this is often a great task for our kids to take the lead on! This week we asked our kids to create some adorable critter DIY napkin rings! Inspired by our Chicken Head Napkin Ring craft, the kids decided to create squirrel and owl napkin rings in honor of the fall and winter seasons!
Want to Save this Recipe or Activity?
Enter your email and we will send it straight to your inbox! You’ll also get the latest posts from Platein28!
By submitting this form, you consent to receive emails from Platein28.
Note: This post contains affiliate links.
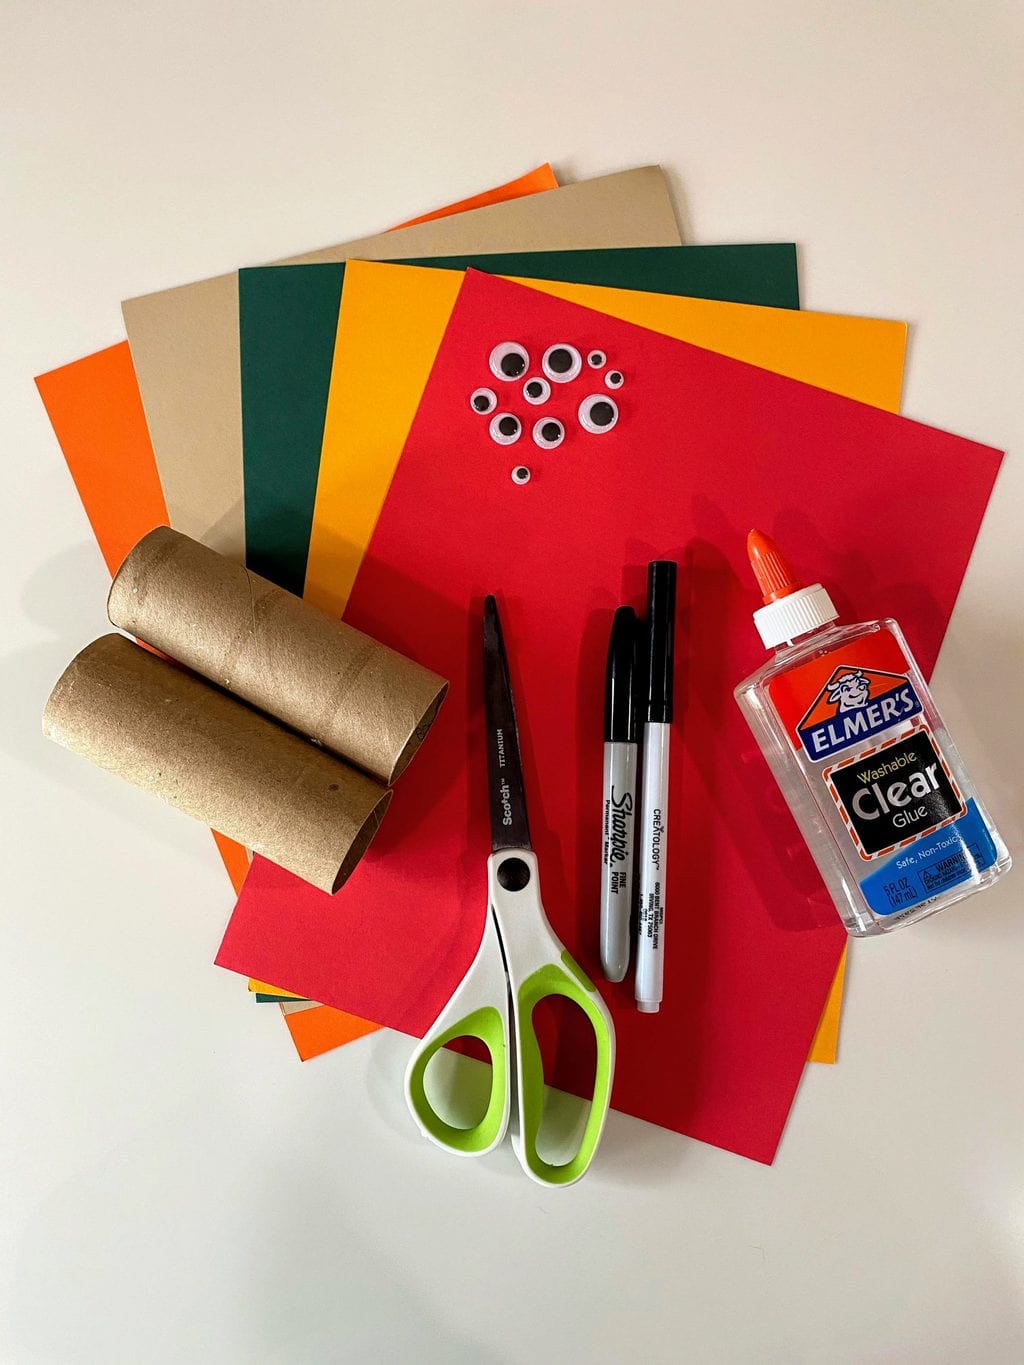
Transform Toilet Paper Rolls into napkin rings
We love crafting with materials that would otherwise be recycled or thrown away. And toilet paper rolls seem like the perfect tool for making napkin rings. TP rolls are easy to paint, cut, or mold into different shapes. And it’s fairly easy to glue other paper products or craft items (like google eyes!) to them. With a diameter of 1.5 inches, they are also the perfect size for holding a fabric or paper napkin.
How to Make an Adorable DIY Napkin Ring
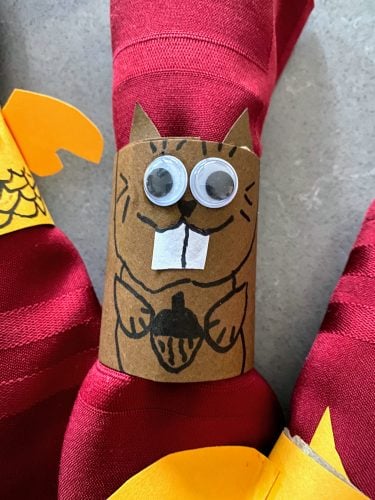
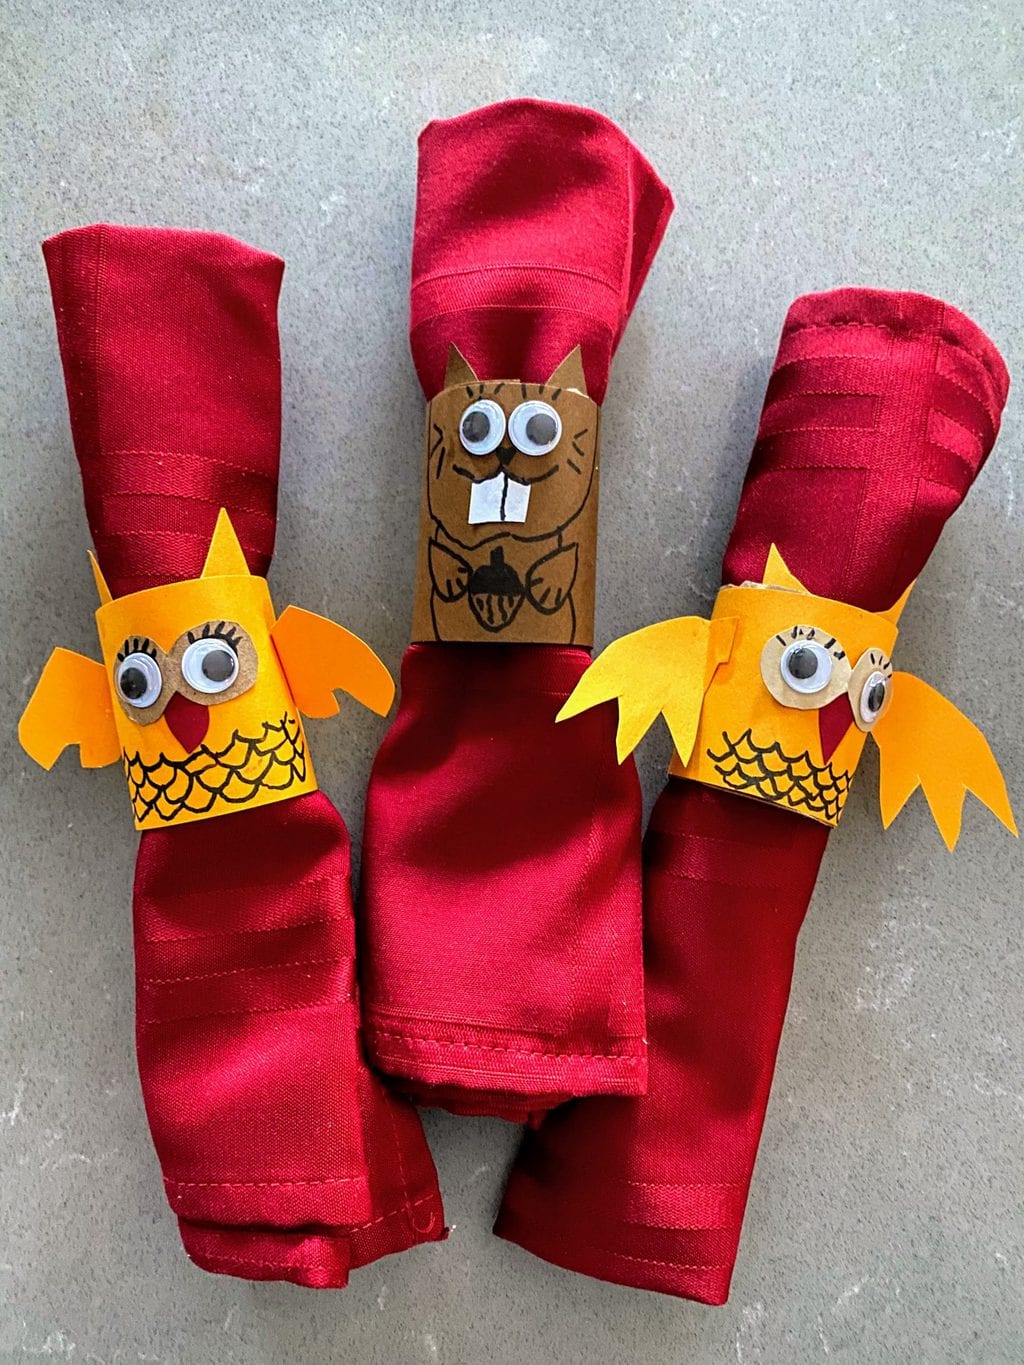
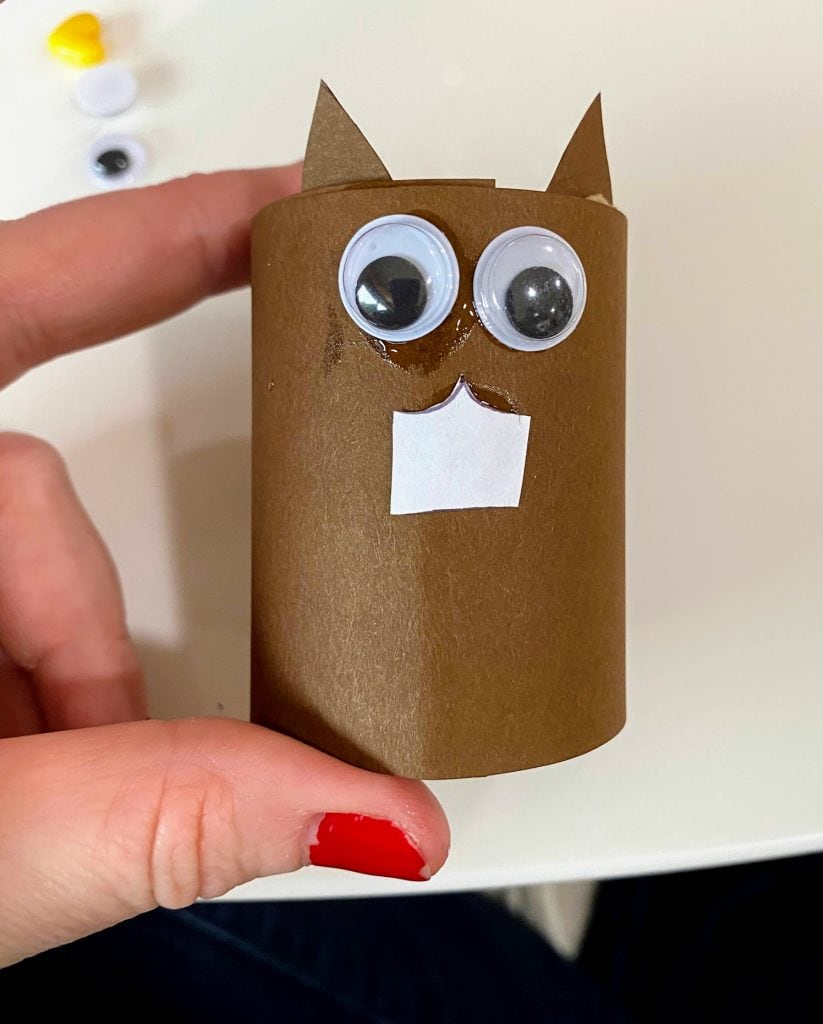
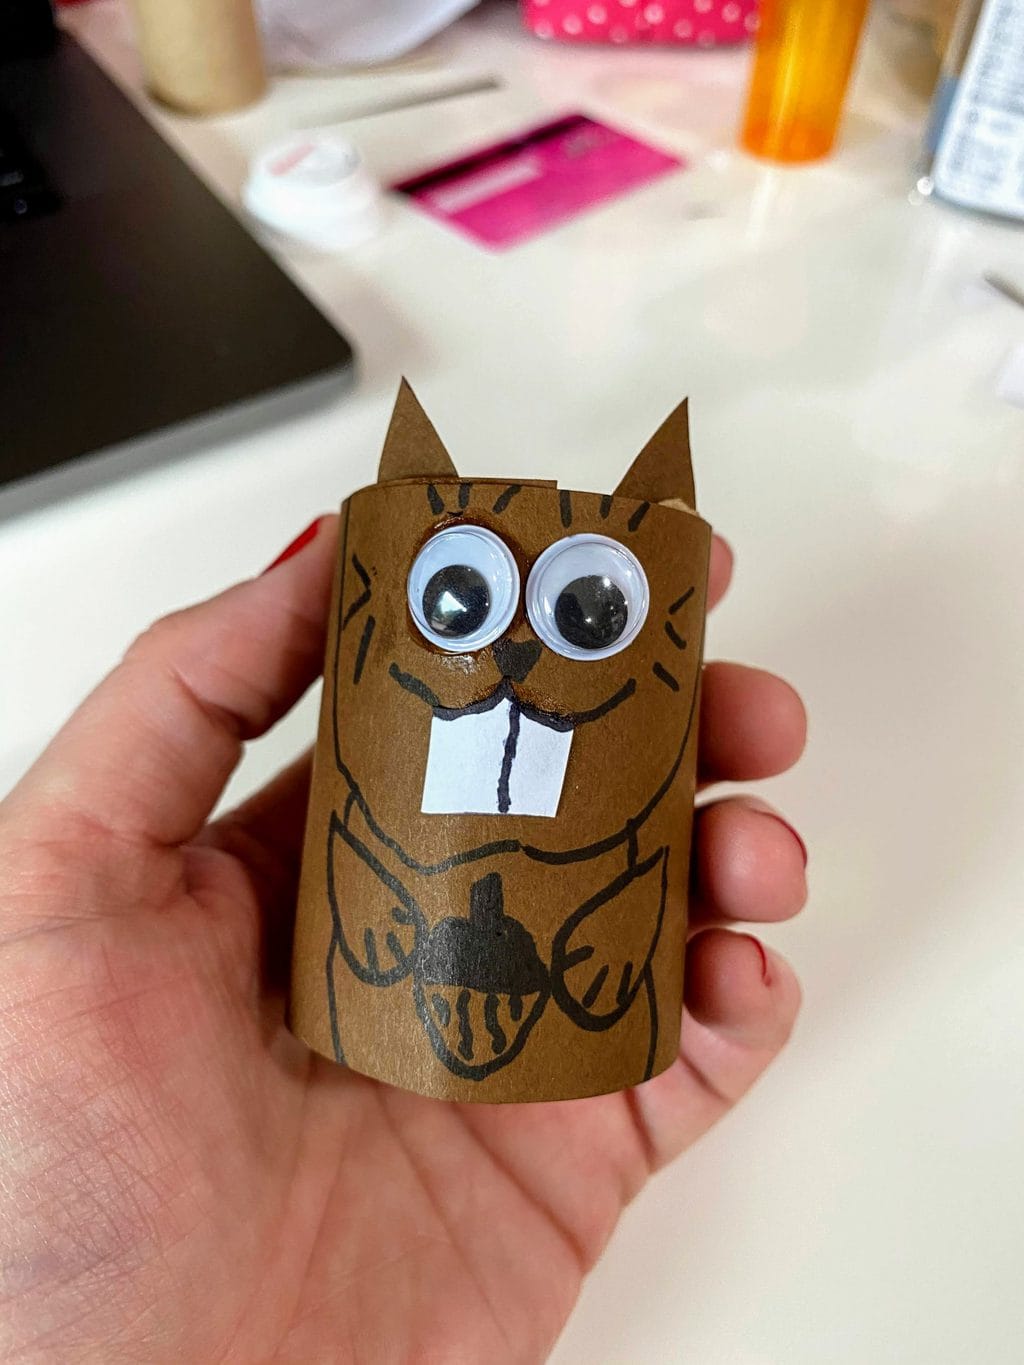
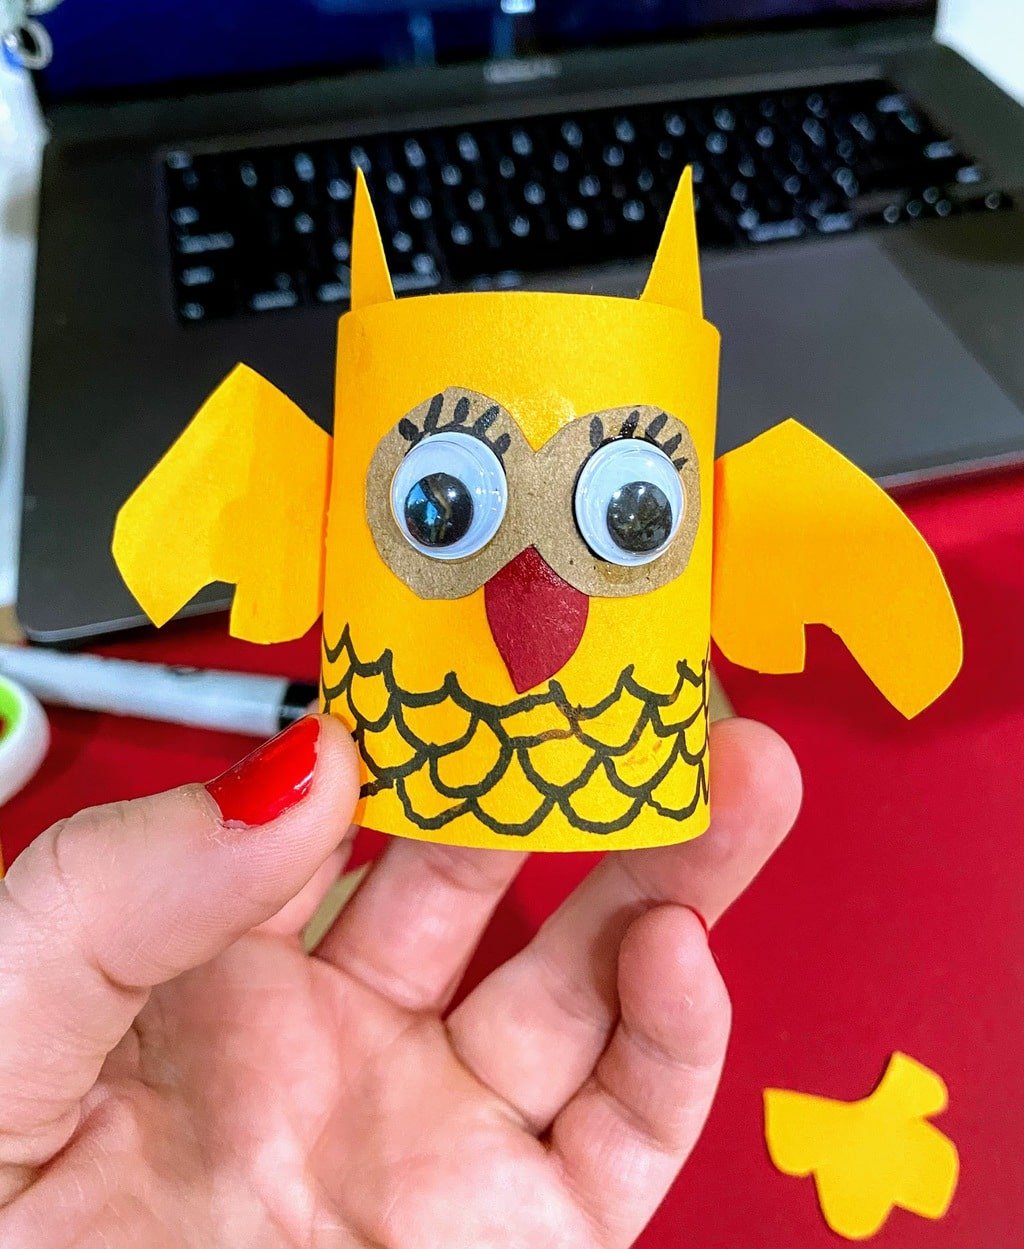
Creating a napkin ring out of a toilet paper roll is quite simple. The kids wanted to make animals. So, our goal was to transform our TP rolls into an adorable owl and squirrel. We focused on the face the most, and then added wings and ears as finishing touches. The main components of our napkin rings were:
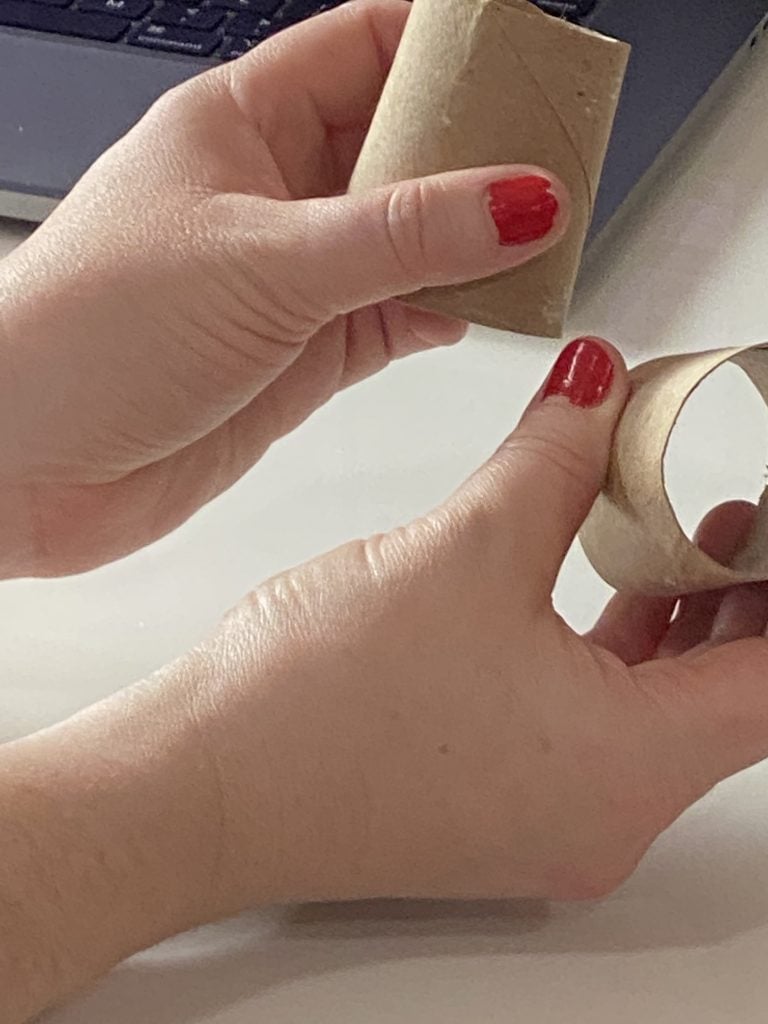
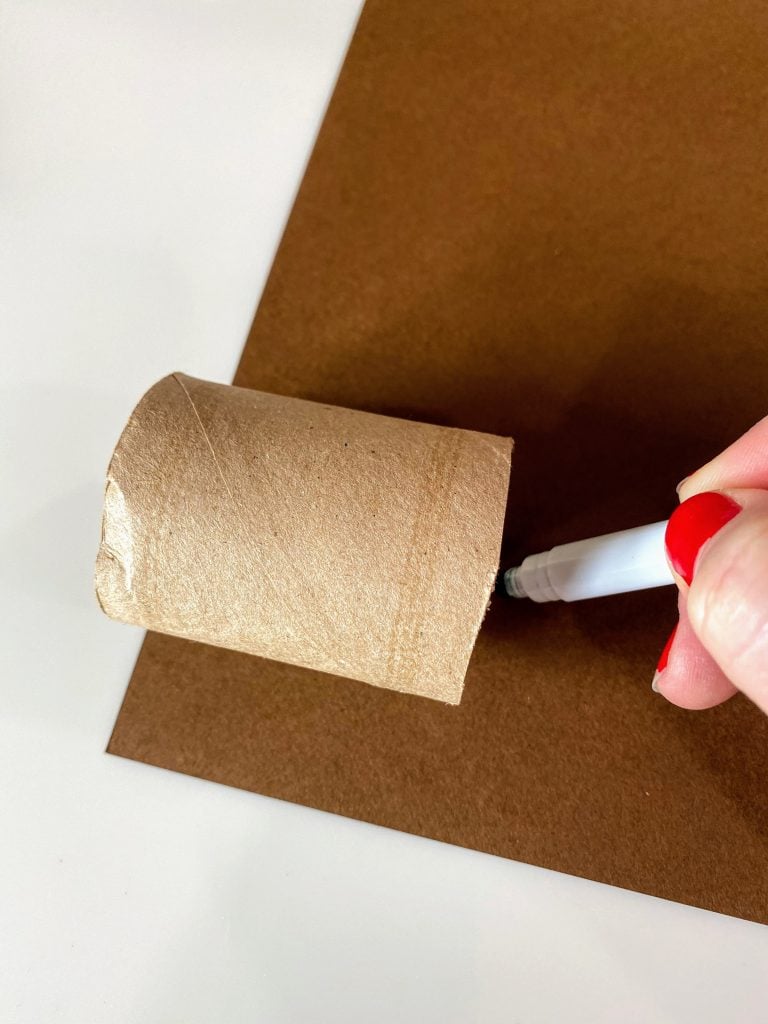
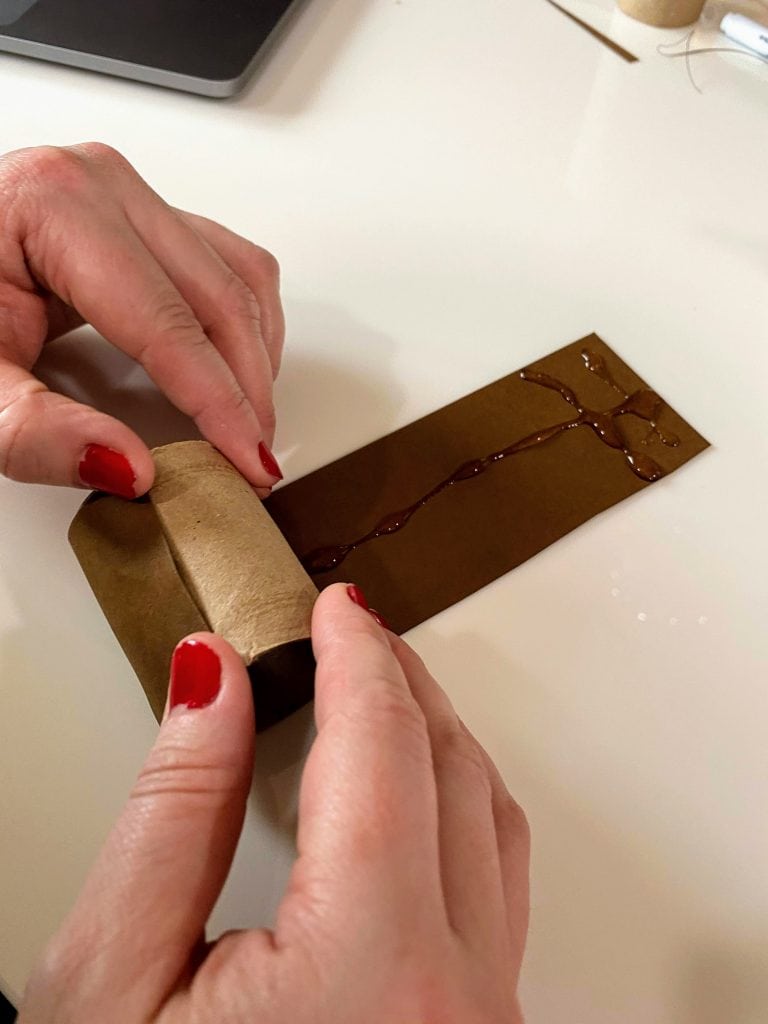
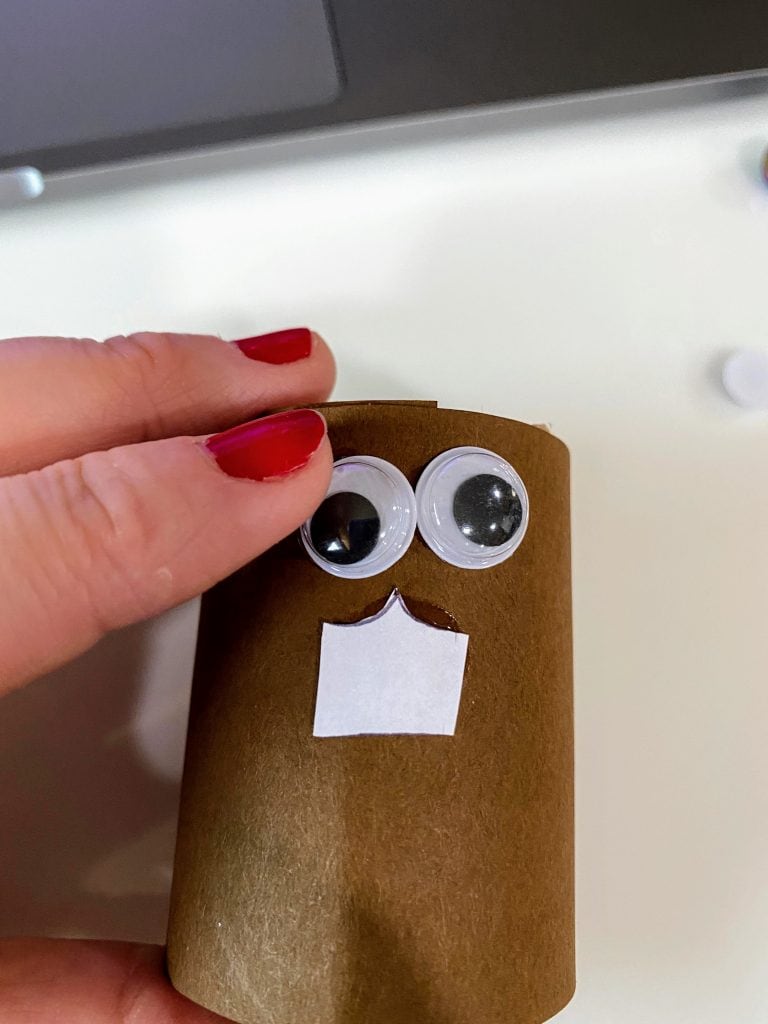
- Body. To create our critter’s body, we simply cut a TP roll in half and covered it with colored construction paper (yellow paper for our owl and brown paper for our squirrel).
- Face. Our animals’ facial features are the primary focus of the napkin ring. We added googly eyes, hand drawn features (like eyelashes), a beak for our owl, and teeth for our squirrel.
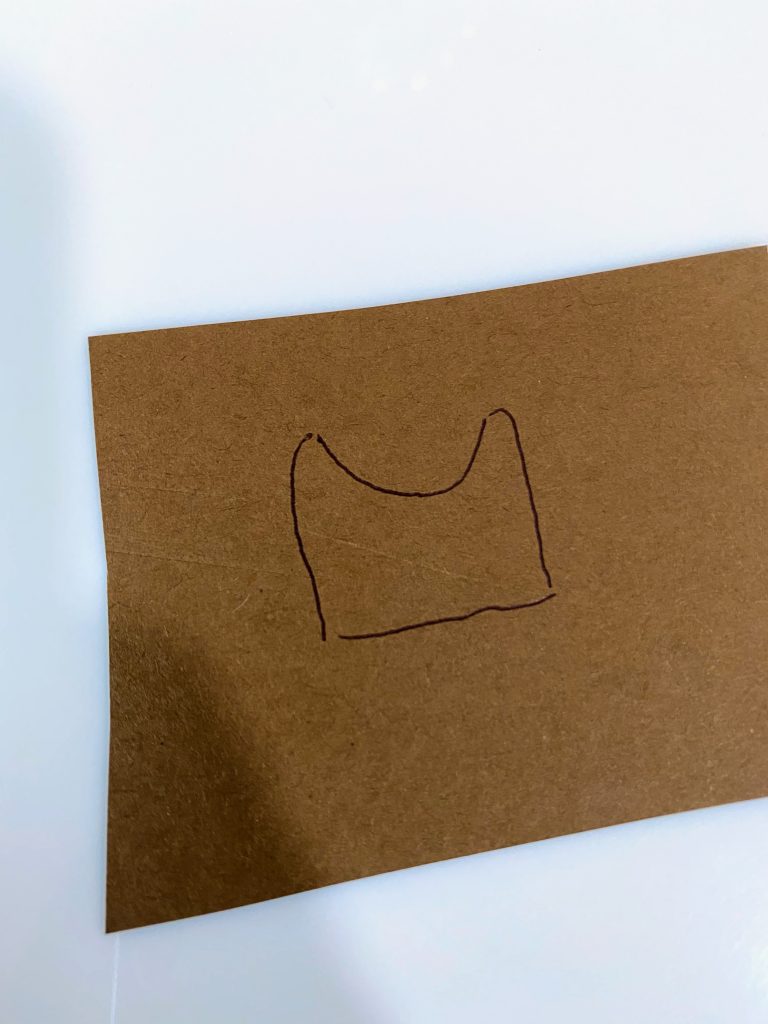
- Ears & Wings. We used colored construction paper to cut out and glue on our animals’ ears and wings.
What else can you use to make napkin rings?
Of course, there are plenty of other recyclable materials you can use to make napkin rings. Here are some other bloggers’ cute ideas for napkin rings:
- Shower curtain rings, like these Easy to Make Sunflower Napkin Rings.
- Paper towel rolls and twine, like DIY Inspired’s Repurposed Paper Towel Roll Napkin Ring.
- Pom Poms and hair ties like these amazing Pom Pom Napkin Rings.
DIY Napkin Rings for all holidays and seasons!
While we intend to use our squirrel and owl napkin rings for Thanksgiving dinner, you can make all sorts of toilet paper roll napkin rings for other holidays and seasons. Check out some of our ideas:
Fall, Halloween & Thanksgiving: jack o’ lanterns, monsters, mini turkeys, acorns, mini squash, pumpkins, leaves, corn harvest
Valentine’s Day: hearts, cupids
Winter & Christmas: mini Santas, reindeer, Christmas trees, ornaments, dreidels, presents, holly, candy canes, snowflakes, NYE top hat, NYE firework
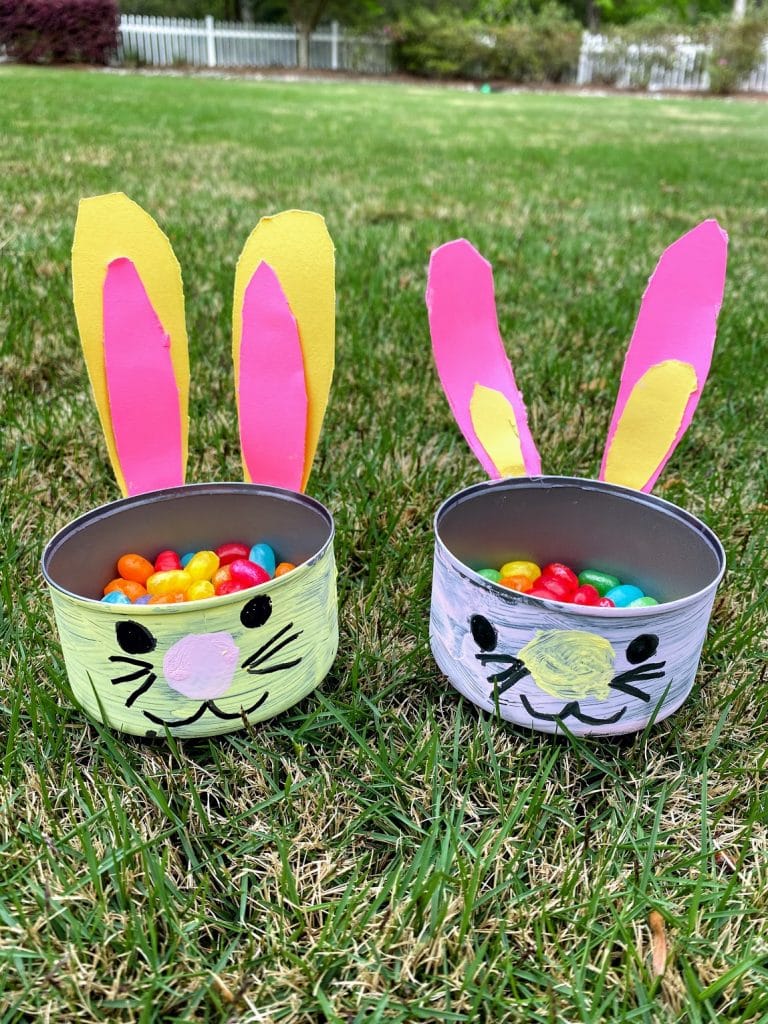
Spring & Easter: flowers, bunnies, Easter eggs, shamrocks, chicks, chickens (check our our Chicken Head Napkin Rings)
DISPLAY YOUR Adorable DIY Napkin Rings!
Once you complete your DIY napkin rings, be sure to display them! Kids can feel proud of their work, which will surely add to the festive mood of your meal.
You might also consider gifting your napkin rings to grandparents, neighbors or teachers.
💡Overview 💡
Skills supported: Fine motor (tracing, cutting, gluing, drawing), following instructions, math (composing shapes)
Note: This post contains affiliate links.
📝 instructions for DIY Napkin Rings 📝
Consider setting up the craft before cooking so kids can get to work right away.
-
SQUIRREL!
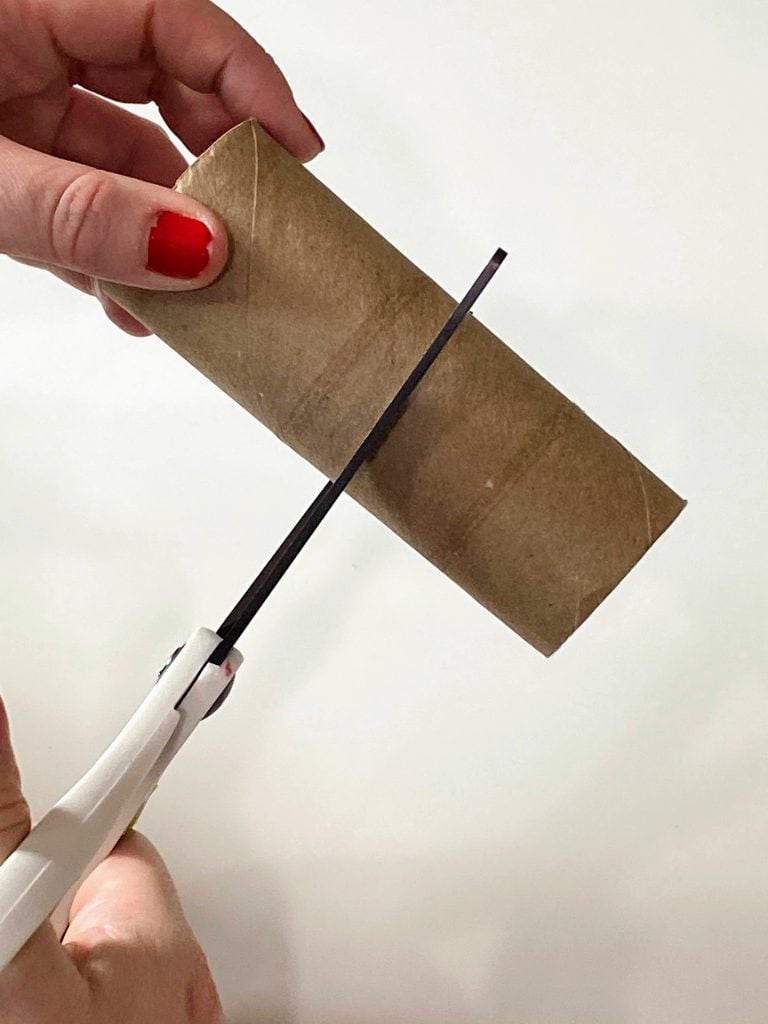
- Cut and Cover a TP Roll. Start by cutting an empty TP roll in half.* Measure the width of your TP roll on brown paper and mark it with a sharpie. Cut out a strip of paper, add glue to the strip, and roll your TP roll along it so the paper covers the whole thing.
OWL!
- Cut and Cover a TP Roll! Start by cutting an empty TP roll in half.* Measure the width of your TP roll on yellow paper and mark it with a sharpie. Cut out a strip of paper, add glue to the strip, and roll your TP roll along it so the paper covers the whole thing. [see squirrel pictures above]
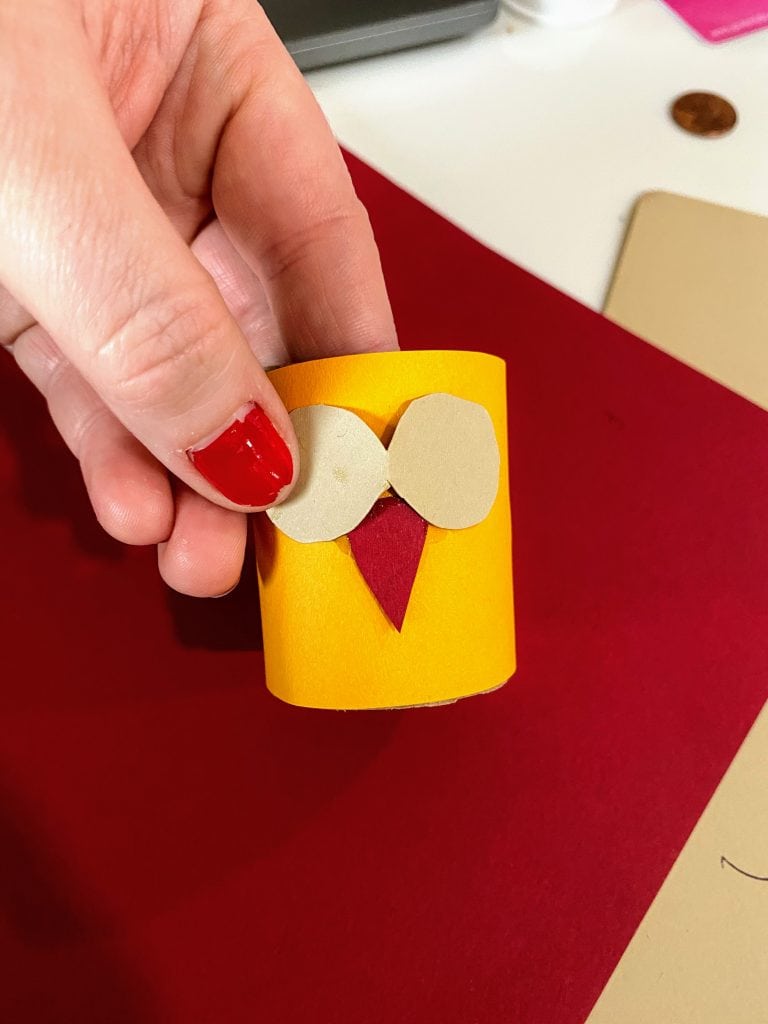
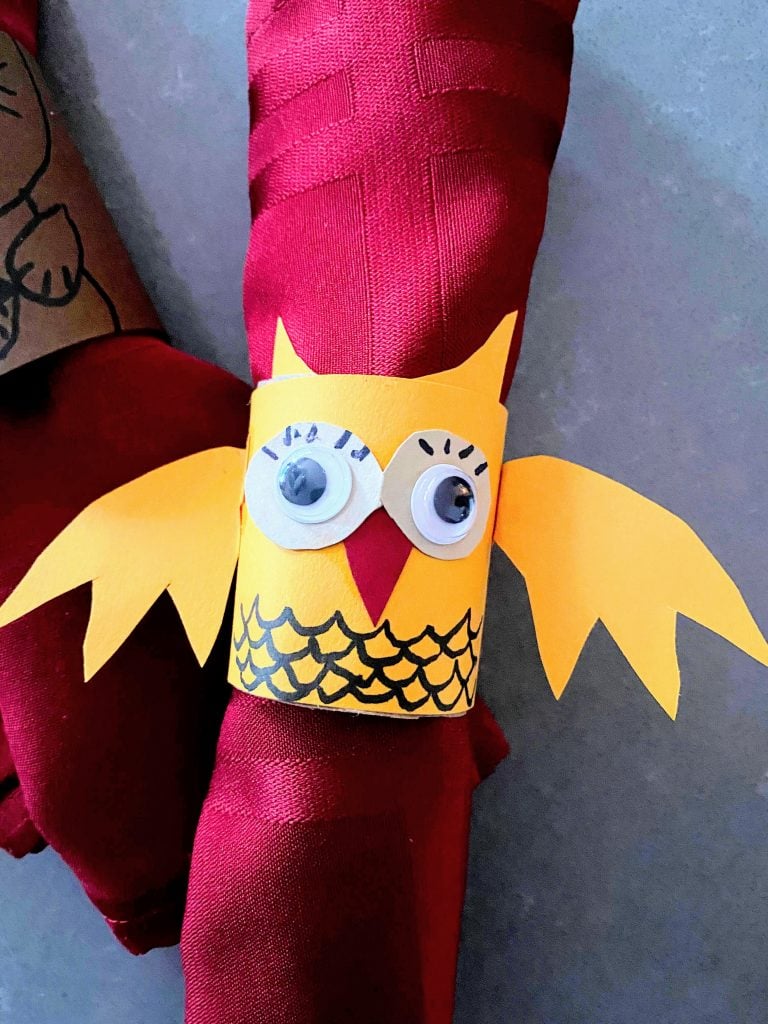
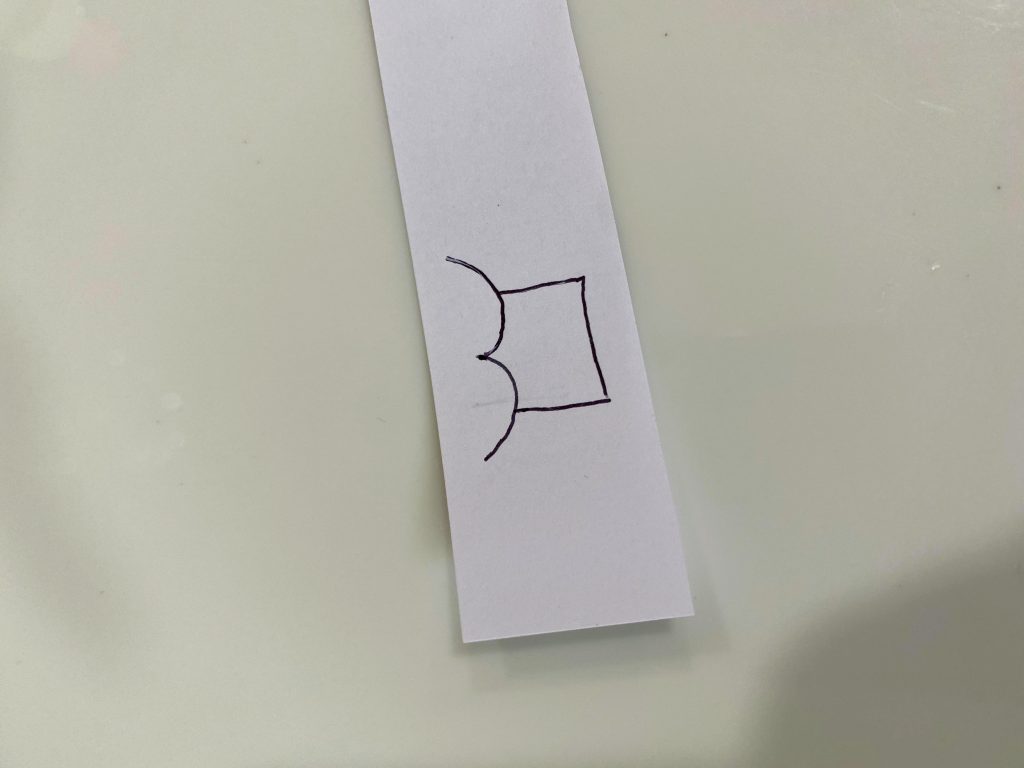
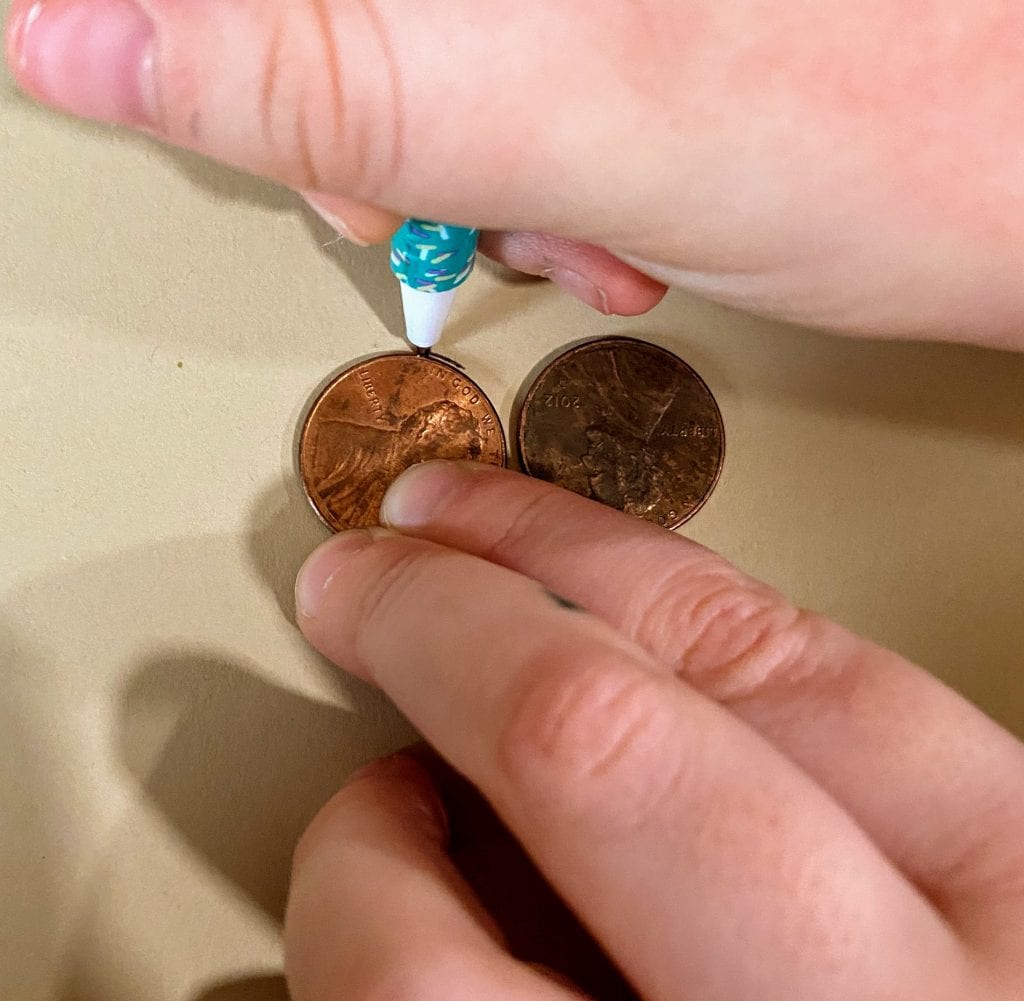
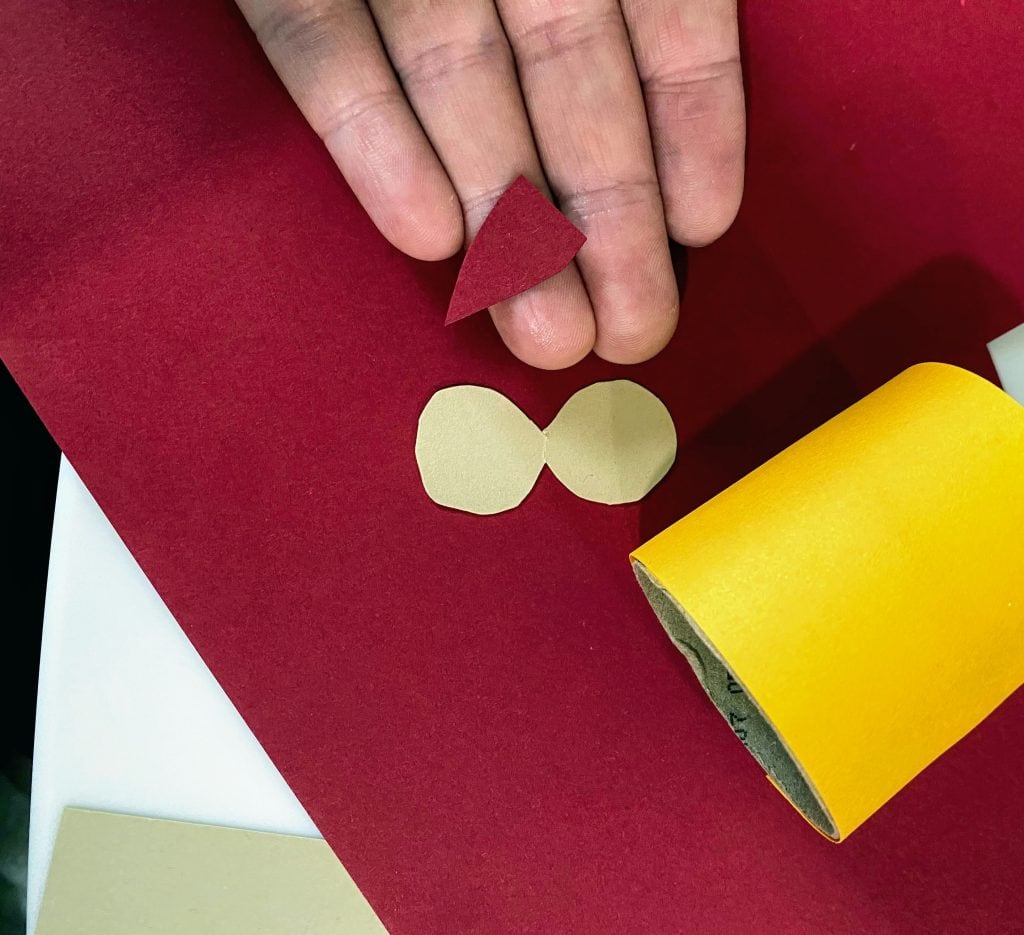
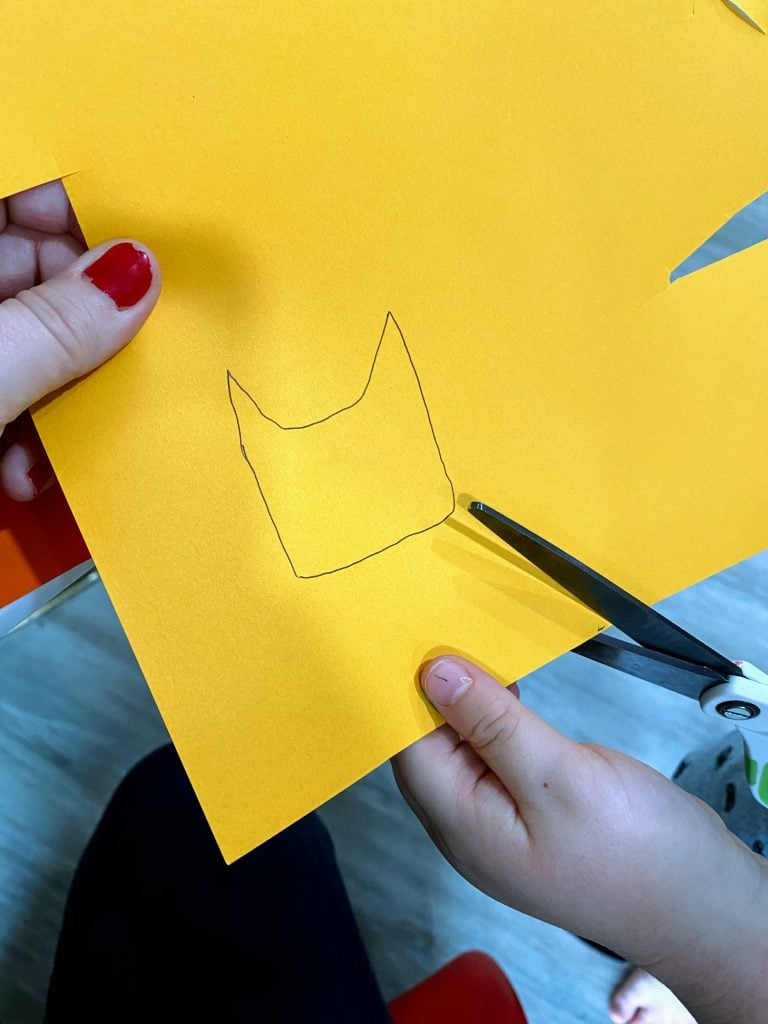
- Paper & Glue! For the eye area, trace two pennies side-by-side on tan paper and cut out the shape. Cut out a small red triangle upside down for the beak. Copy and cut out the shape below on yellow paper for the ears. And finally, cut out two yellow wings. Glue the eyes and beak to the owl’s face, as pictured below. [Wait on the ears and wings til the end]
- Final touches! Use a black sharpie to add feathers onto the owl’s belly and eyelashes above the eyes (as pictured below). Finally, glue googly eyes to the circles. My final step is to glue the ears to the inside (front) of the TP roll and the wings to the sides.


*For toddlers especially, these tasks may require adult supervision and/or assistance.
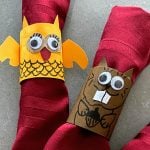
OTHER DECORATIVE DIY CRAFTS YOU MAY LIKE:
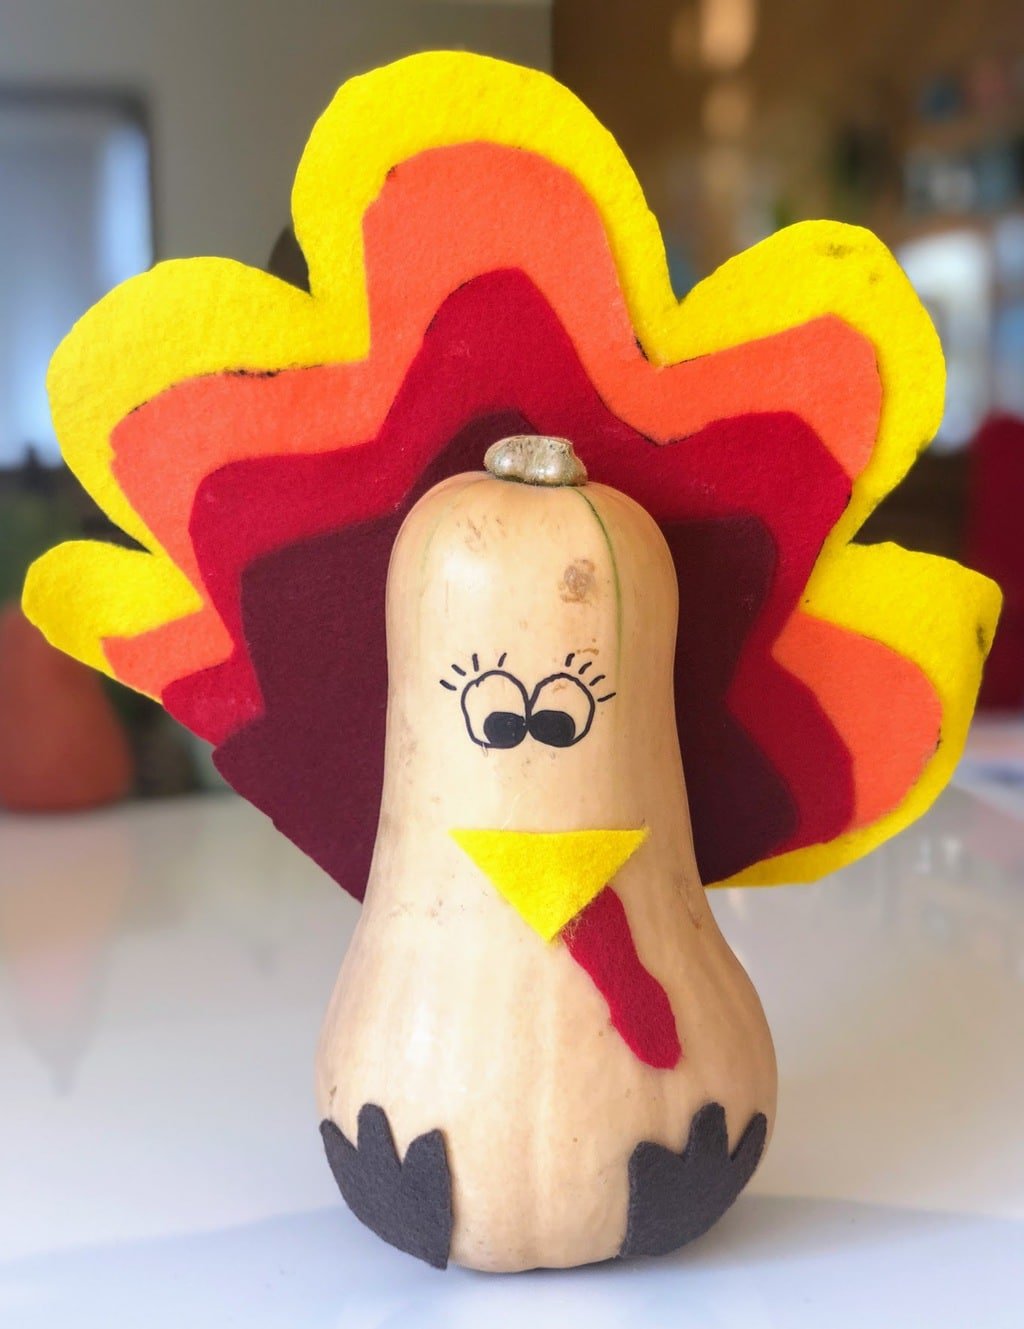
- Chicken Head Napkin Rings
- Felt Turkey Squash Craft
- DIY Tin Can Leprechaun Hats
- Spring Bunny Candy Dishes


