Paper Plate Pizza Craft

In the mood for pizza? Kids can use paper plates and some scrap paper to make this adorable paper plate pizza craft! This craft is simple, sweet and sure to make your kids hungry for dinner!
Want to Save this Recipe or Activity?
Enter your email and we will send it straight to your inbox! You’ll also get the latest posts from Platein28!
By submitting this form, you consent to receive emails from Platein28.
Note: If you love paper plate crafts, be sure to also check out our Paper Plate Tomato, Paper Plate Watermelon and Paper Plate Sunflower crafts!

Why We Love this Paper Plate Pizza Craft
- Lots of playtime. We love play food crafts! Once kids create their paper plate pizzas, they can actually play with them!
- Creativity! The cool thing about this craft is that kids can get as creative as they’d like when it comes to decorating their pizza. They can create paper toppings of their choice and have fun with the colors!
- Fine motor skills. Kids can put their developing tracing, cutting, coloring and gluing skills to good use while making their paper pizzas!
- Learn about pizza! While crafting, share some cool facts about pizza with kids, like how pizza was invented in Naples in the early 1500s and that pizza dough is tossed in the air to help form the dough’s round shape, retain the right amount of moisture, and create the pizza’s uniform crust.
✂️Supplies
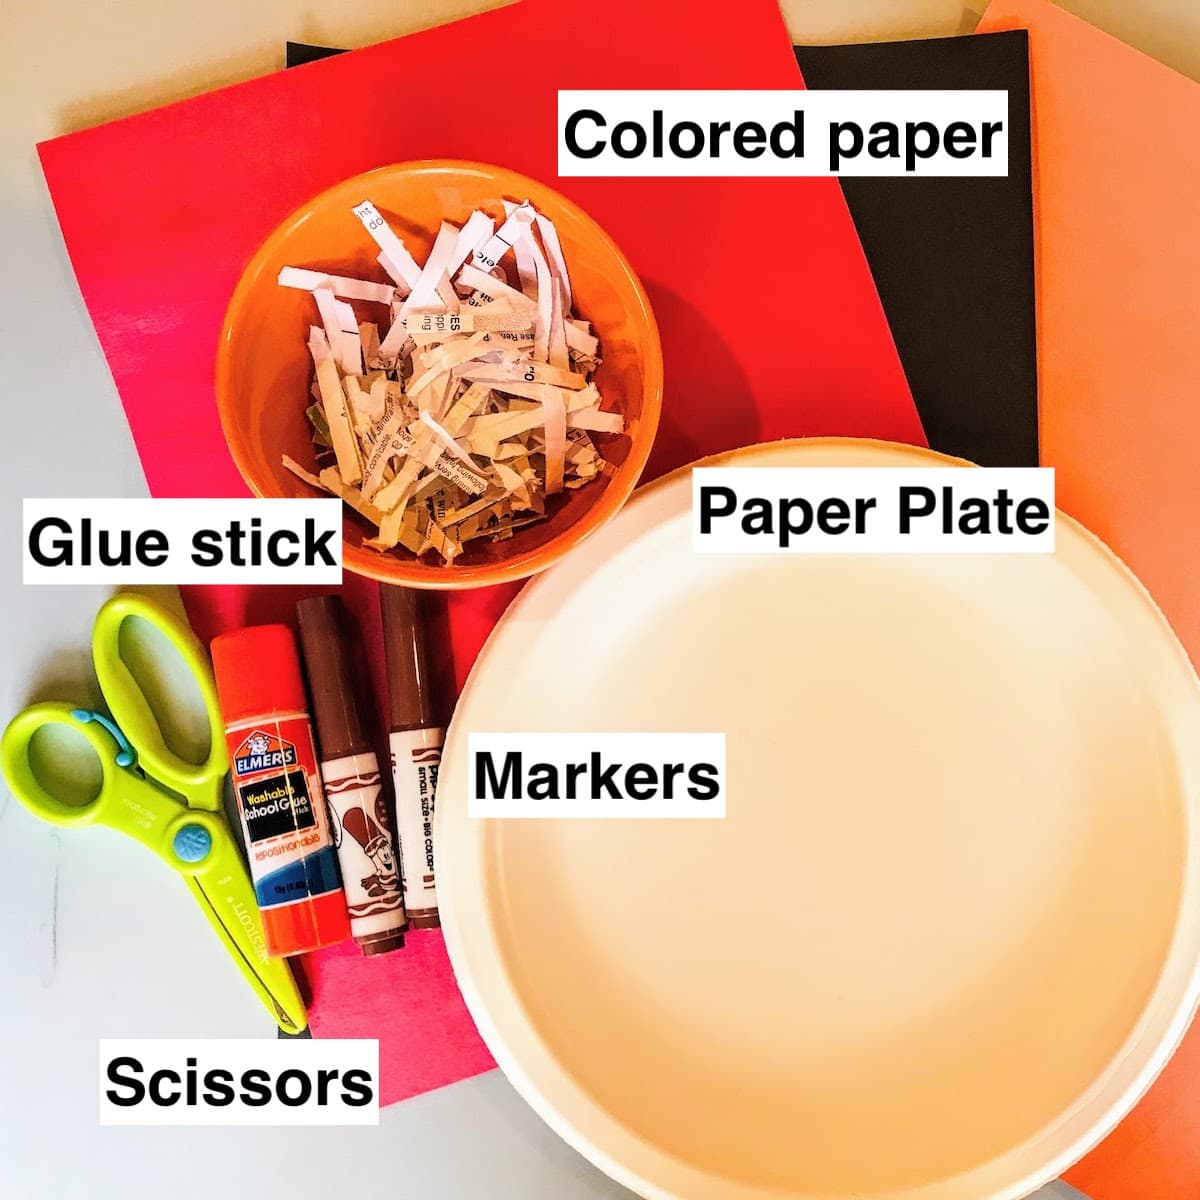
Notes on Supplies:
Paper plate– White or brown is ideal.
Brown markers– To color your pizza’s crust.
Scissors– We love these kid-friendly scissors.
Glue– A simple glue stick should do the trick.
Colored paper– Ideally white, red, orange and brown.
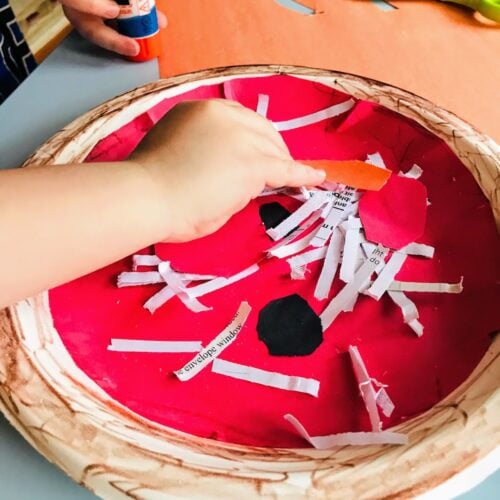
Note: For the pizza’s cheese, we decided to take some shredded paper from our paper shredder, but you can also cut white or yellow paper into small shreds for the “cheese.”
📝 Instructions
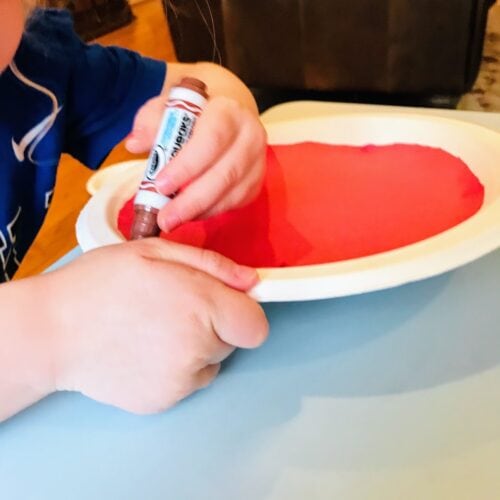
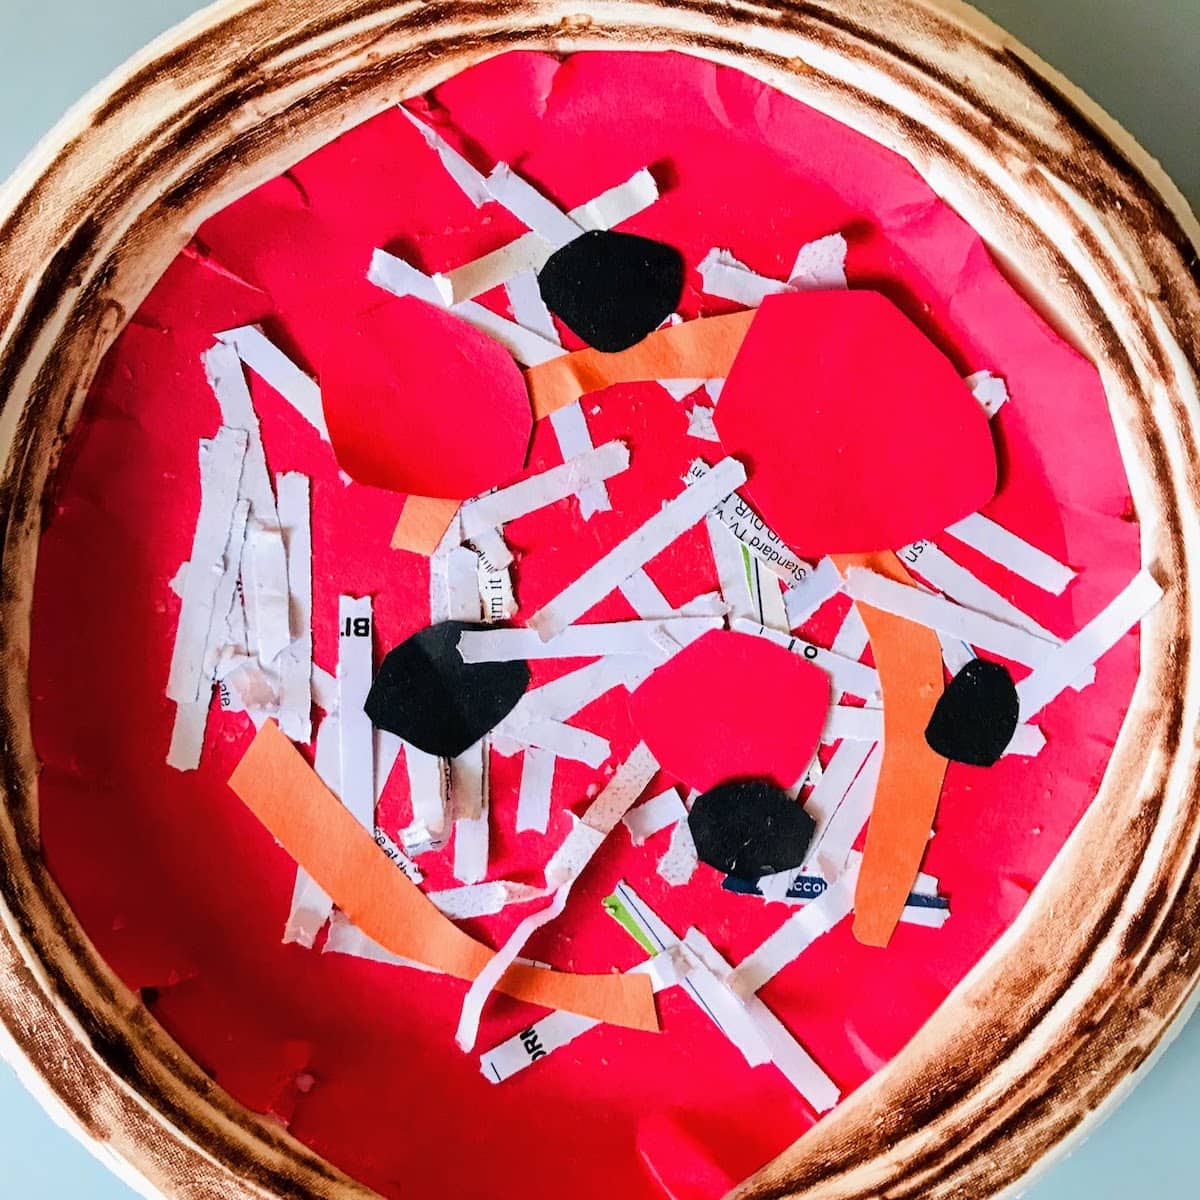
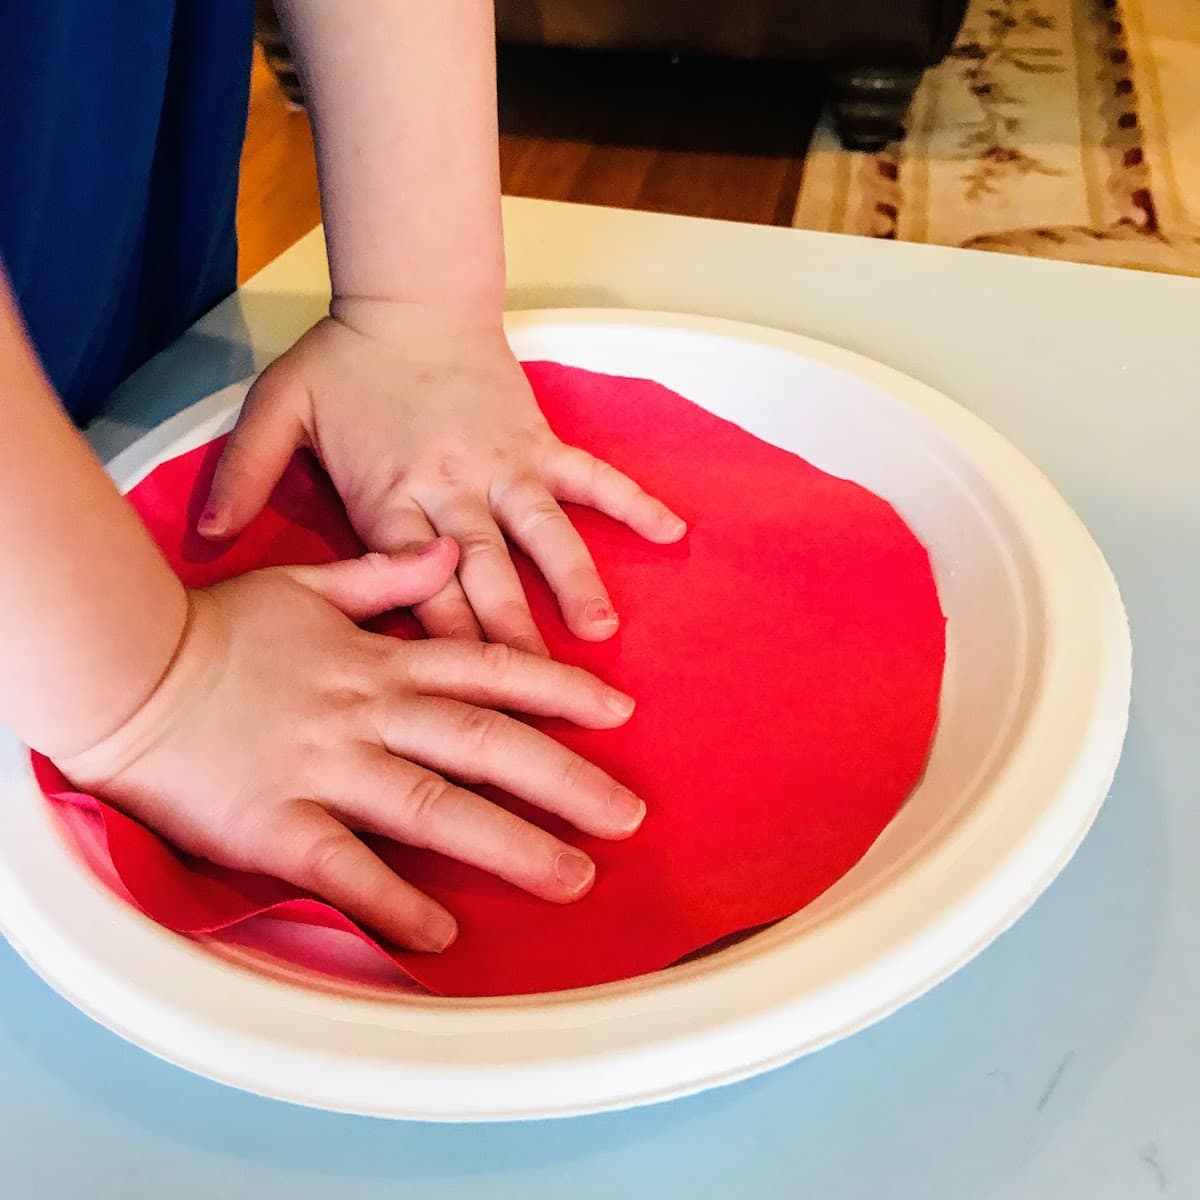
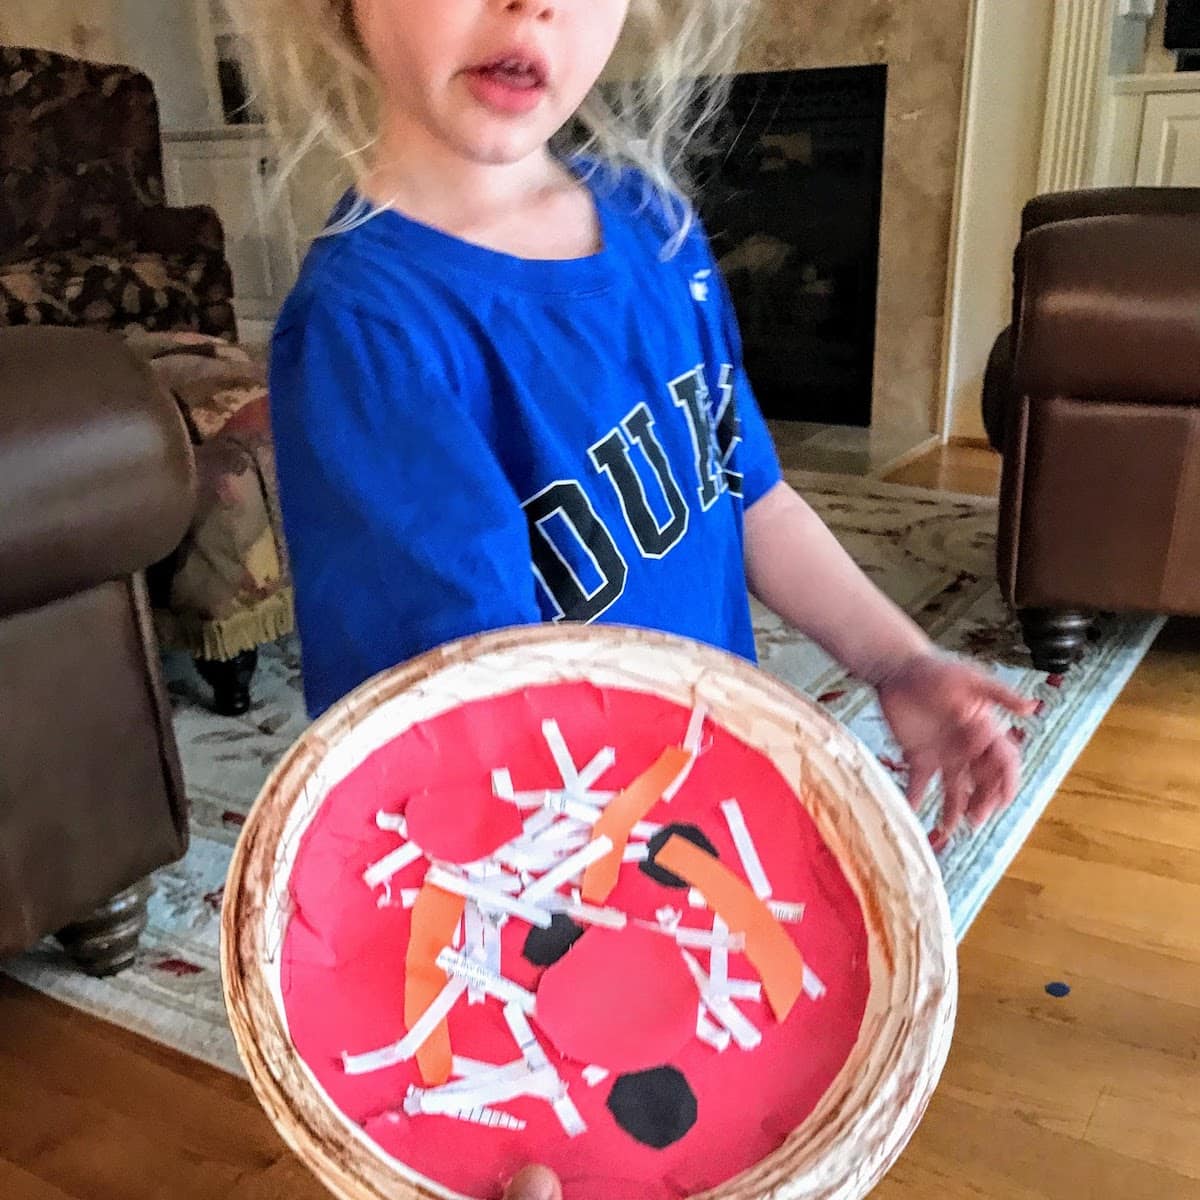
1. Sauce: Trace the underside of a paper plate onto a piece of red paper. Cut out the circle and glue to the front, inner circle of the plate. This is the pizza’s red sauce.
2. Crust: Color the white edge of the paper plate brown. This will be the pizza’s crust.

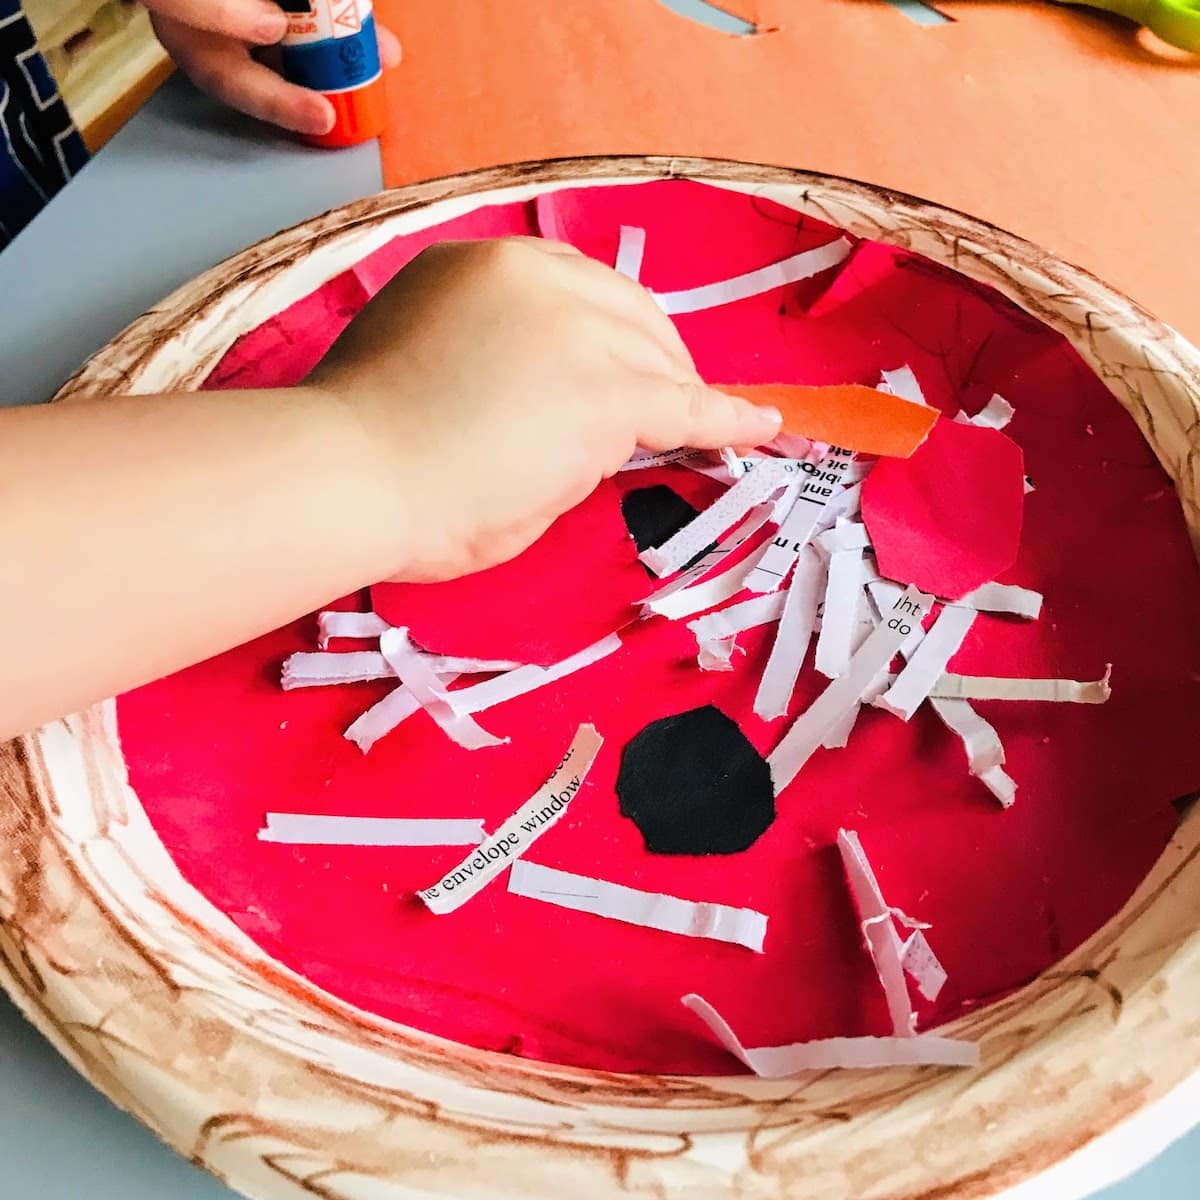
3. Toppings: Decide on your pizza toppings and grab some colored paper to match! Cut the colored paper into the shape of the toppings (i.e. shredded cheese, pepperoni, black olives). We used paper from our shredder for the cheese. Glue your toppings onto the pizza.
And enjoy your paper plate pizza craft!


Want more crafts?
Sign up below to get crafts and recipes straight to your inbox plus make sure to follow on your favorite social!

🍕Paper Plate Pizza Craft
Equipment
Supplies
- Paper plate (white or brown is ideal)
- Markers (brown is ideal)
- Glue stick
- Colored paper (Ideally white, red, orange and brown)
Instructions
- Sauce: Trace the underside of a paper plate onto a piece of red paper. Cut out the circle and glue to the front, inner circle of the plate. This is the pizza's red sauce.

- Crust: Color the white edge of the paper plate brown. This will be the pizza's crust.
- Toppings: Decide on your pizza toppings and grab some colored paper to match! Cut the colored paper into the shape of the toppings (i.e. shredded cheese, pepperoni, black olives). We used paper from our shredder for the cheese. Glue your toppings onto the pizza. And you've got your pizza pie!